
The exhaust power valve is important for a good and even power output of the engine, sometimes, issues with engine power output are related to the power valve.
Common symptoms of exhaust power valve failures are
- If the engine suddenly starts to pull strongly at 7,500 rpm and the power output increases, this indicates that the power valve is permanently open.
- If the engine does not reach speeds higher than 9,000 rpm while driving, this indicates that the power valve is permanently closed.
Checking the function
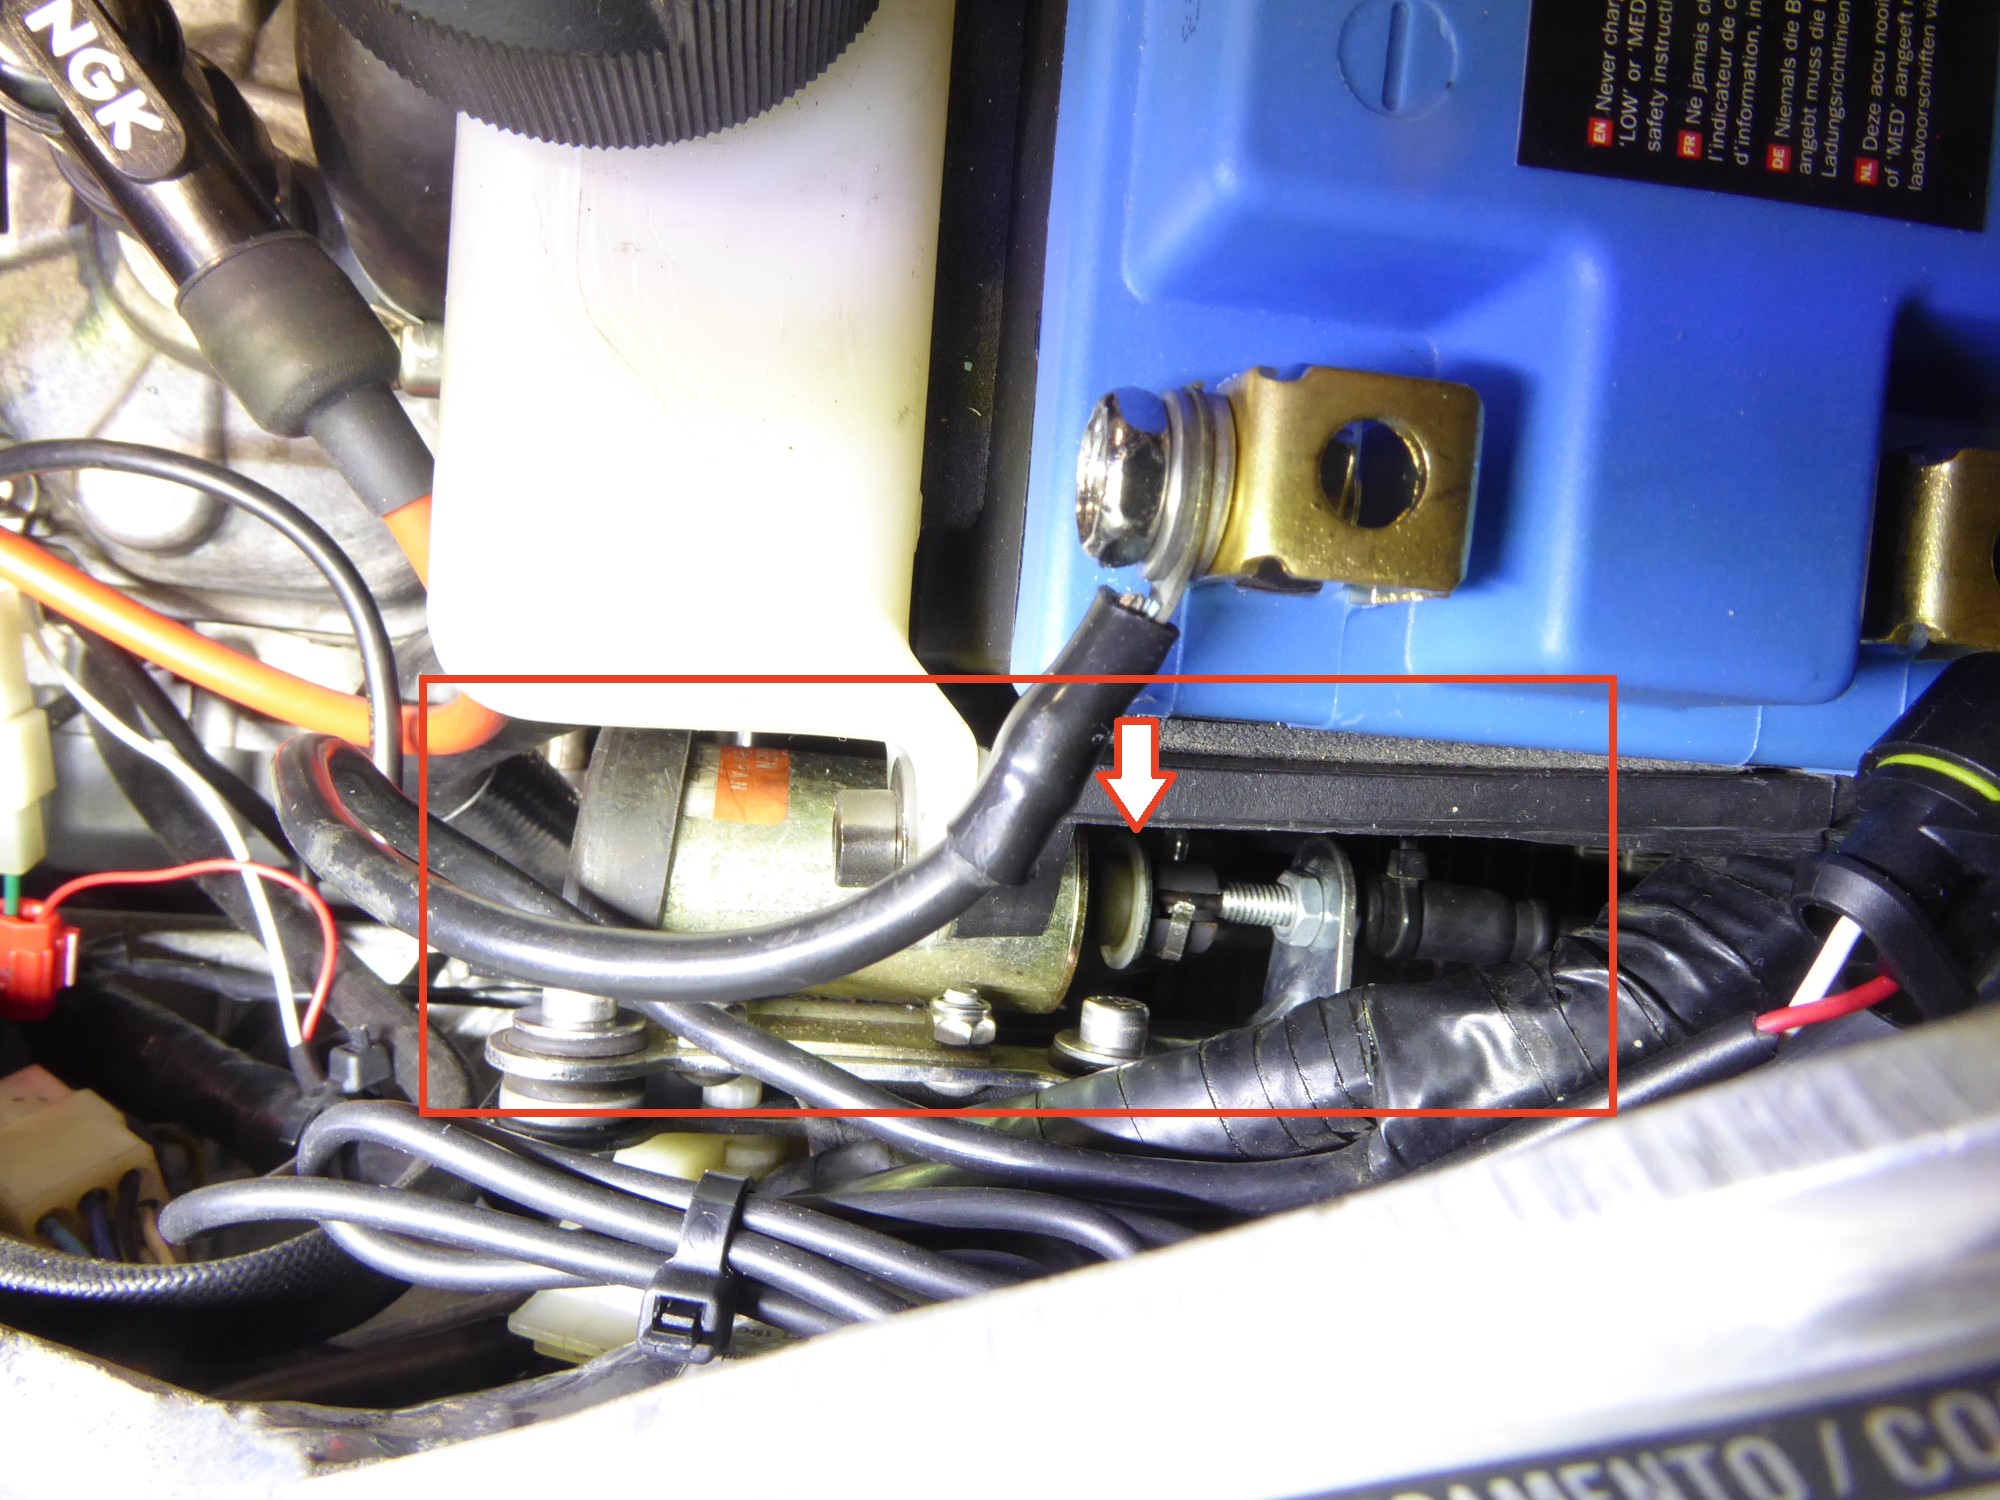
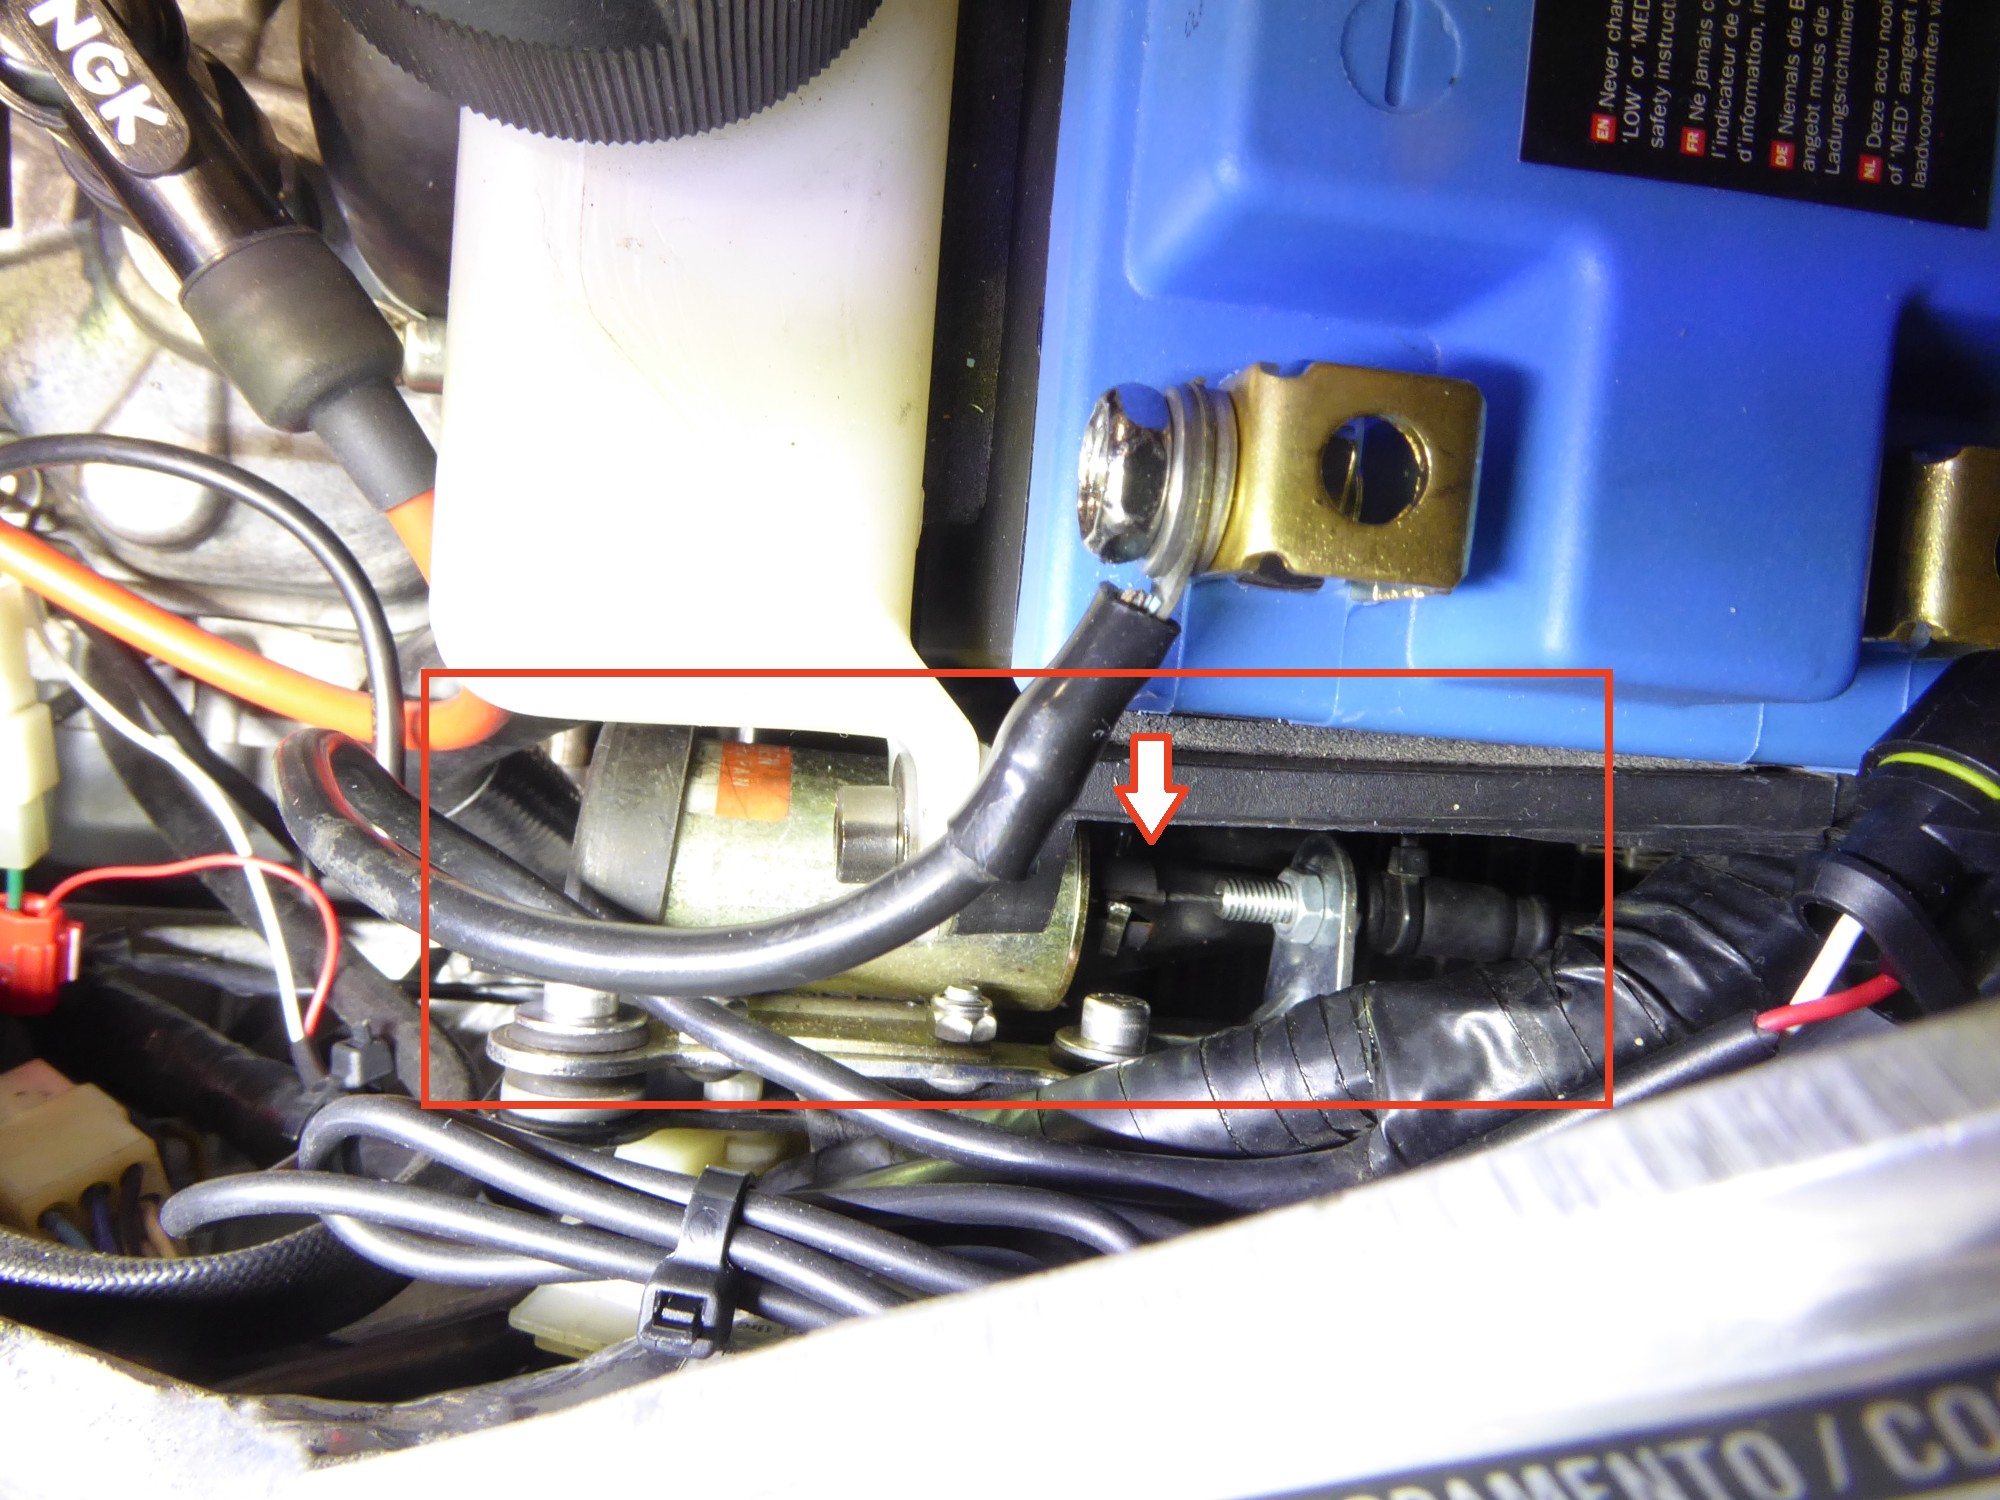
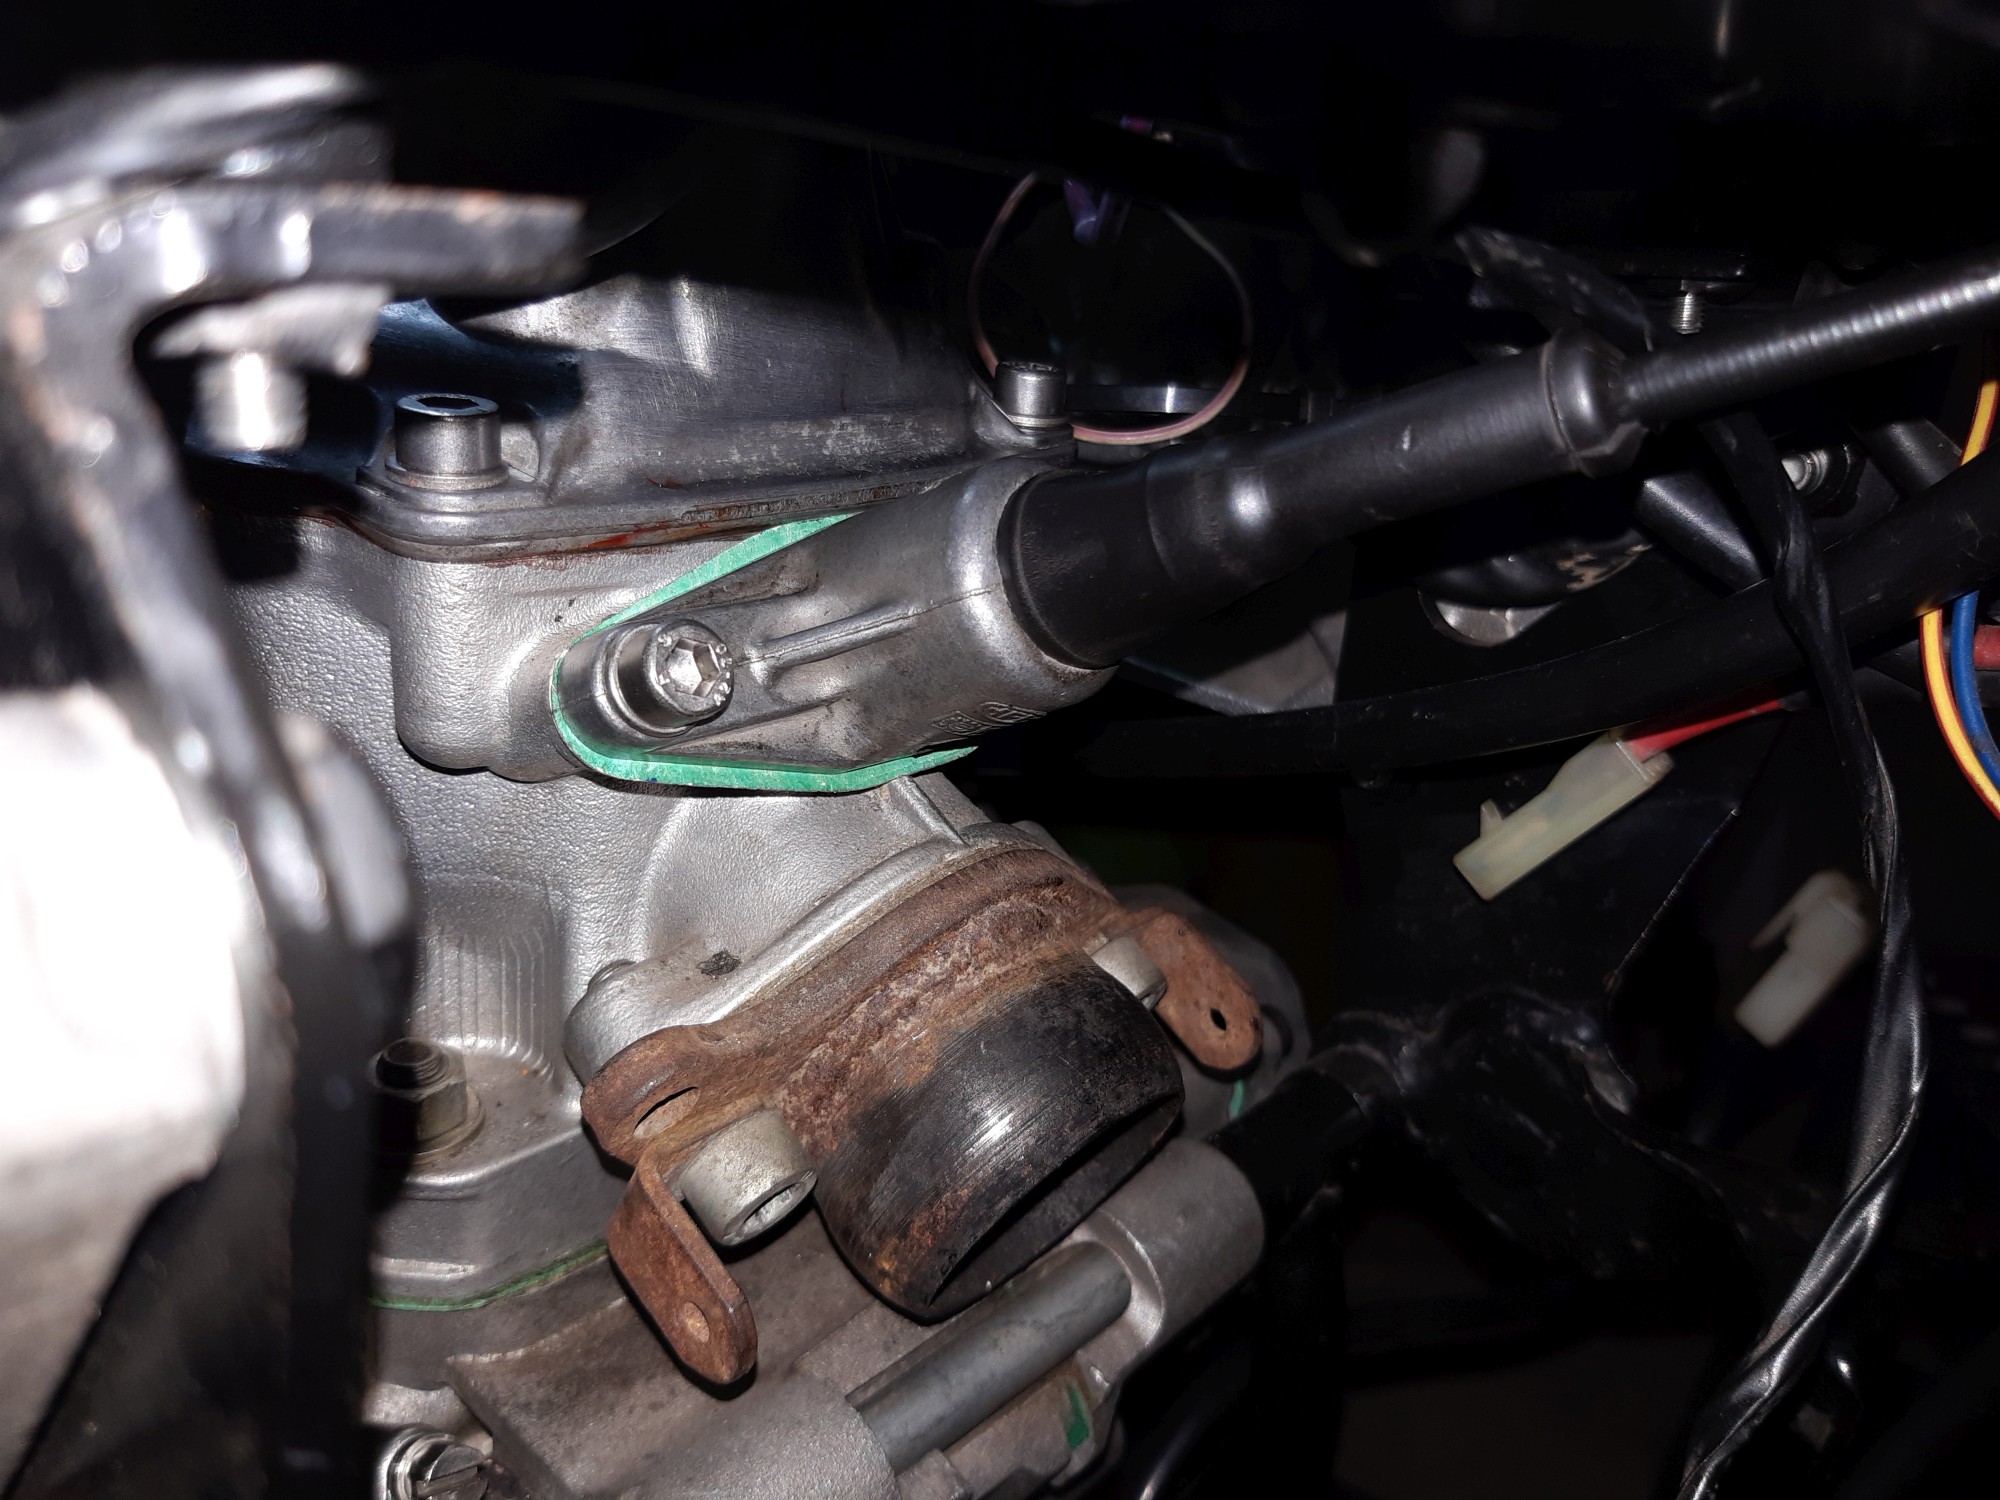
You can clearly see the solenoid of the power valve system (on the right side of the battery) when the tank is lifted and simply check if it moves or not and pulls the power valve.
When switching on the ignition, nothing should happen. If you start the engine, the valve must open immediately after starting (speed over 500 1/min). If you raise enginge rpm a little bit, the valve closes at about 2.500 1/min and has to open again when the speed drops below 2.500 1/min. On newer bikes with EFI ignition, the powervalve will continuously open and close if the engine is in idle speed and close on slightly higer rpm.
This kind of opening at idle rpm is for cleaning purposes. At high eninge rpm of around 8,000 1/min, the valve must open again, depending on the installed control unit, and close again below this speed.
If it can be observed that the solenoid is working, there is usually no problem with electronics. Loose contacts, which only occur during driving or other temperatures, can generally never be excluded.
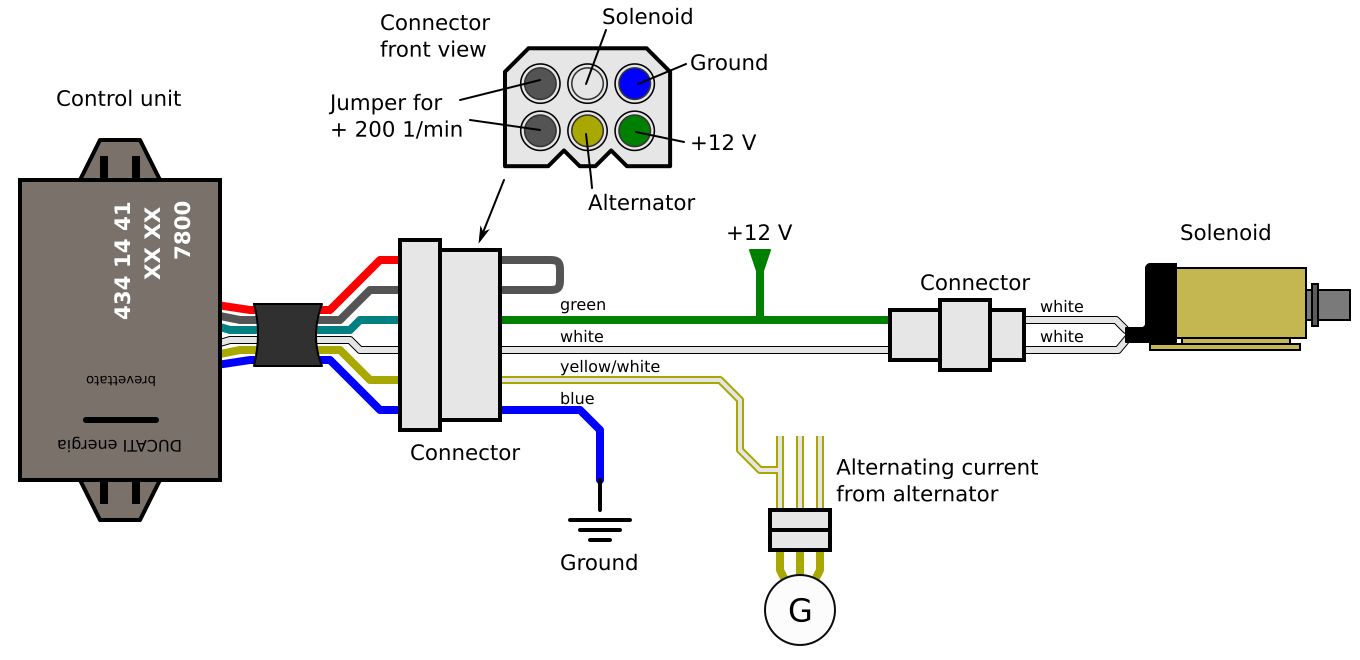
The electronic system is quite simple, the following diagram shows the circuit as it was installed in models until 2007. Later models control the exhaust control via the engine control unit (EFI).
If no function can be observed, you can now test the solenoid and the wiring to the solenoid.
It is possible that the valve is stuck and the solenoid does not open for this reason. This can be recognized by the fact that the core of the solenoid moves just a tiny bit instead of pulling the core into the coil as shown.
Testing the solenoid
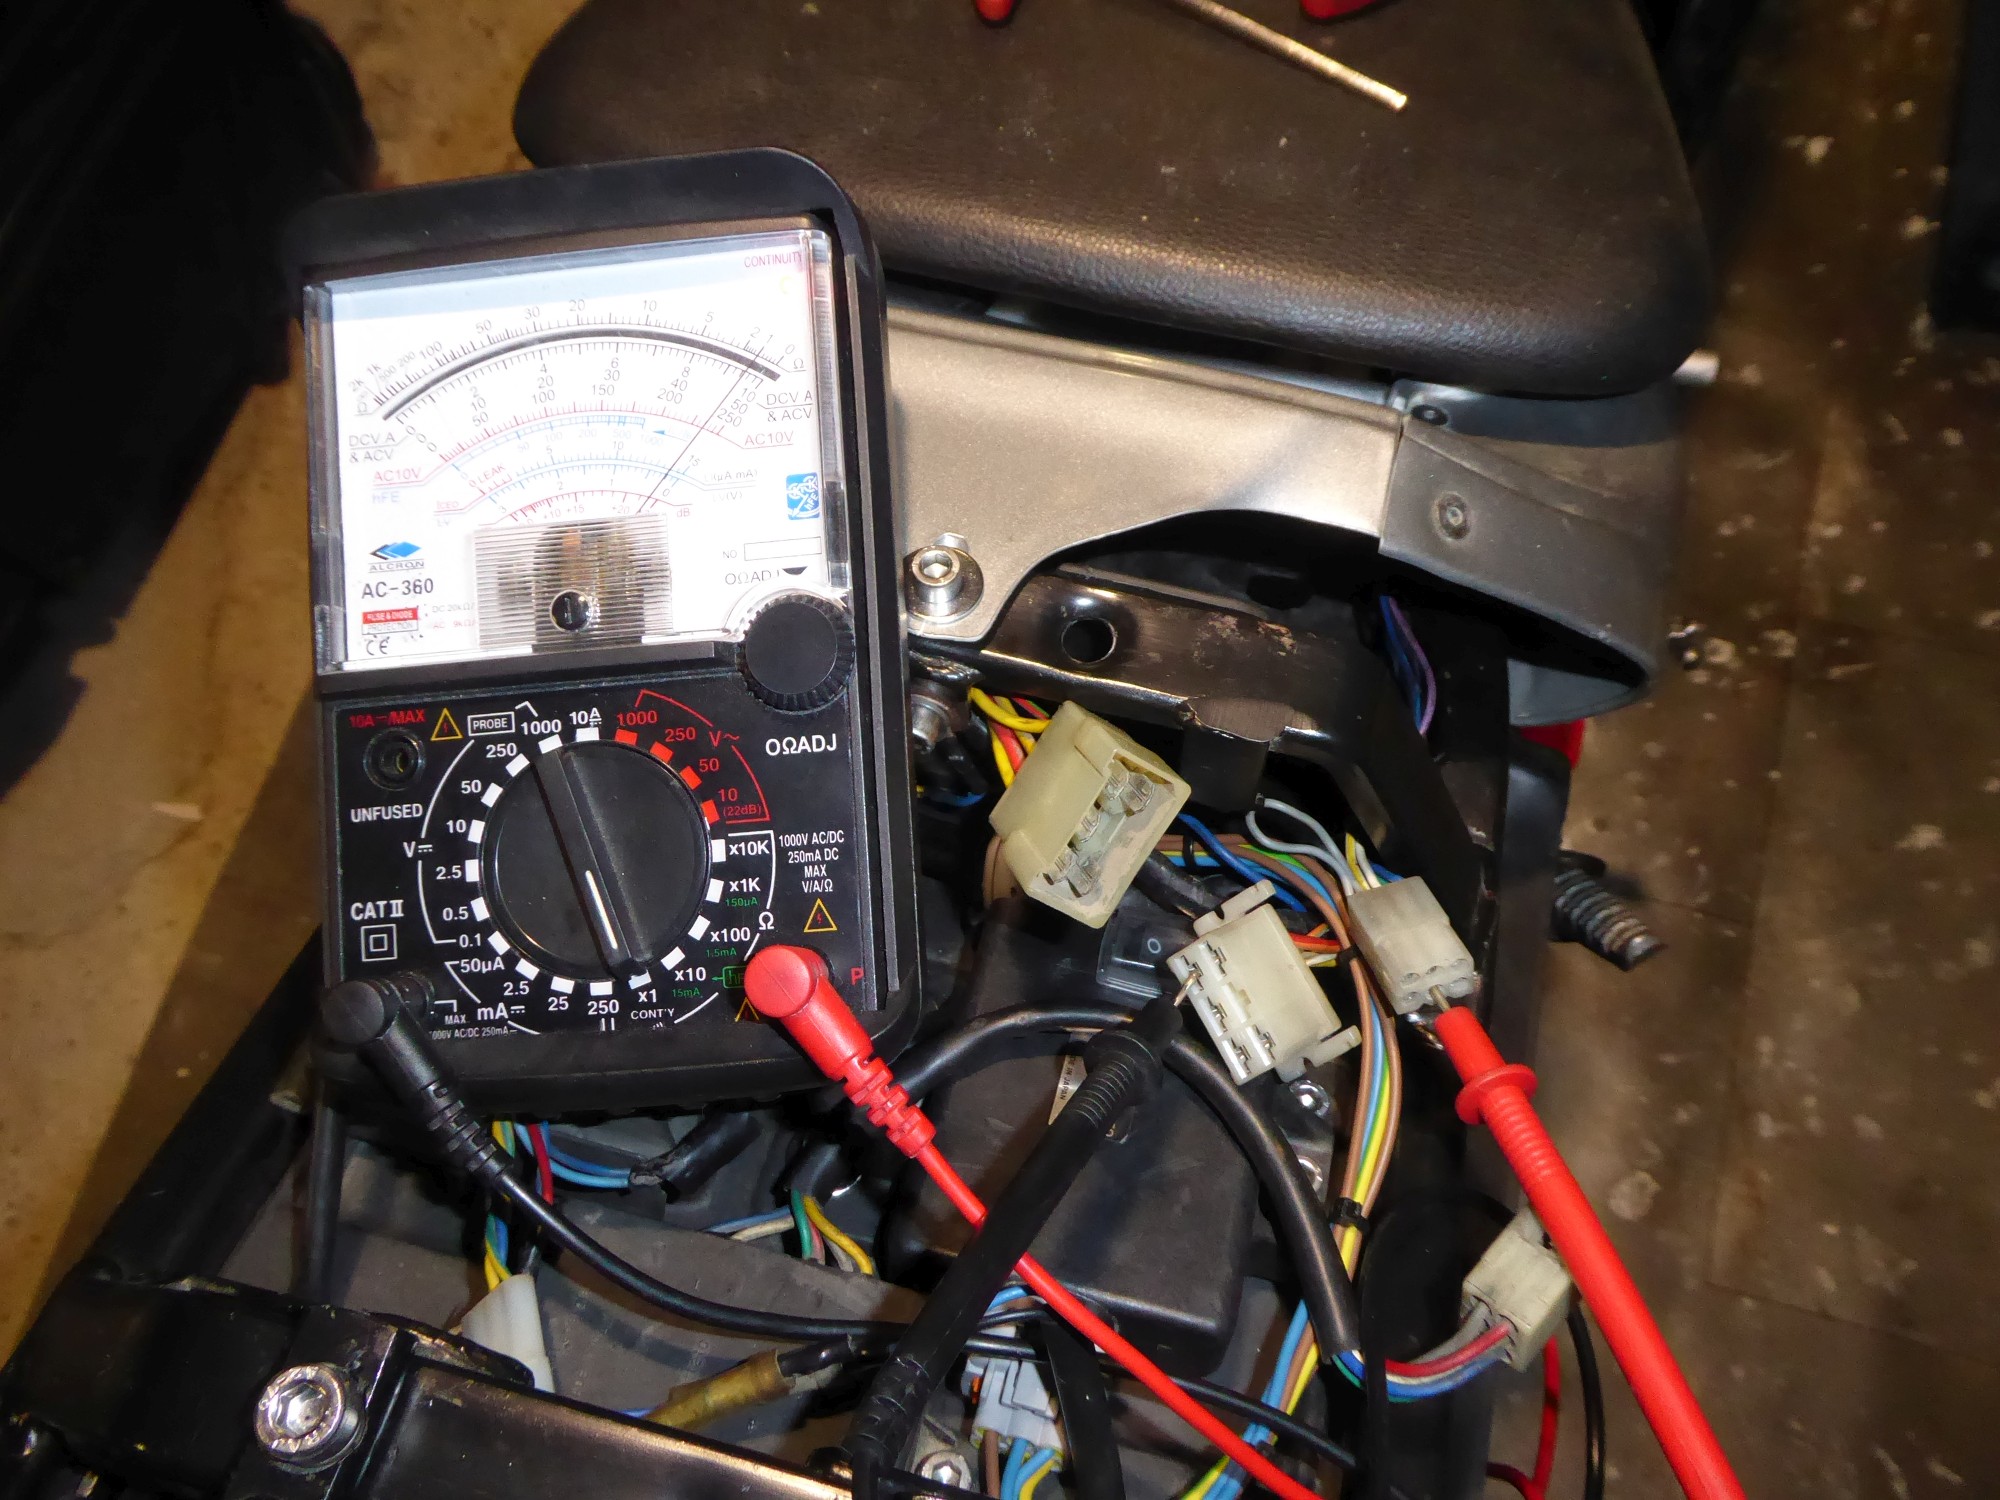
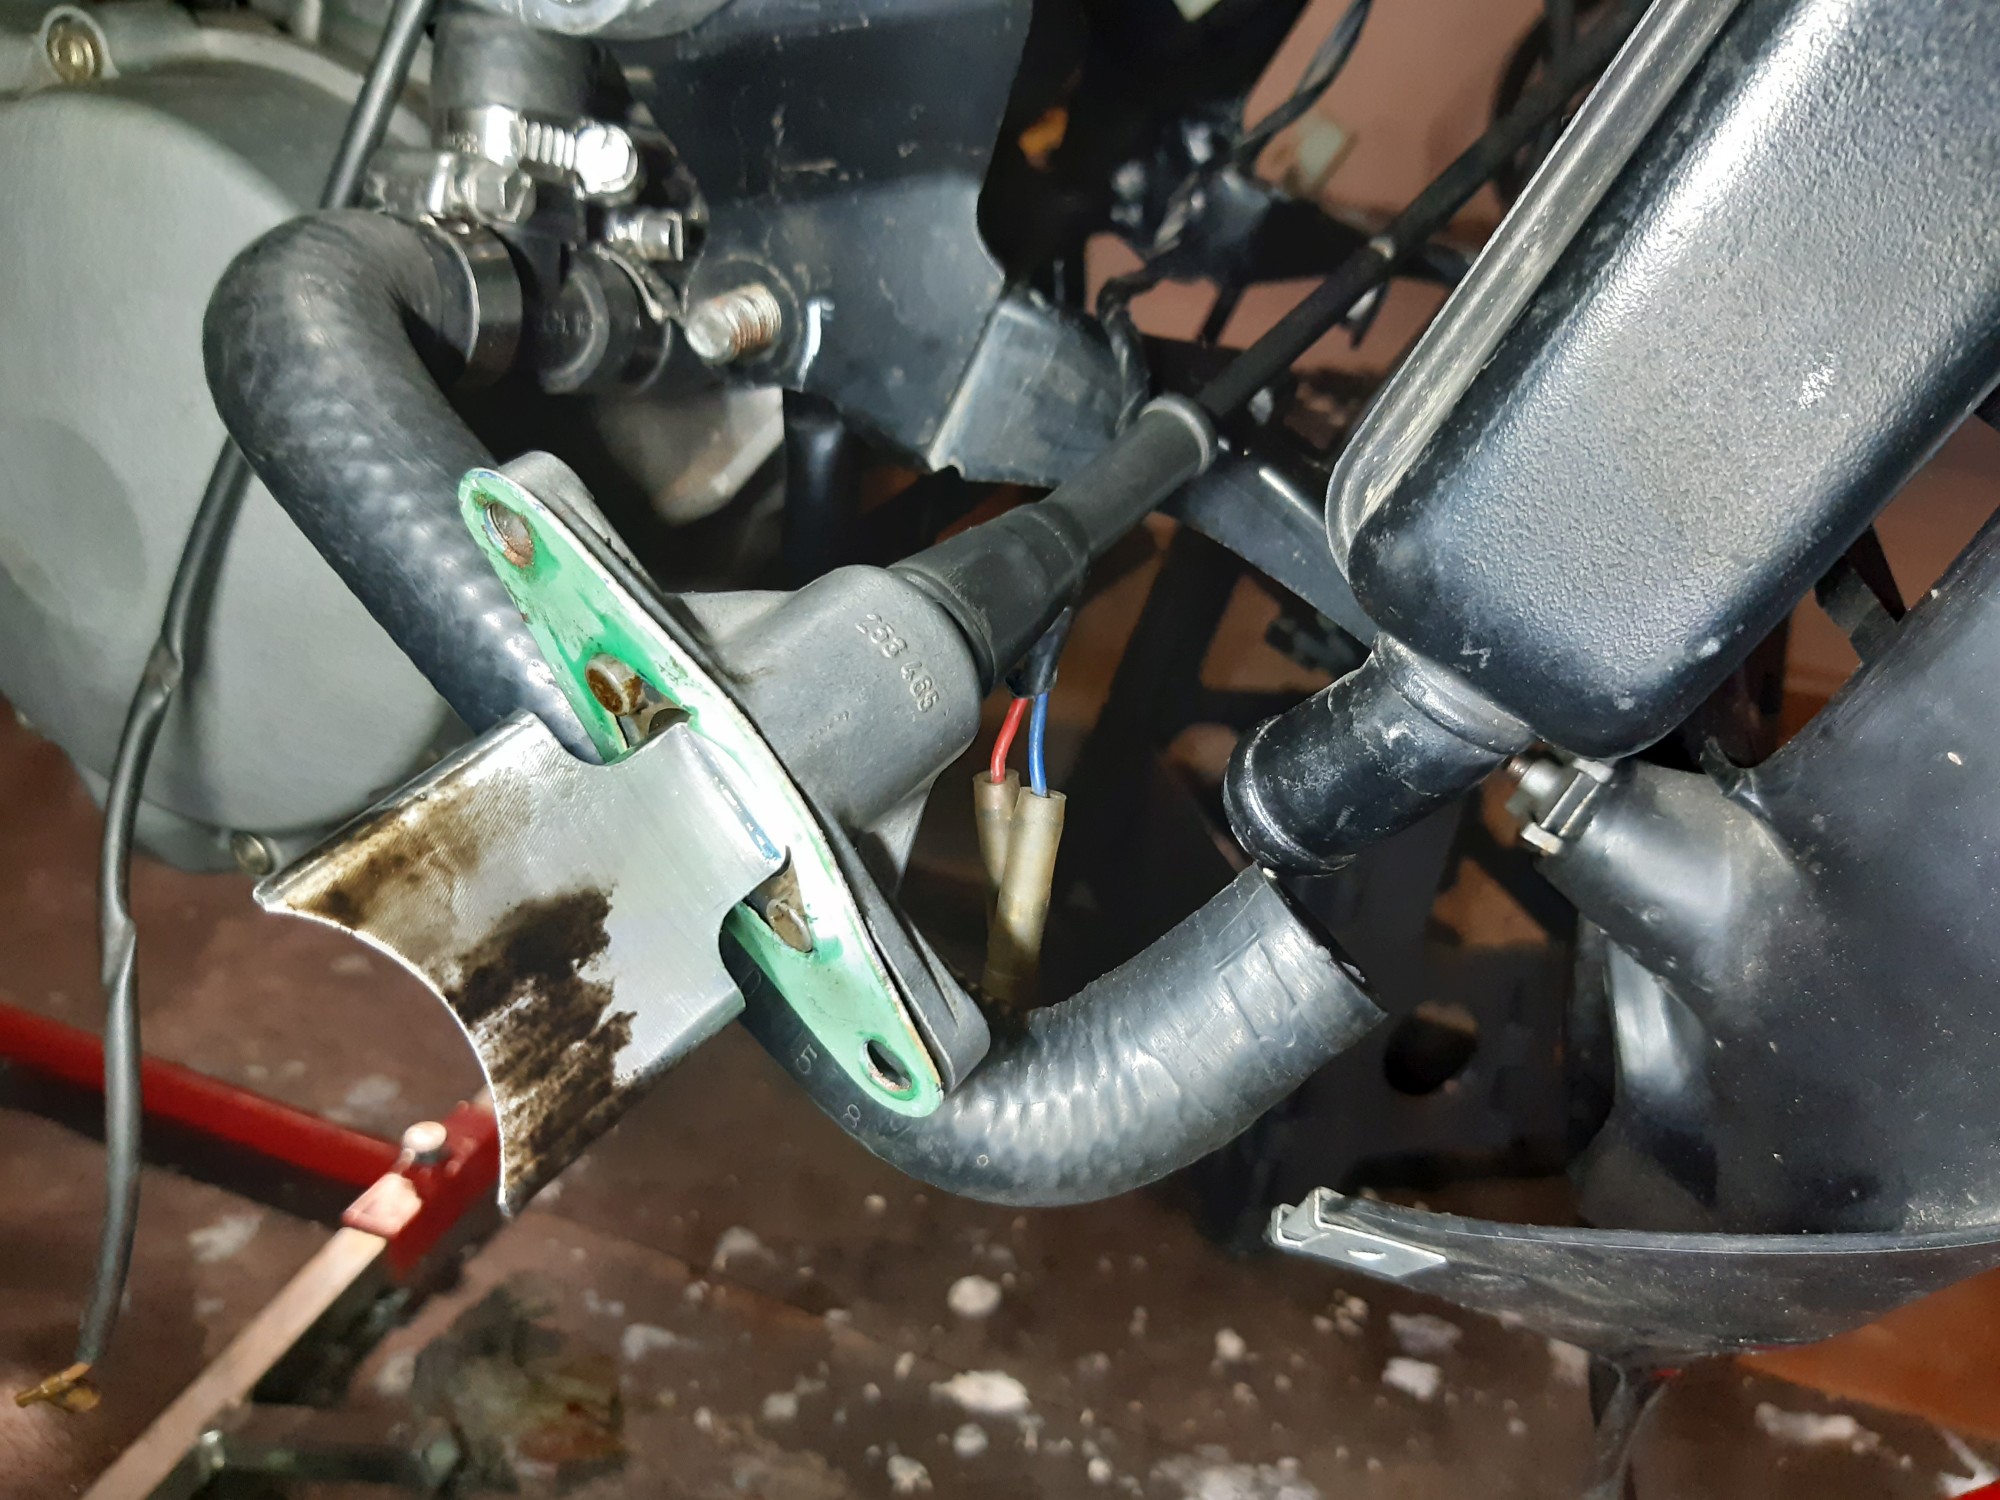
You can test the solenoid directly by disconnecting the plug of the control unit in the rear of the bike (up to and including bikes manufactured until 2007) and connecting a pin to the vehicle ground. The solenoid is connected to plus on the wiring harness, the control unit switches the solenoid to vehicle ground – this can be bridged for testing.

If you connect the pin as shown in the picture with the ignition switched on, the solenoid must open the valve. This should not be done too long, because the solenoid is normally held open after a few seconds with a lower voltage. When disconnecting the pin, the valve must close immediately. The valve is pushed by the spring back inside, pulling the solenoid core back out.
If the solenoid works with the bridge but the actuator does not open at idle speed, the problem is to be found at the control unit or near it (e.g. faulty connectors).
If this test does not work, there are three possible causes:
- Valve and cable are too stiff, the force of the solenoid is too low
- There is a problem with the wiring harness
- The solenoid is defective
Due to the inductance of the solenoid, sparking always occurs when testing with the wire as soon as the wire is removed from the vehicle mass. If a spark can be seen, it is highly probable that the mechanic is blocked. If it can be observed that the solenoid wobbles slightly, the force is probably too low to overcome the stiffness.
Checking the electronics
If the test described above does not work, you can take some measurements to further locate the problem.
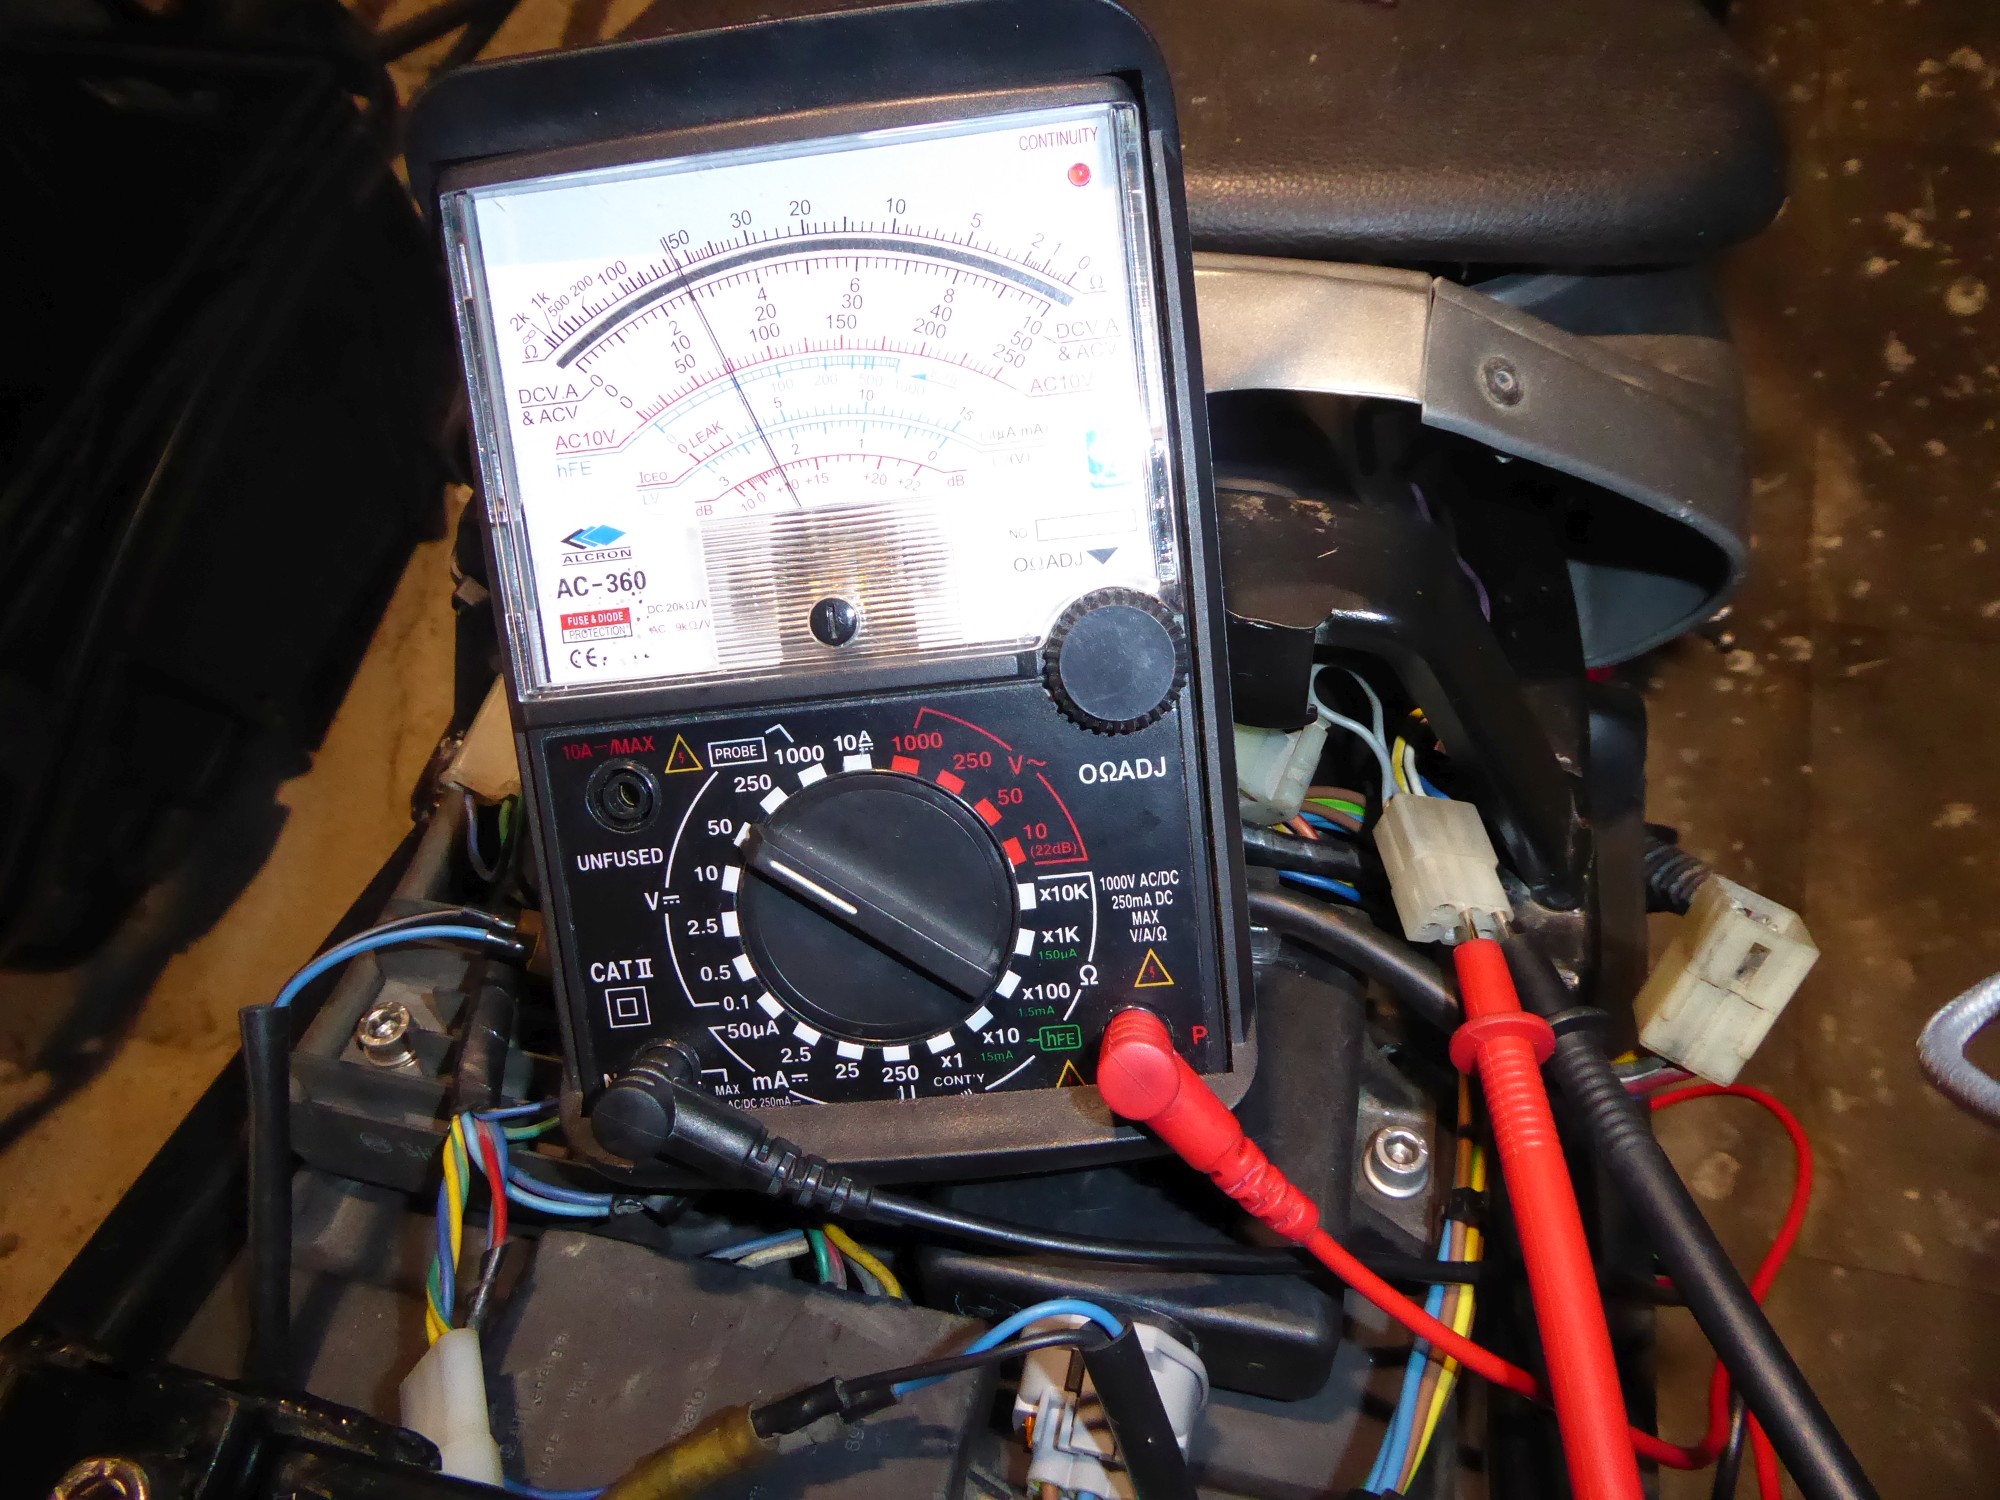
The test shown above can now be done with an ammeter instead of the wire. Most multimeters have a function to measure higher currents up to 10 amperes. To do this, plug the plus wire of the multimeter into the connector on the wiring harness and hold the minus/com wire to vehicle ground. It should be possible to measure a current of about 4 amperes. If this cannot be measured, the solenoid may be defective. If nothing moves and the current flows, this indicates a mechanical problem.
Solenoid
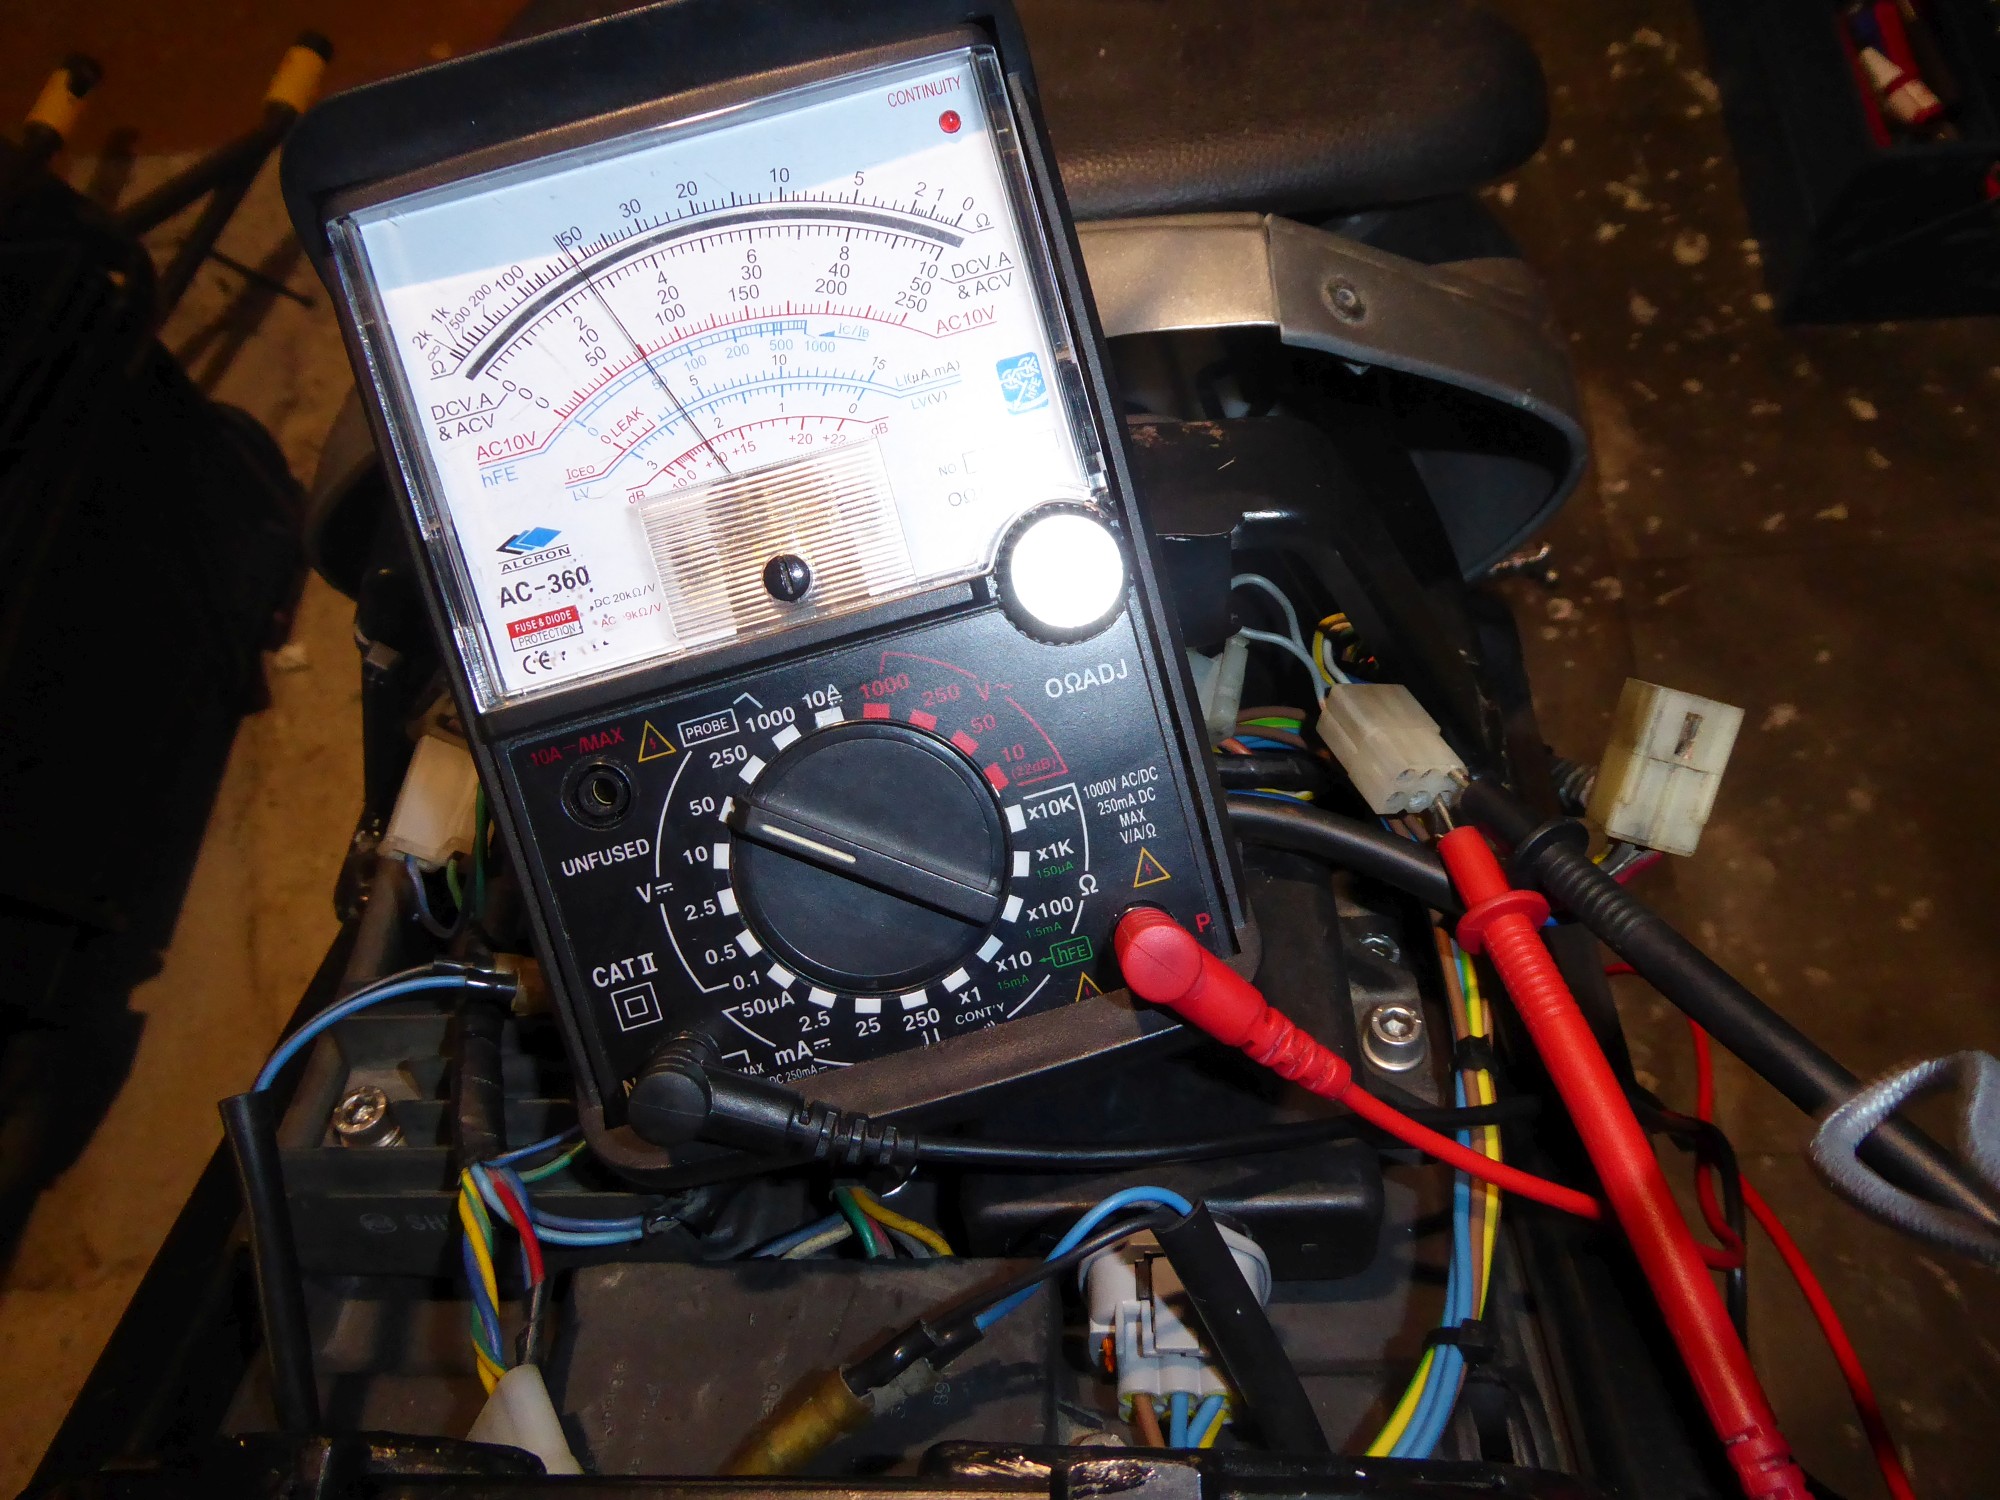
At the solenoid the ohmic resistance of the coil can be measured, e.g. with a multimeter or an LCR-meter. The solenoid does not have to be removed for this purpose. The following values should be measurable:
- Resistance: (2.2 ± 0.3) Ω
- Inductance: approx. 5 mH (core not retracted)

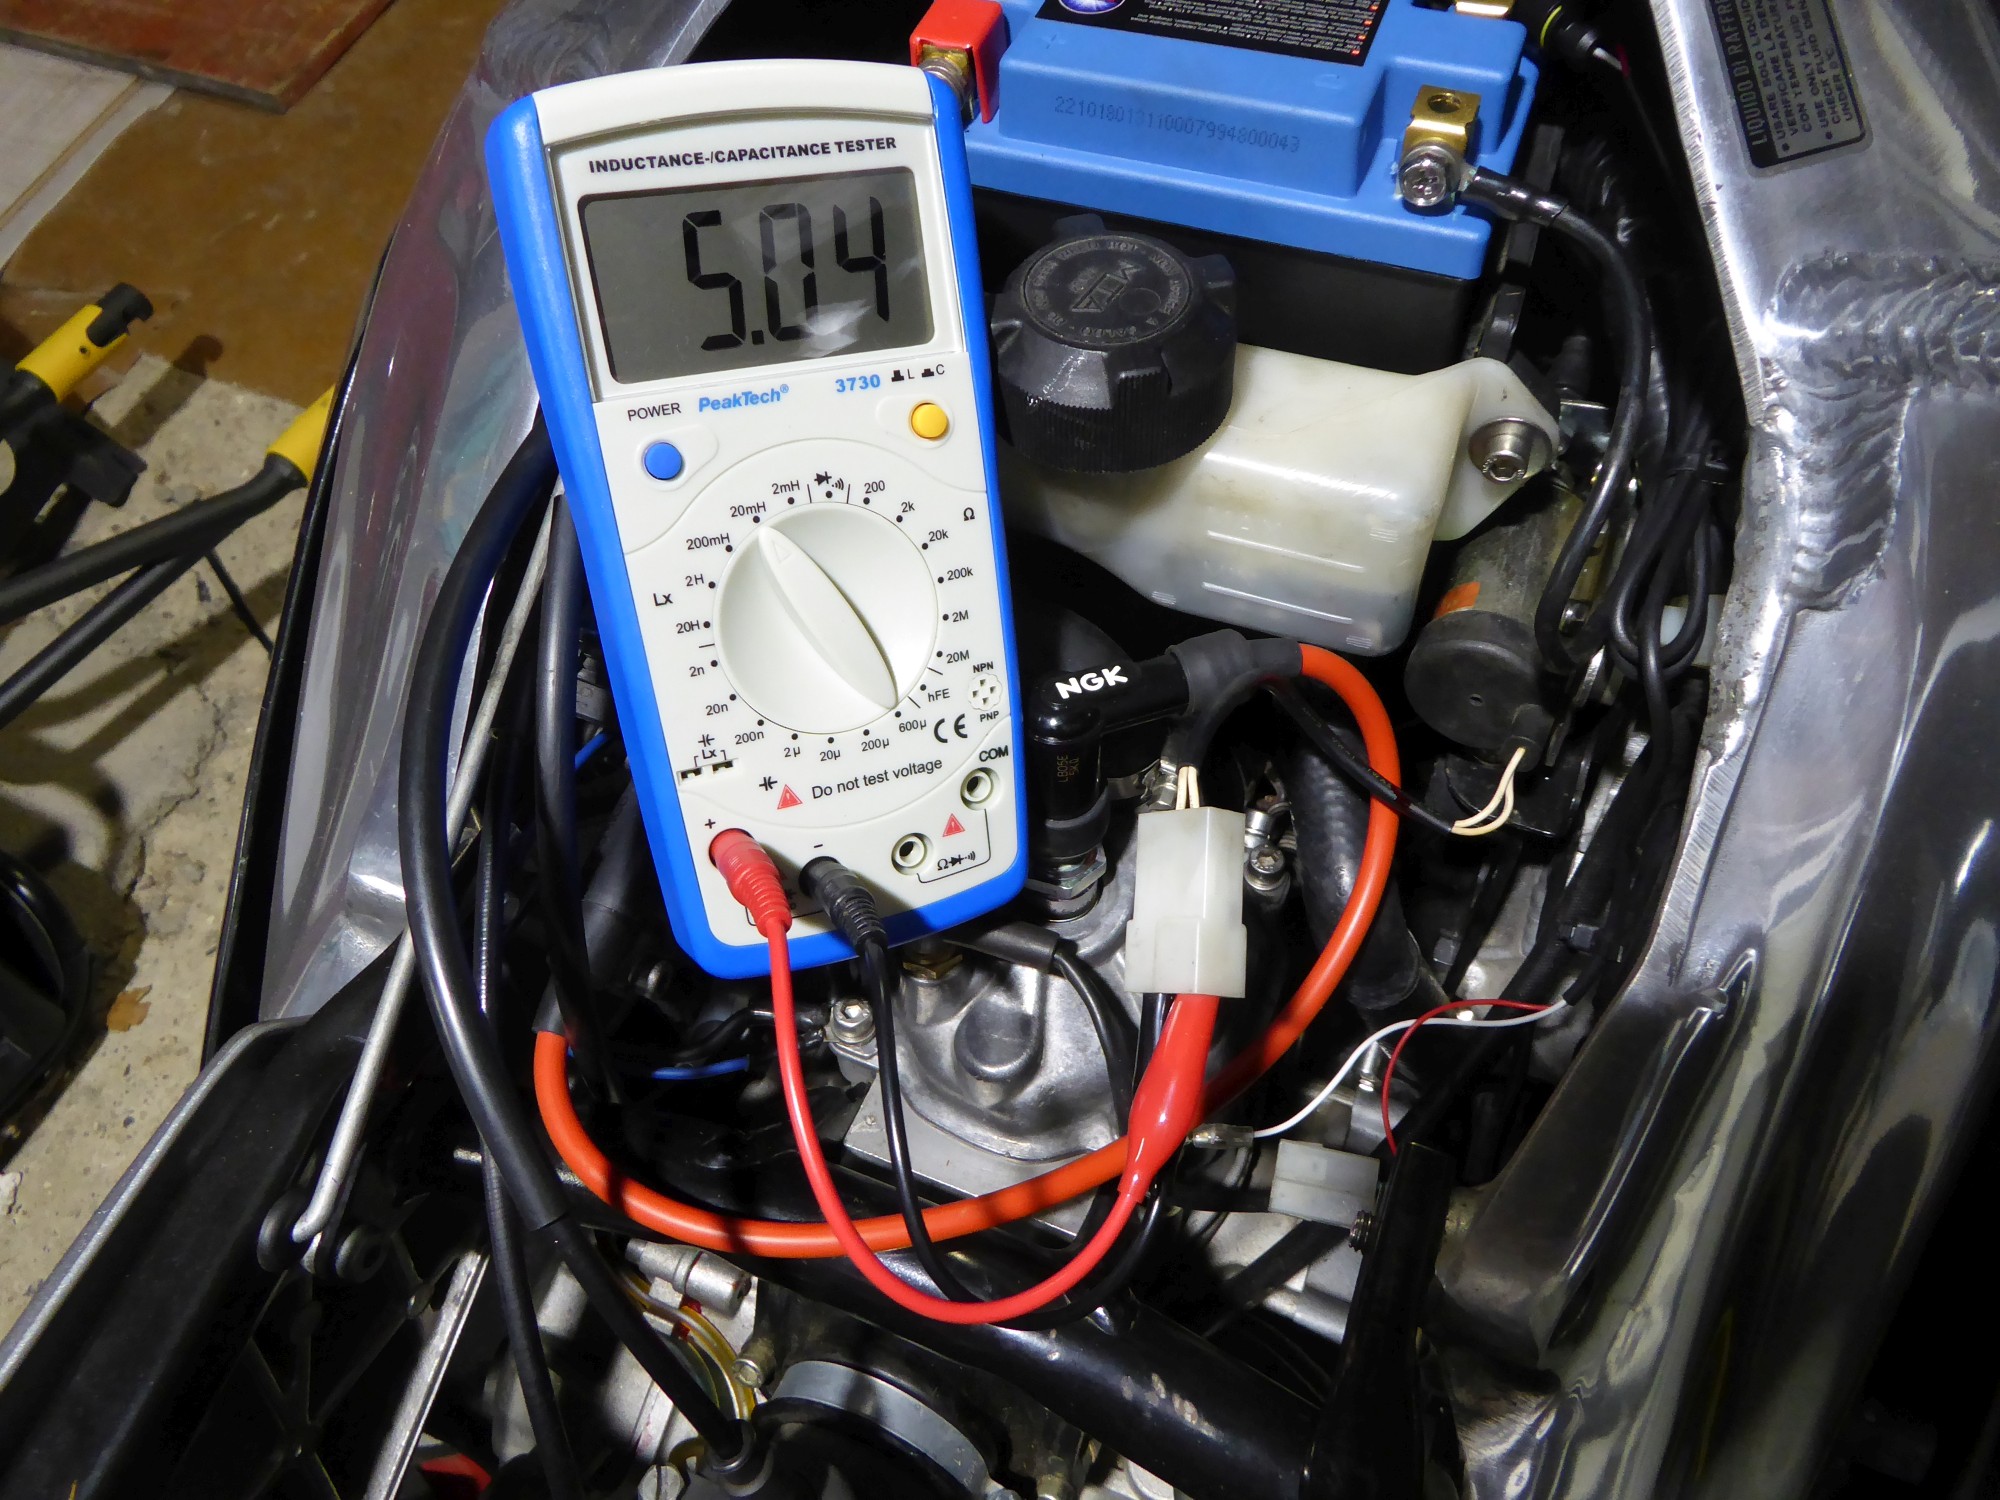
Many cheap multimeters (like the one used in the picture) have a high absolute measuring error at low resistances. The multimeter used in the picture has a measuring error of 0.8% of the measured value and 3 steps, therefore the measuring result here hast to be noted as (2.6 ± 0.3) Ω – this overlaps with the default value, so according to this measurement the solenoid is ok.
Measurements on the wiring harness
With the ignition switched on, solenoid connected and control unit disconnected, the on-board voltage between green and blue must be measurable at the connector to the control unit. It must also be possible to measure the on-board voltage between white and blue – this voltage is available via the solenoid when no current is flowing.
When the ignition is switched off, the plug to the rectifier can be disconnected. It must be possible to measure the internal resistance of the alternator (0.1 to 1 Ω for Rotax 122, 0.3 Ω for Rotax 123) and one direct connection between yellow-white on the plug to the exhaust control unit and yellow–white on the plug to the rectifier.
If no voltage can be measured, you can check the 15-amp fuse, but other components are also connected to this fuse, so a defect here causes completely different problems and should actually be noticed immediately.
If these measurements show no problems, the solenoid opens when bridging the contact to ground and the solenoid does not move when the engine is running, this clearly indicates a defective control unit. The control unit is encapsulated, there are no exchangeable or repairable parts, so unfortunately the entire control unit must be replaced.
Check mechanics
If the valve does not move during the tests described above and the measurements do not show any problems, it can be assumed that the valve is stuck or the mechanism is jammed elsewhere.
If there is nothing wrong in first sight and you still suspect that the valve does not work because of performance problems, you will have to remove the slider. Unfortunately there is no other way except removing the slide.
After disassembly, the solenoid should be tested again and also check that it can be moved easily by hand. You can either remove the solenoid (the battery compartment must be removed for this purpose) or you can try to push the core into the solenoid with a screwdriver. The core must be clean and easy to move.
At the valve itself on the cylinder itself there are several things to check:
- Is the installation direction correct?
- Is the cable put correctly in the eyelet of the slider, is the eyelet not worn out and the cable tip not bent?
- Is the valve and the hole in the cylinder clean so that the valve can be moved easily?
- Is the cable laid correctly (above the radiator, not in front of it)? Any sharp bend can prevent the valve from opening.
- Is the exhaust valve correctly adjusted? If the solenoid core is not completely pulled towards the stop limit, the force with reduced working voltage may be too low to hold the valve open.
- Wrong spring: Complete sets from third-party manufacturers may include springs that are too strong.
- Heavily damaged sliders should not be used.
- Incorrect installation or severely damaged sealing surfaces can cause the housing to sit crooked and the slider to jam.
A damaged housing or damaged sealing surfaces may cause the power valve to jam only when the engine is hot and then it will become stuck. This can be checked by loosening the two screws on the valve housing when the engine is hot and then bridging the solenoid on the wiring harness as described above to test. If the valve does work but not with the screws tightened, the housing or cylinder is probably damaged.
Tips for removing stuck power valves are described in the article “Removing the power valve”.
If the valve works when removed and can be moved easily by hand in the cylinder but jams after installation, the housing may be bent or the sealing surface may no longer be flat. A new gasket may also help.
Hi, on my Rs 125 (1999) the yellow cable going to the control unit become EXTREMELY hot and literally burns the control unit. This is the third ecu in 1 month. The voltage regolatore is brand new but i’m afraid it’s faulty from the factory. Do you have any idea what could be the problem? Ps: I have the solenoid mechanic cable that is in front of the radiator, could it be the cause of the problem? Its very urgent please per me know