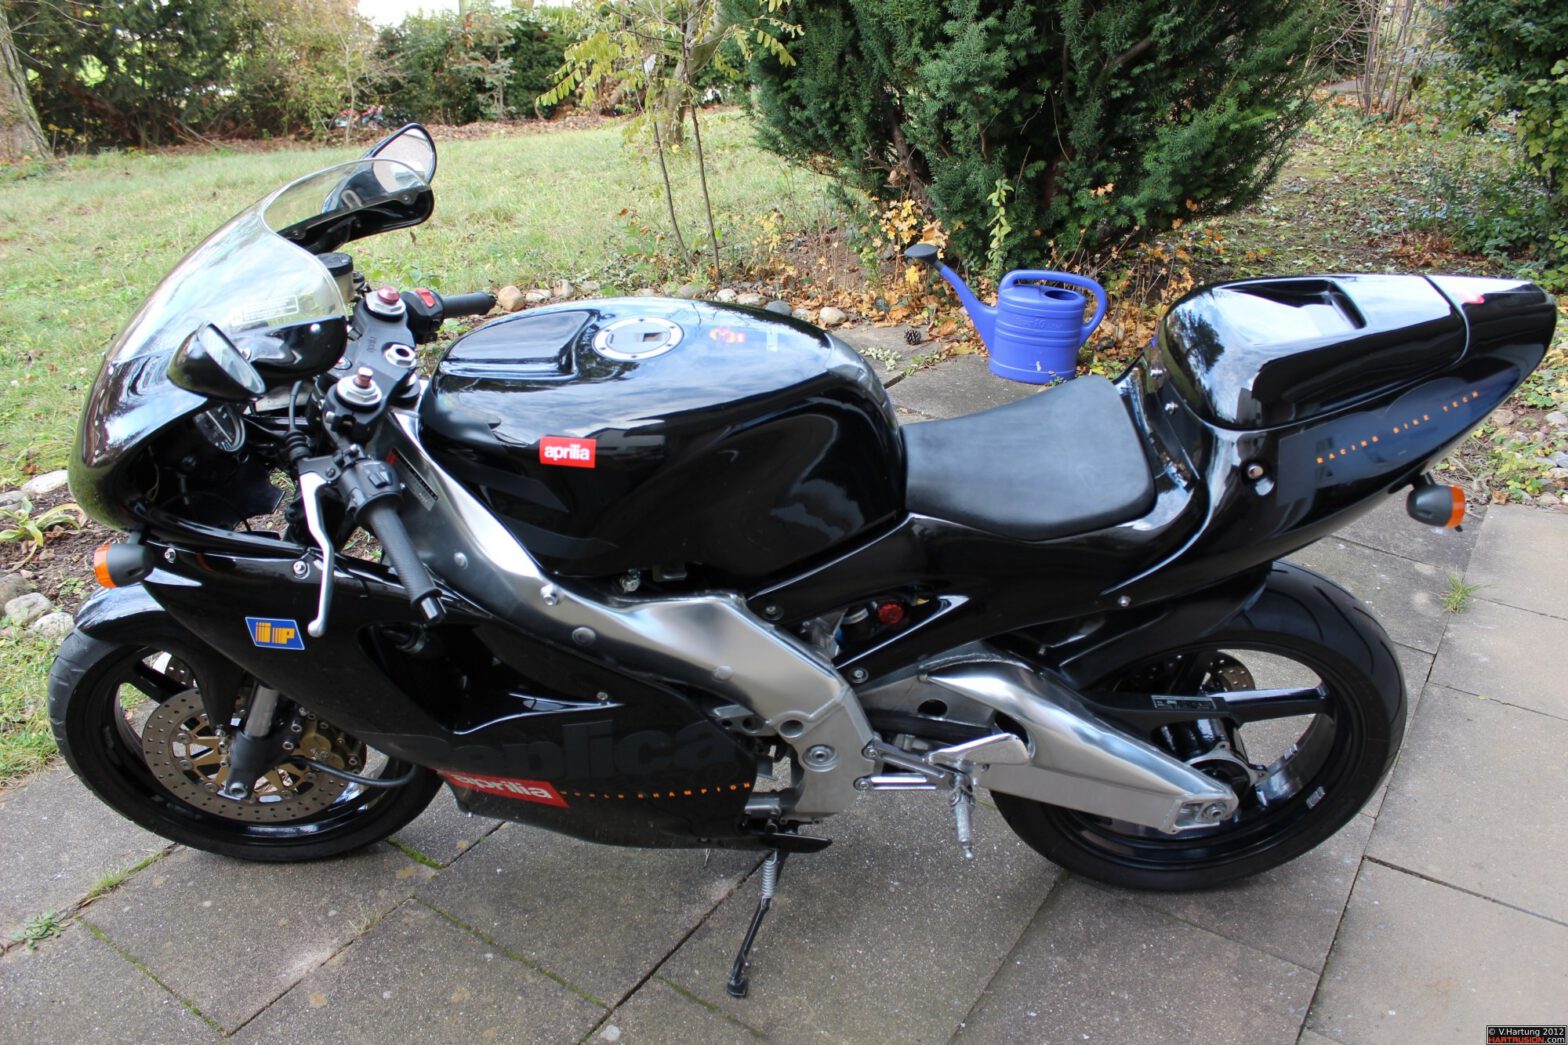
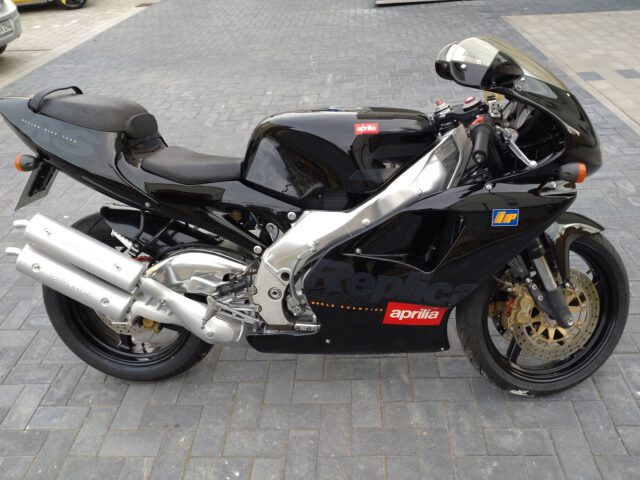
This diary shows the rebuilding of an Aprilia RS 250, completely disassembled, all wear parts renewed and preserved for a long time. The bike stood for some time in my living room.
The whole thing was inspired by a simple forum post about a so-called “noble bike”, where such a bike was rebuilt from scratch with a lot o patience and cleaning every single part.
Entry #22
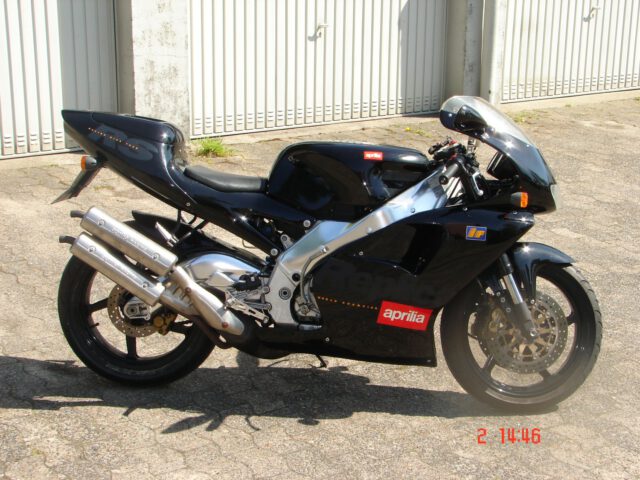
First Run & certification at testing institute
Project is almost finished, just some small things to fix left.
Entry #21
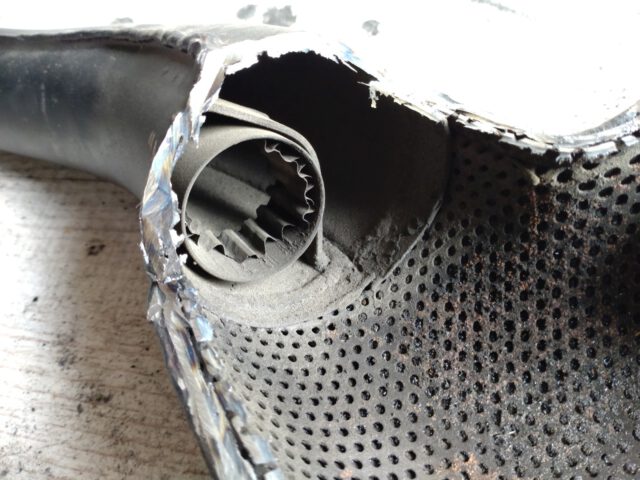
Exhaust system
All three available exhauts were resprayed, catalytic converter exhaust was opened and one catalytic converter removed.
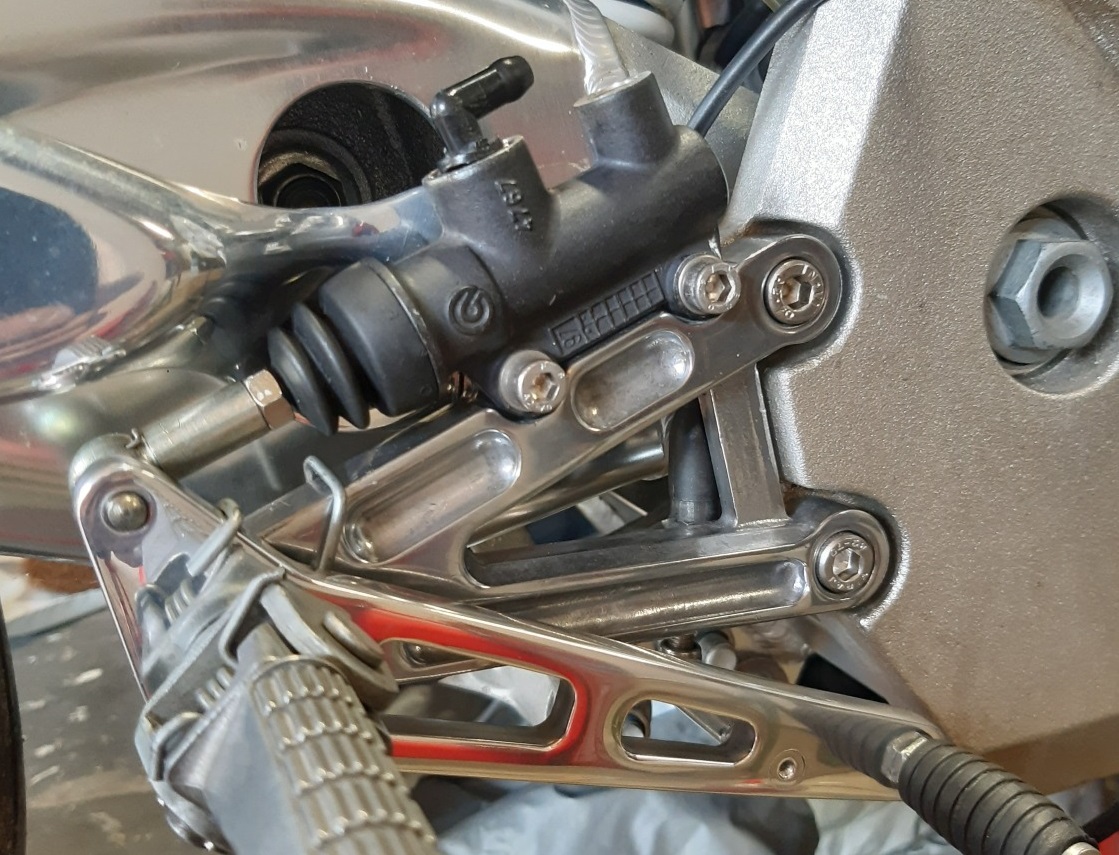
Entry #20
Brake bleeding and footrest assembly
After 9 years of pause, project is continued now, brakes have been bleeded and footrests were assembled.
Entry #19
Lots of small pieces
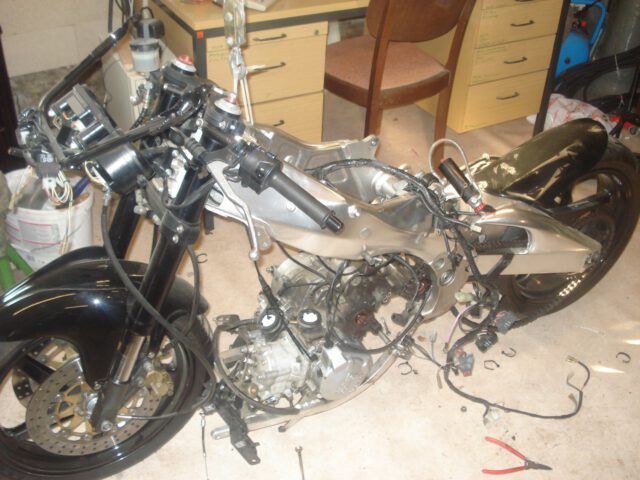
The cable pulls, hoses and much more of the little things have now been assembled. Now it pays off that a lot of photos were taken of the disassembly at the beginning.
Entry #18
Replacing wheel bearings
The speedometer and other small parts in the cockpit as well as the handlebars were now mounted. Also here everything was equipped with new screws, so that the screw heads have a uniform look. But the exchange of the wheel bearings was not as easy as sometimes hoped for.
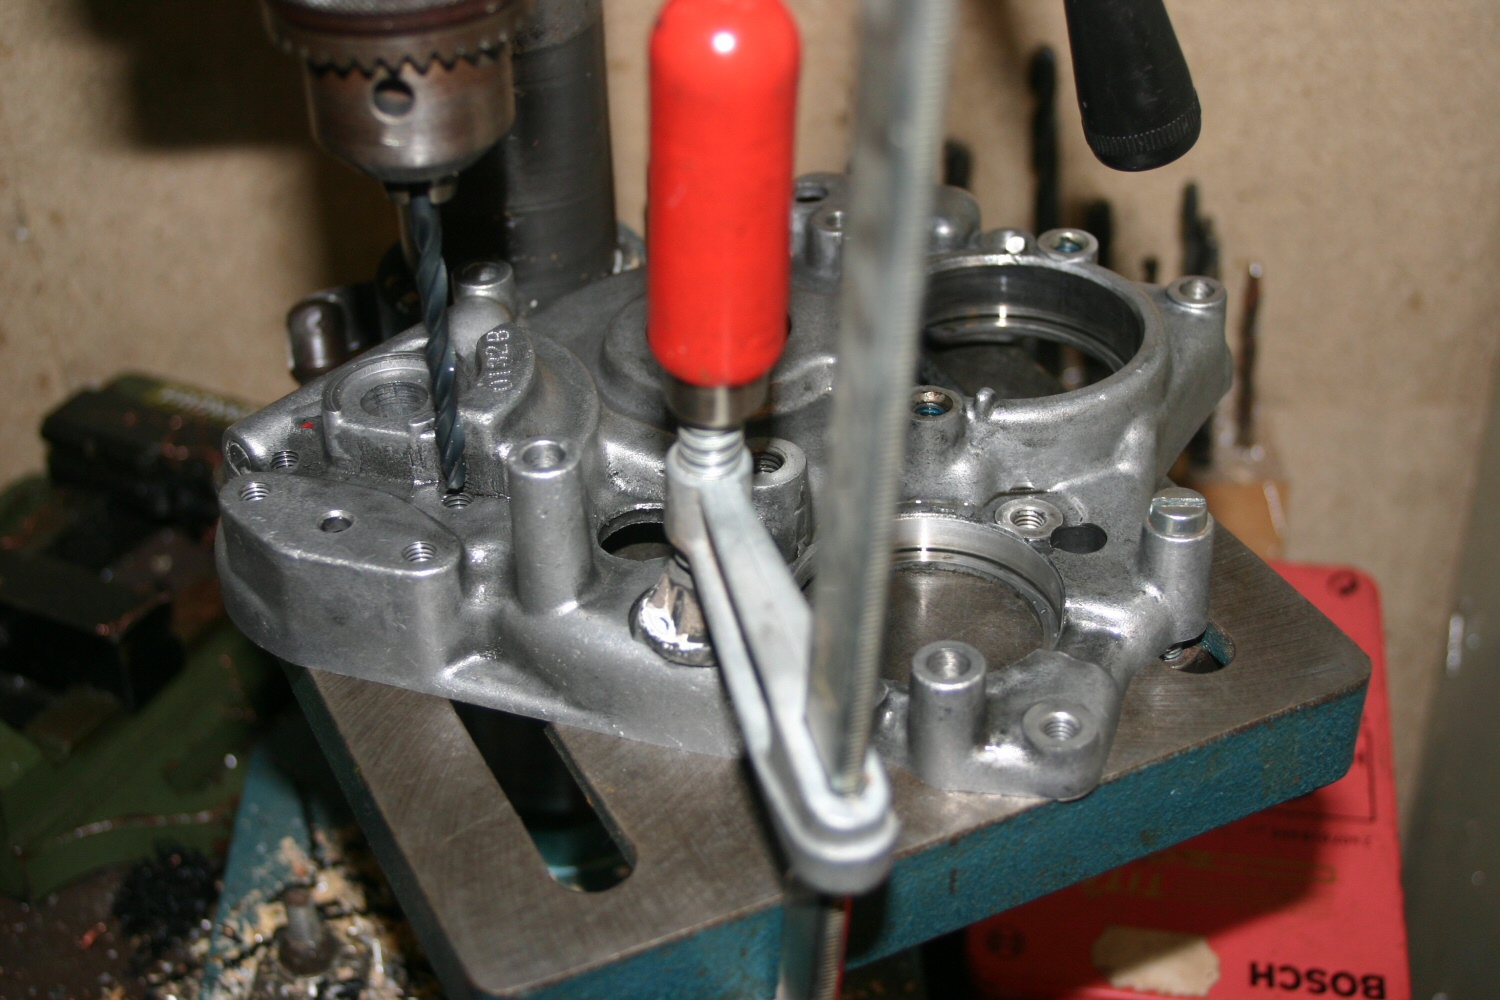
Entry #17
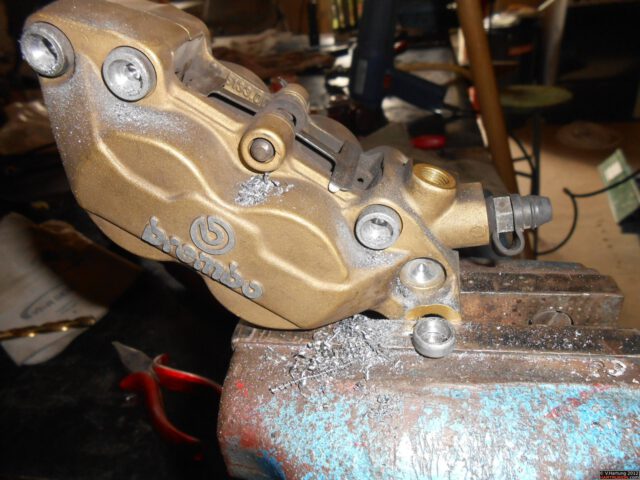
Brake Disassembly
It was obvious: M8 screws with 5 mm hexagon socket, where the tool cross-section is smaller than the cross-section of the screws. This could not end well. Actually, I only wanted to disassemble the calipers, clean them and reassemble them with new screws to keep the look uniform on the machine
Entry #16
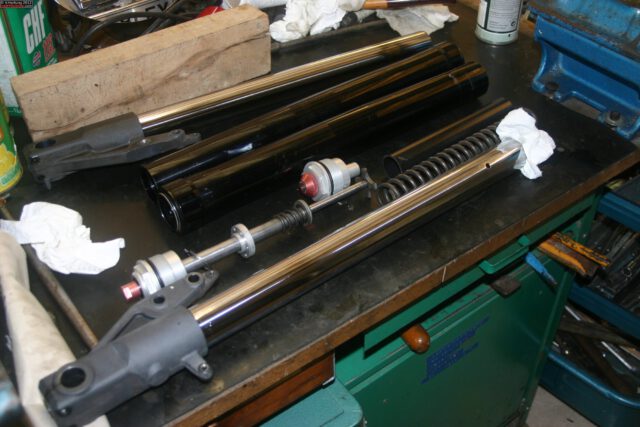
Front Fork
When disassembling the front fork it turned out that the crumbs on the spars were not crumbs at all but rust spots where the chrome layer already had holes. So the fork legs are scrap.
Entry #15
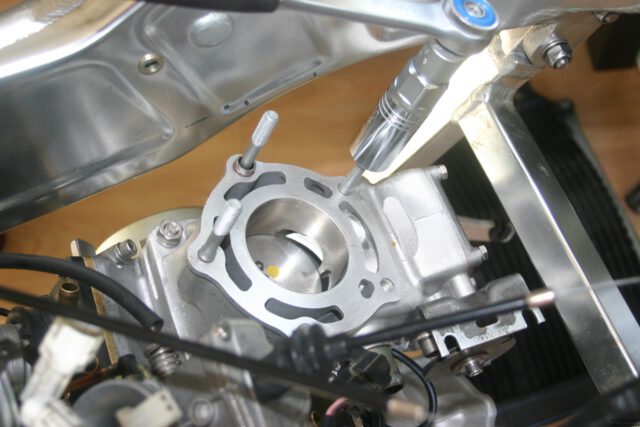
Installing Cylinder Heads, Cooling and rear Frame
For the assembly of the cylinder heads I had to order new expansion bolts and a few other small parts, these should not be reused after disassembly. Unfortunately the copper gaskets at the nuts at the cylinder head are not according to standard, so the old gaskets were brushed off and installed again.

Entry #14
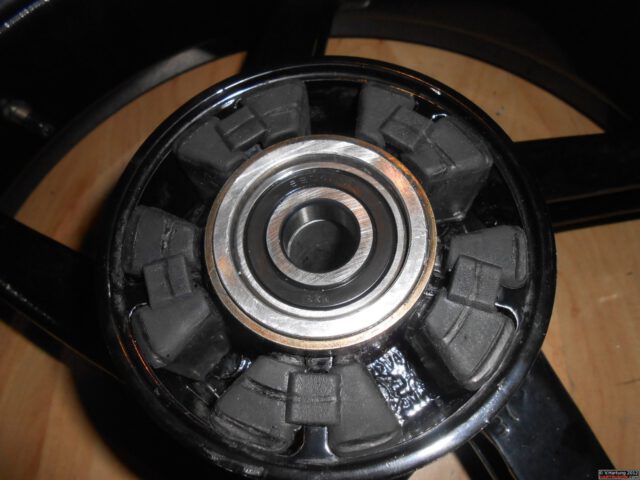
Renewal of rear suspension bearings
At the rear suspension all needle bearings had to be replaced, because the old cages were full of water for years. Therefore the cages were corroded when they were removed. For the installation of the needle bushes I made a suitable bolt on the lathe to countersink the bushes so that the shoulder for the shaft seals fits exactly. The holes for the sleeves unfortunately don’t have the appropriate shoulders everywhere.
Entry #13
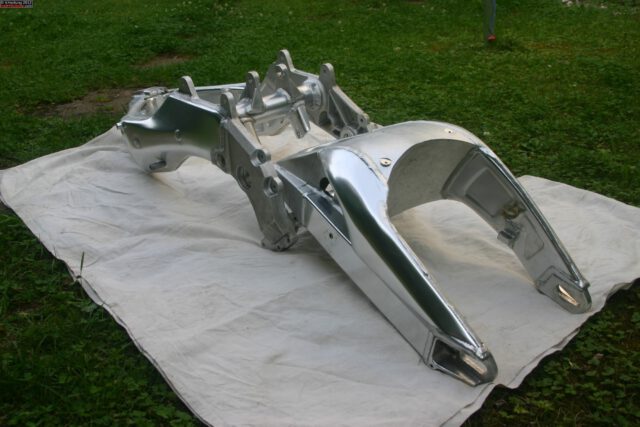
Cleaning Chassis and Swing Arm
The motorcycle frame and the rear swing arm were completely disassembled, the bearings from the swing arm will be replaced later. The frame was first cleaned with a parts cleaner and washed afterwards.
Entry #12
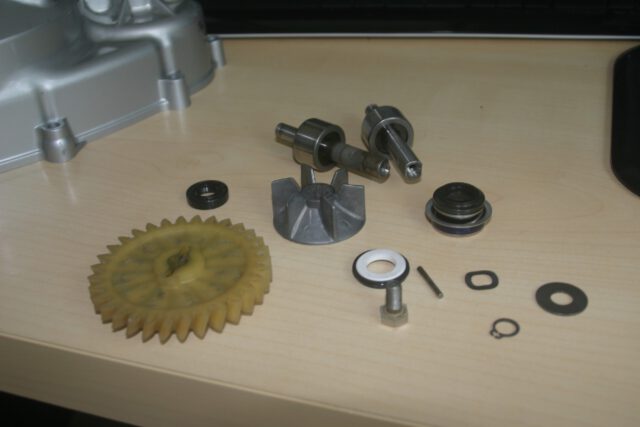
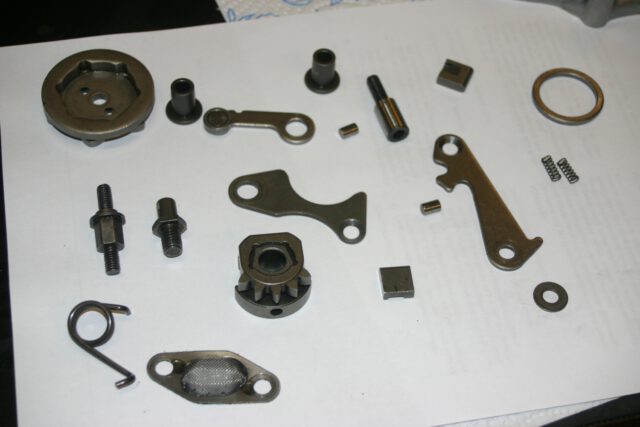
Installation of Clutch and Water Pump
The clutch is now mounted, together with all the parts of the kickstarter, without any incidents. The water pump drive shaft was damaged, it was quite corroded and leaking because of the worn mechanical seal, which damaged the whole shaft afterwards.
Entry #11
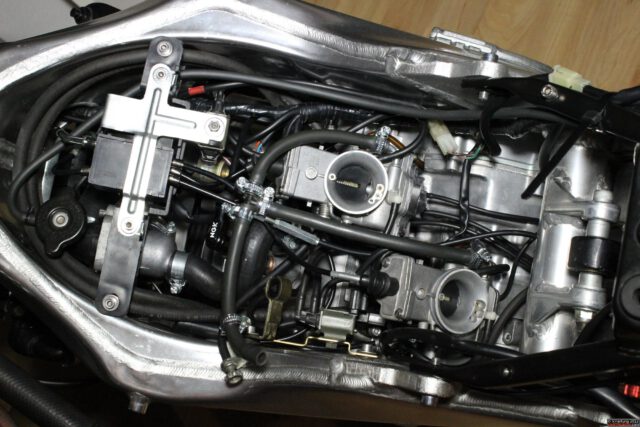
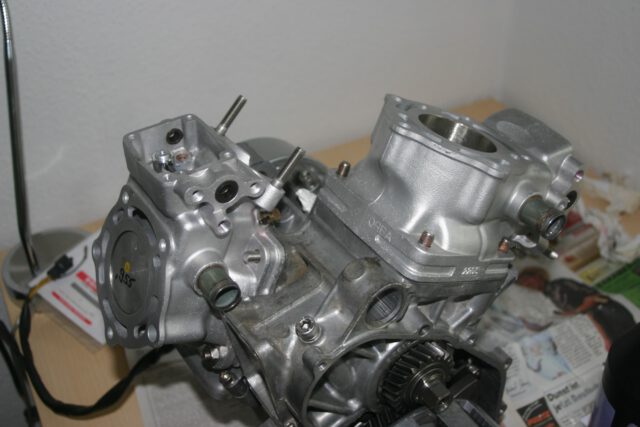
Mounting the cylinders
The exhaust power valves were installed before the cylinders were mounted. For the exhaust, a new threaded bolt M8x30 was screwed in.
Entry #10
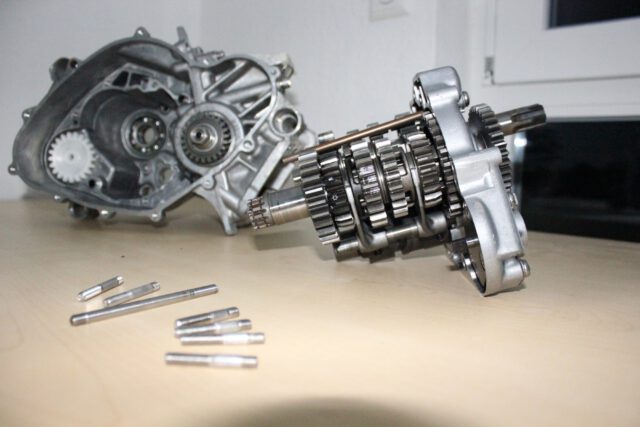
Gearbox Assembly #3
After the struggle to get the studs out of the housing, I also exchanged them for new ones made of corrosion resistant steel with appropriate strength and then installed the gearbox.

Entry #9
Gearbox Assembly #2
The gearbox shafts were disassembled, cleaned and put back together afterwards.
Entry #8
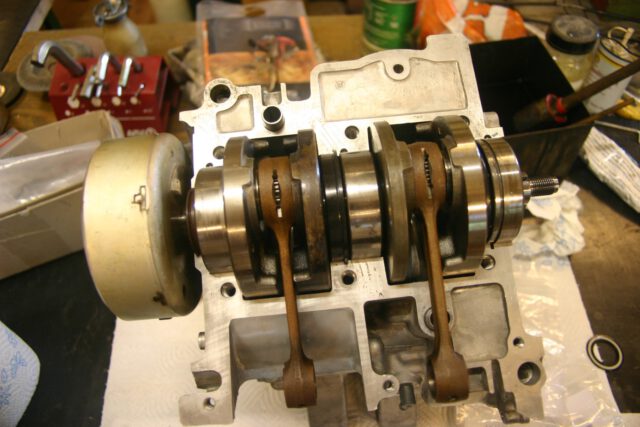
Crankshaft Installation
As the RS 250 uses a second oil pump to lubricate the gear shafts, the two bearings on the output side of the gear must be sealed on one side with a seal. The oil pump then presses the oil through holes in the gearbox shaft directly against the shift forks and bearings.
Entry #7
Gearbox Assembly #1
On the gearbox itself, all ball bearings are removed and replaced by ball bearings from SKF with polyamide cage. The reason for the replacement was a slightly rough running noise of the original bearings and the quiet running of the polyamide cage bearings. Unfortunately there are no pictures of this.
Entry #6
Cylinder Coating, Cooper Power Valves
The first package from MuS Förster arrived, he checked the crankshaft and the cylinders. The crankshaft was in very good condition and was only re-balanced, the cylinders unfortunately had to be recoated because of a damage due to loose catalyst parts. I also ordered some small parts like gaskets there.
Entry #5
Gearbox Disassembly
The gearbox housing was cleaned with a special cleaning device, so all oil and dirt were off. The gearbox was removed. The gear shafts made a grinding noise when turning, it turned out that this came from the bearings. Since all ball bearings had these running noises, I ordered also equal a set of new ball bearings with polyamide cage for better quiet running as they are used in my RS125.
Entry #4
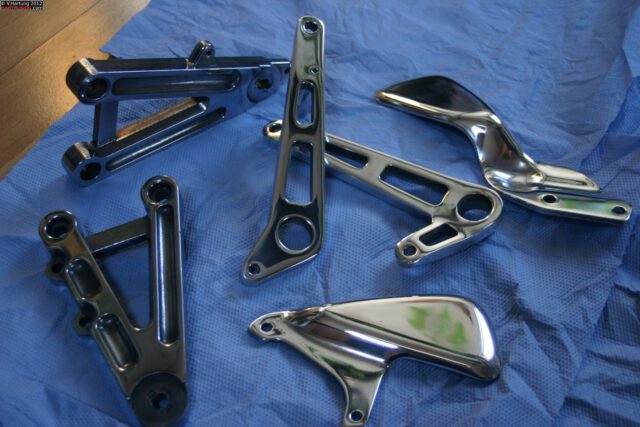
Polishing Footrests
One of the first things I did was to polish the footrests. Many thanks at this point to my two colleagues who helped me with the sanding with sandpaper – high gloss polishing itself isn’t that much work but the preparation is a real pain.

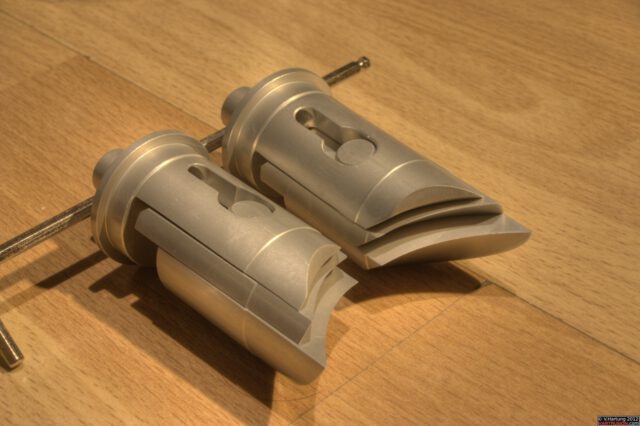
Entry #3
Worn Power Valves
It was already known and therefore no surprise. The power valves didn’t look that good, 3 of the 4 sliders already had a slanted center pin, so these need to be replaced.
The problems of the original sliders of the RS 250 are widely known: The pin in the middle part starts to tilt after some time and slowly expands the hole.
Entry #2
Disassembly of the RS 250
After some weeks I found some time and started to disassemble the whole bike.
Entry #1
Buying a used RS 250
I discovered the matching motorcycle in October 2008 on a site called “mobile.de”, with 20.000km and a price of 2300 € with complete original covering.
Hi,
thank you very much for the Aprilia 250 diary, i’ve started working on my bike just few weeks ago (Mk1 Chesterfield) and this will be VERY useful. Congrats for your bike and thanks again.
Cheers from Italy!
Diego
Hello Hartrusion,
Can you please tell me if the lcd module on the RS125 is the same part as used on the 250. The one on my 250 is beginning to fail and there seem to be many more 125 parts available to purchase second hand.
Having recently had to deal with rust on my forks and ceased front callipers I fully appreciate your efforts. Be prepared for a few hours of brake bleeding. Tips I found are to tap the banjos and callipers to release the air, pump the brake with steering in full left and right positions.
Thanks, Simon.
Hi Simon, thanks for your comment. I checked the spare parts catalogue and those LCDs have different part numbers. I have not yet compared the schematics of both but usually they use same part numbers for identical parts (like its the case for headlights). Even though I have not updated this section for years now, I continued the project some weeks ago and finally managed to do a sucessful brake bleeding. It took about 30 minutes (and no special tools) for the front brakes, I will write an article about that as soon as there is some free time. Basically I used a small hose to circulate the fluid from the bleeder screw to the brake pump reservoir, closing the screw while releasing the handle and I pushed the brake pads back a few times, repeating the procedure afterwards. best regards, viktor