
On my Lenovo X380 Yoga, I wanted to find out how much the performance can be improved after a year of use by replacing the thermal compound. To do this, I opened the device, replaced the thermal paste and did some benchmarks before and after replacing the thermal compound.
It uses an 4 core Intel Core i5 8250U with 1,6 GHz (Turbo up to 3,4 GHz).
This test and these requirements are actually not suitable for such a device, the device is actually made for high battery life, mobility and touch/pen input. Outside such tests in everyday use, the CPU doesn’t need any power, the power consumption is often less than one watt, the CPU fan doesn’t even spin at all.
Test method and used benchmarks
For the benchmark I use about 10 minutes of continuous load with Prime95 (8 workers, small FFTs), where the possible clock frequency and power consumption under load is measured with HWMonitor. Immediately after starting Prime95 the min/max values are reset, this should capture the highest possible performance with still cool CPU, after about 10 minutes a screenshot is taken. It is interesting to see what power consumption is still possible and how far the CPU clocks will be throtteled.
After these 10 minutes the device should be well “warmed up”, then a wPrime benchmark with 1024M and 8 threads is started immediately.
Initial Situation
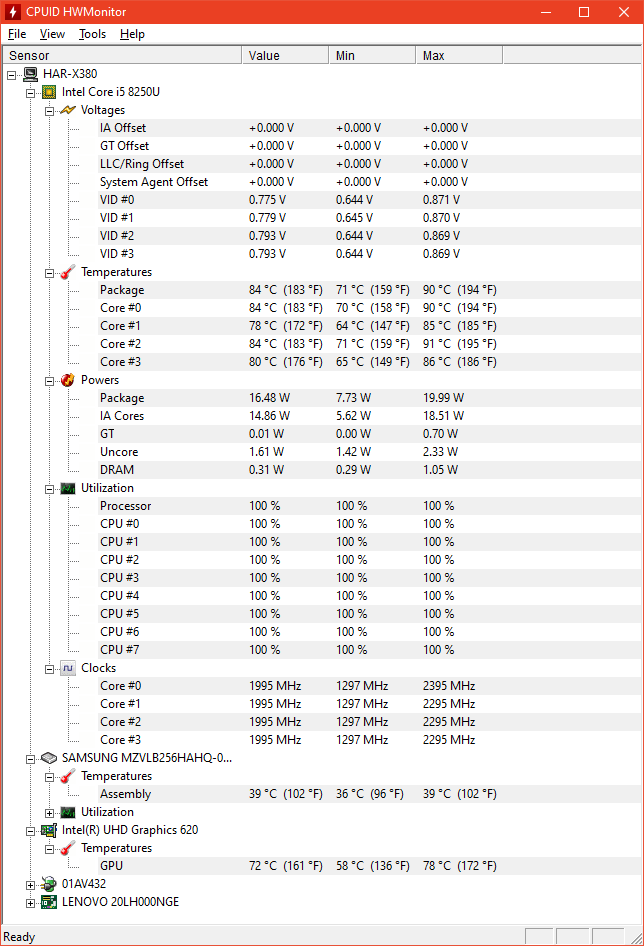
During the Prime95 test, the power consumption of the CPU was between 5.3 and 20 watts, the CPU was throttled from 2.3 GHz to 900 MHz in some cases. Interestingly, there is no fixed power value, the power consumption of the CPU varies with a period of about 20-30 seconds by up to 10 watts.
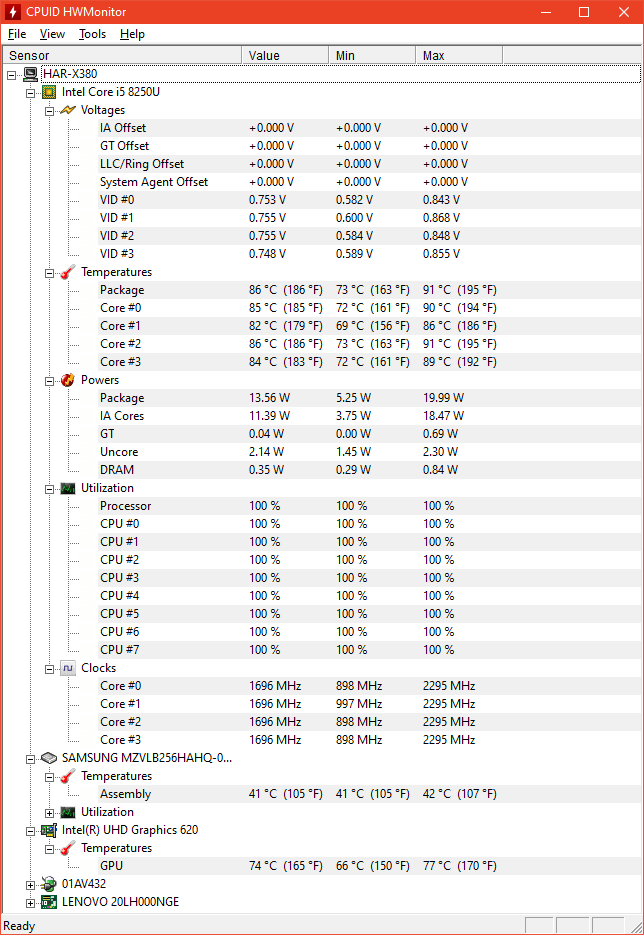
wPrime benchmark took 381,9 Seconds.
The temperatures here are indeed not of interest, as they are always limited to 90 °C. What is interesting is what else is possible when hitting this temperature limit.
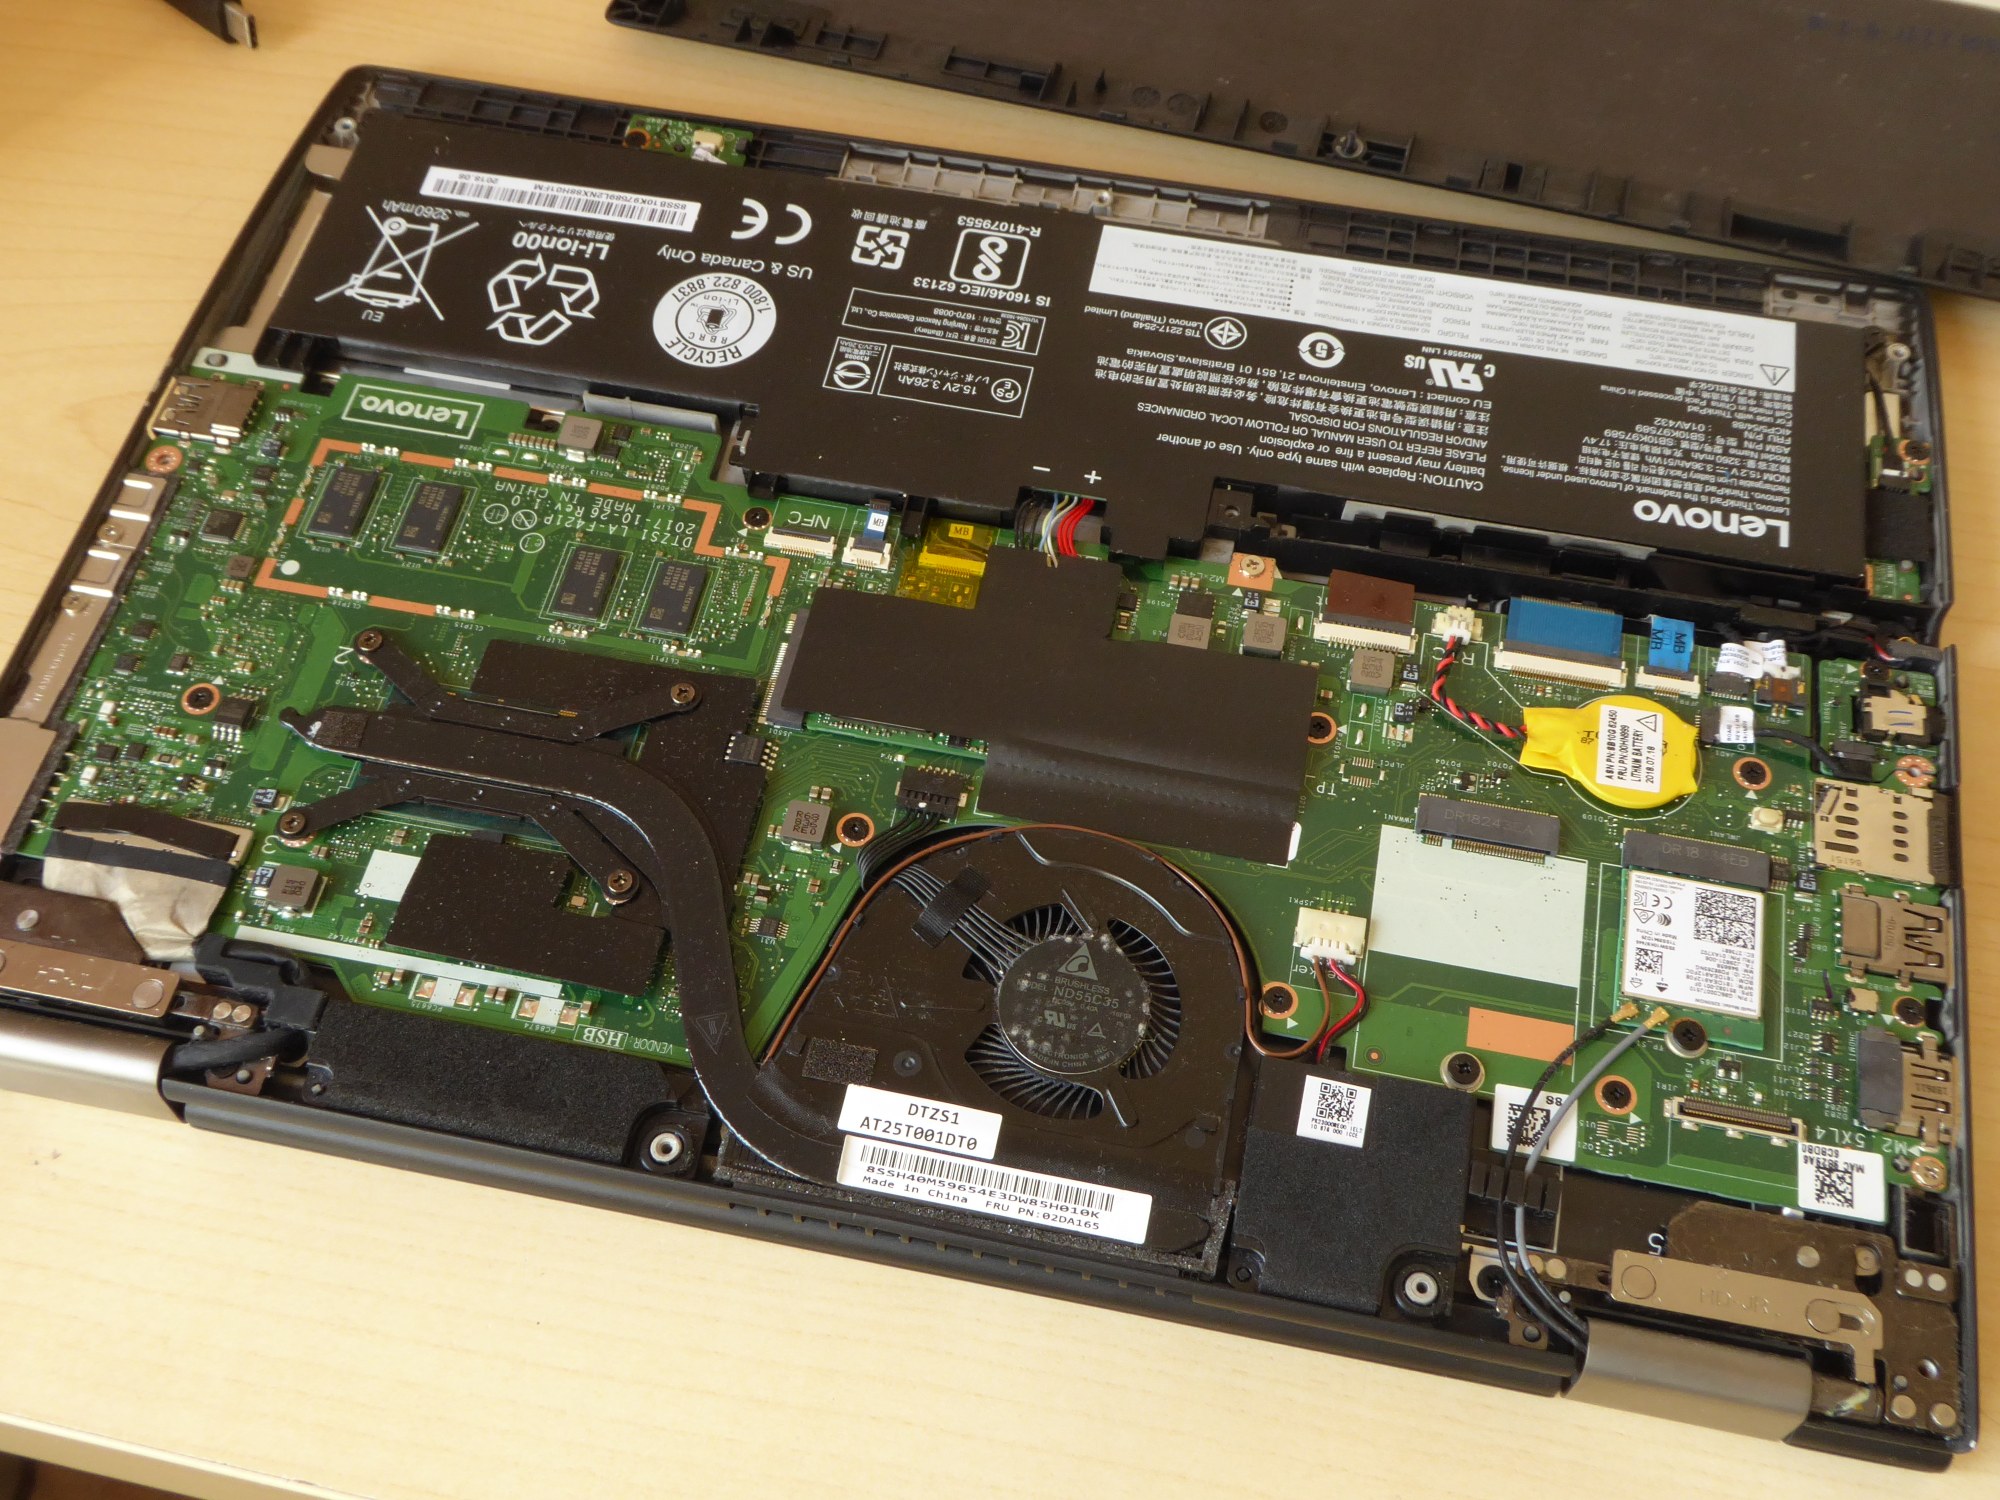
Opening the notebook case
The cover of the device is screwed on and hooked and clamped in some places. Some of the clamps are already loosened when the screws are opened, as the screws also lift the housing cover. With a piece of plastic (I had used a guitar plectrum) you can loosen the last places at the front and then open the cover to the back.
First, the CPU cooler was blown through to remove all the dust and a benchmark was performed again in this state. The results are surprisingly better:
- CPU-Frequency between 1,4 and 2,5 GHz
- Lowest Power consumption 8,4 watts
- wPrime benchmark: 345,5 s
New thermal compound
For the choice of the heat-conducting paste I was talking to der8auer and received the following hints and recommendations:
Since notebook CPUs do not use heatspreaders, the thermal expansion coefficients of copper (16.5 – 10-6 K-1) and silicon (2.6 – 10-6 K-1) are very different, and the constant change in temperature causes the thermal paste to work slowly outwards (“pump-out effect”).
Theoretically, liquid metal has the best thermal conductivity and, due to the absence of solid particles, no pump-out effect. The liquid is always held between the surfaces by capillary action. However, gallium can corrode the copper surfaces of notebook computer coolers. Besides the problem that liquid metal is conductive.
Although Thermal Grizzly Kryonaut has the best thermal conductivity among the other pastes of Thermal Grizzly, due to the pump-out problem especially with notebooks Hydronaut is more suitable. This paste differs among other things by the used binder and is clearly more long-term stable.
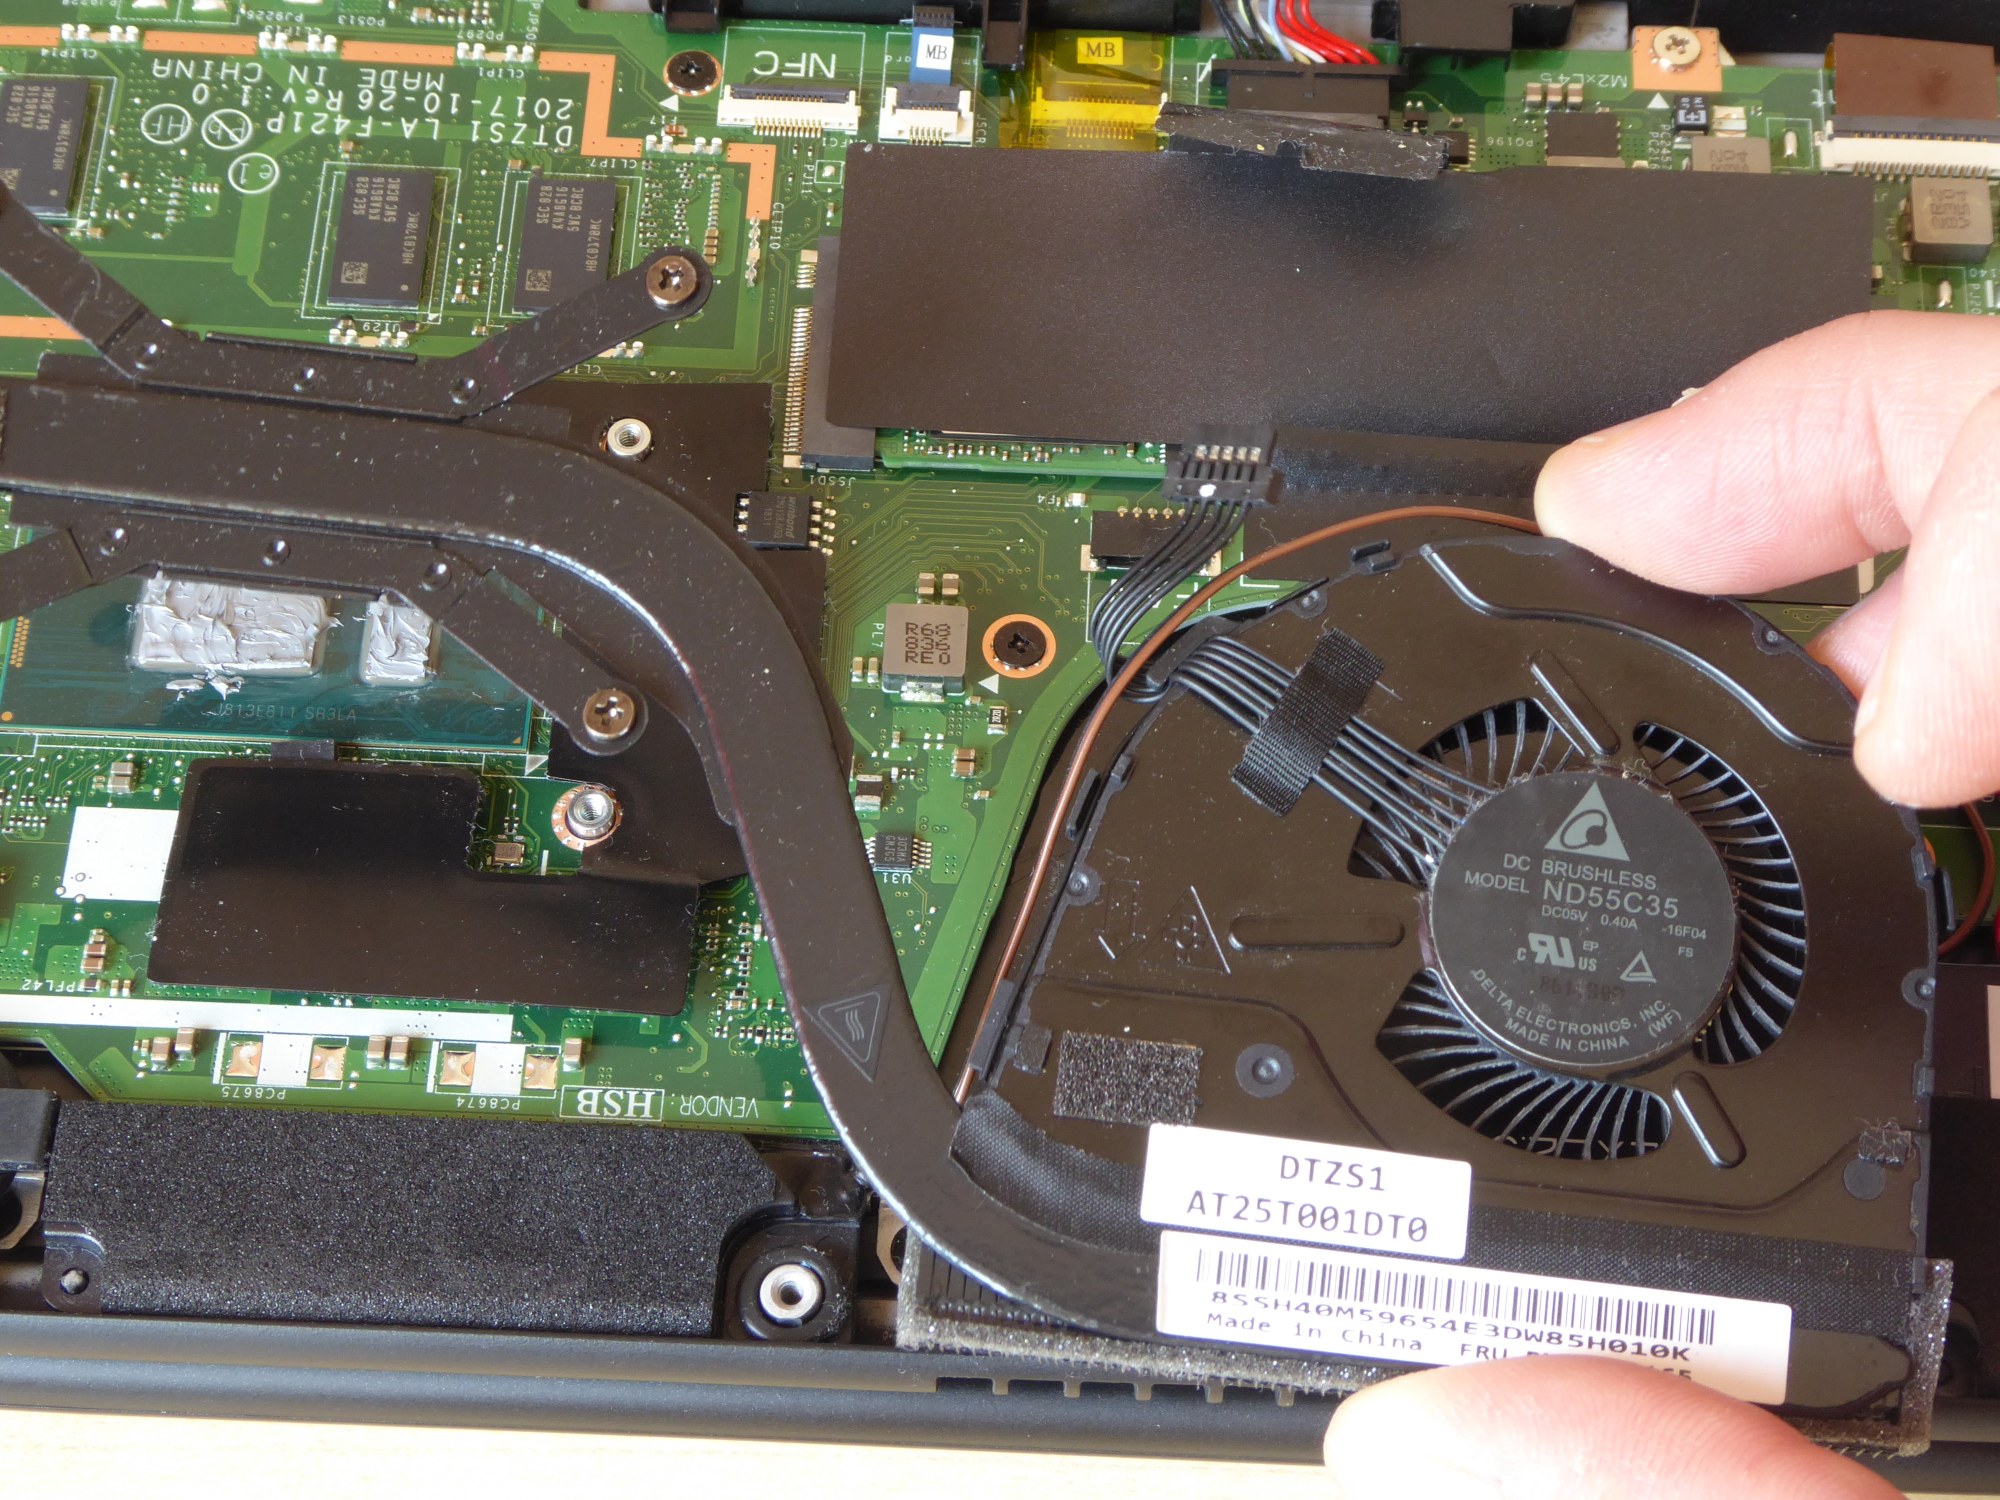
Removal of the CPU cooling unit
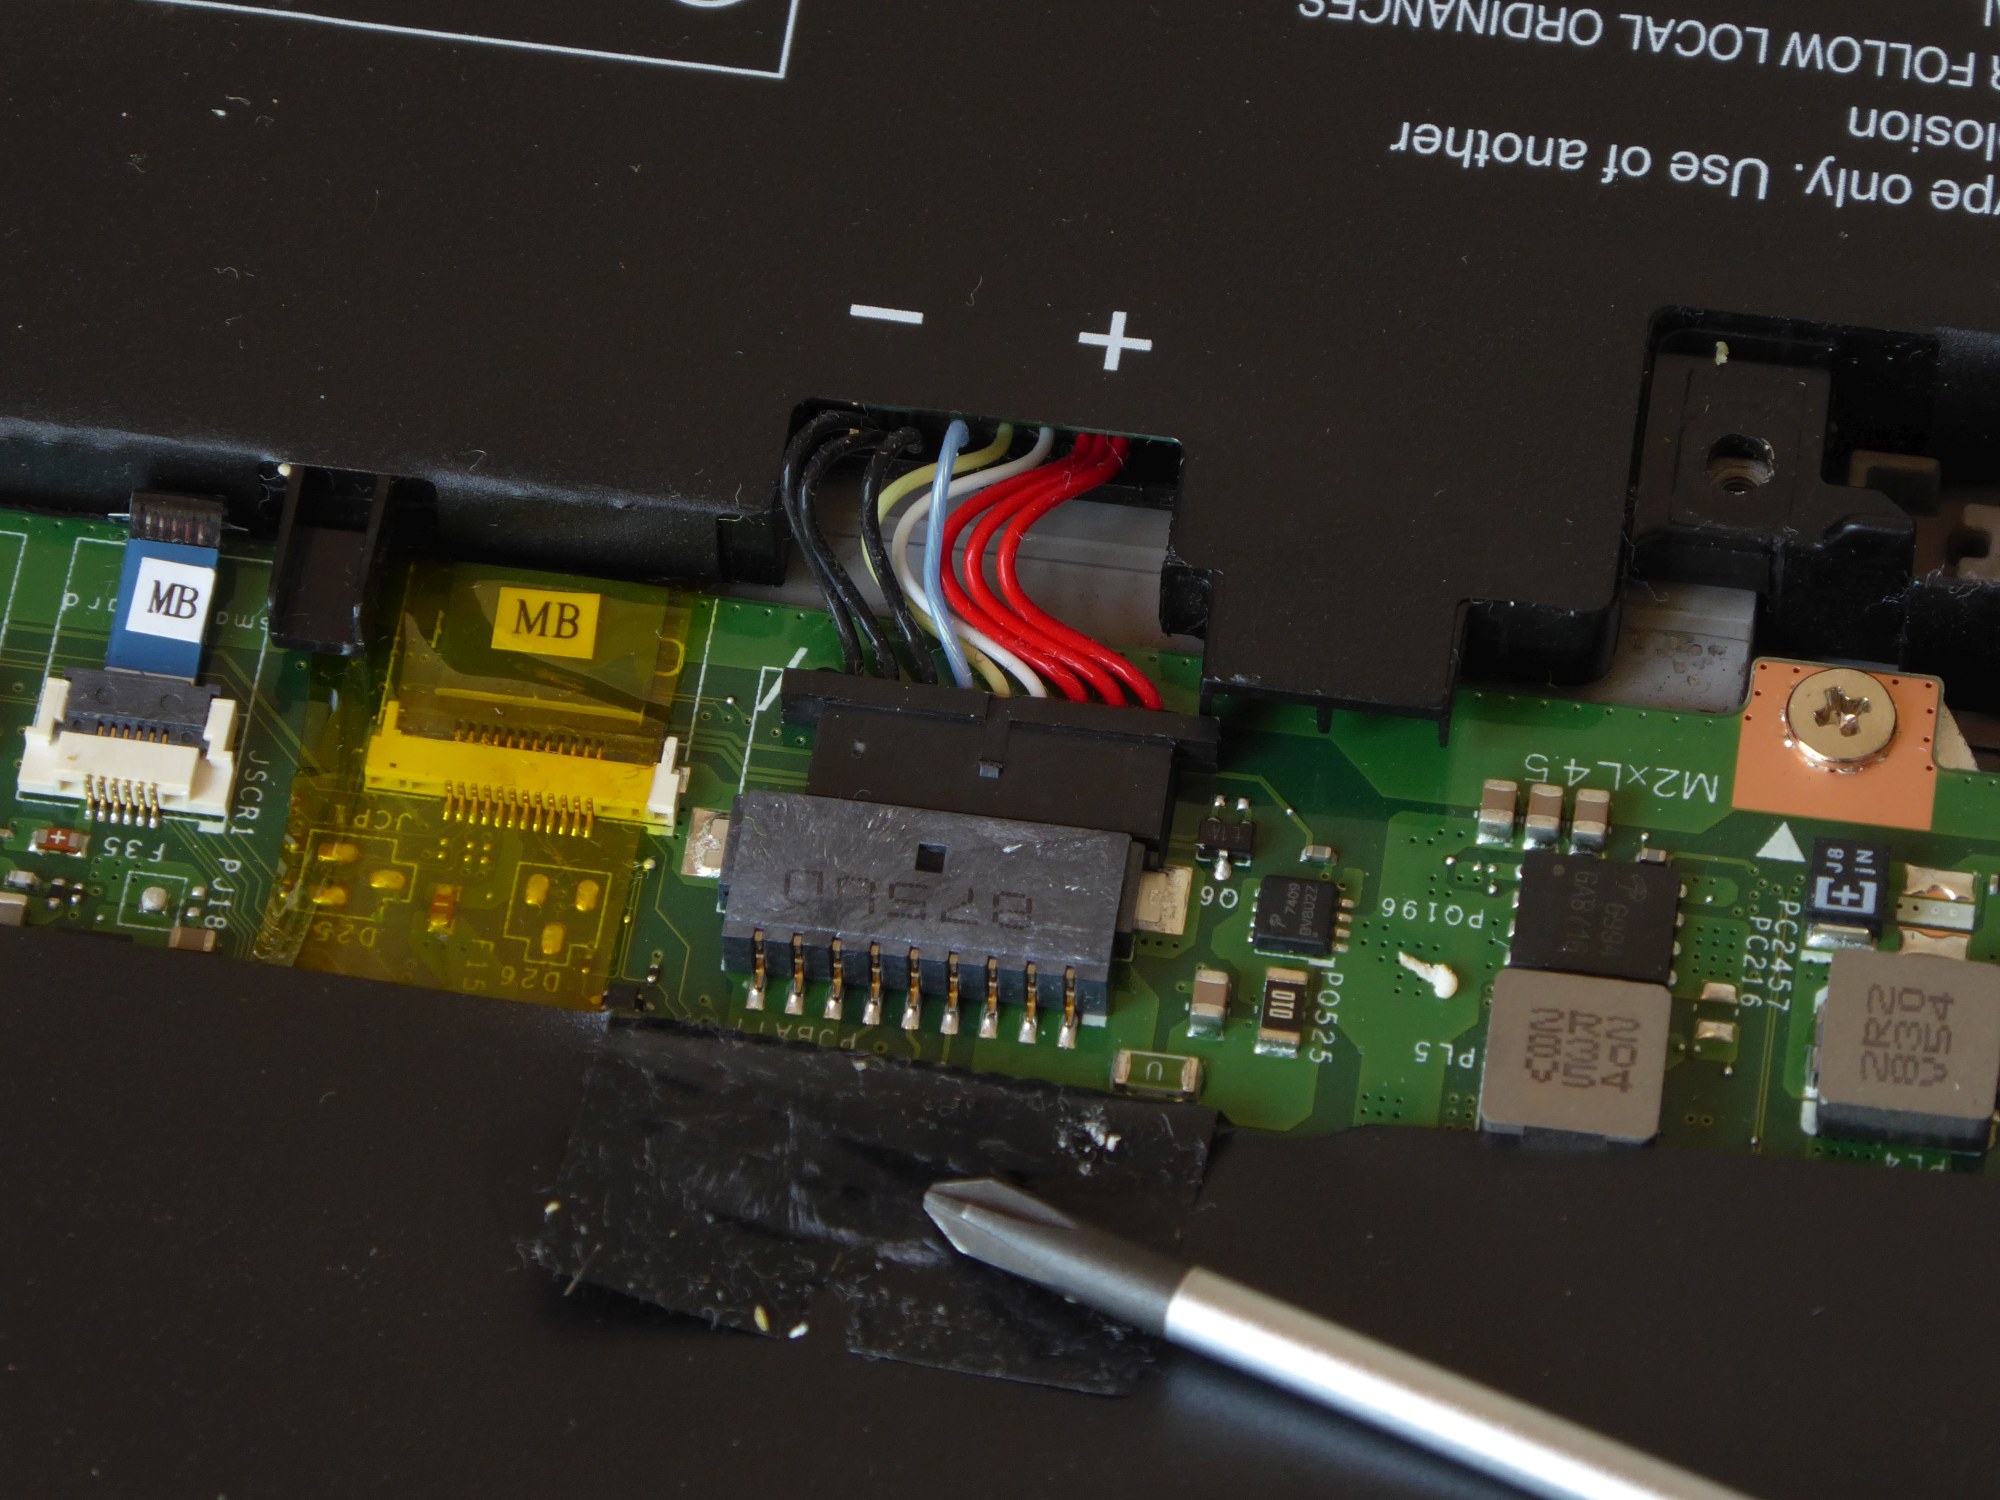
Before any work on the mainboard is carried out, we remove the battery power plug.
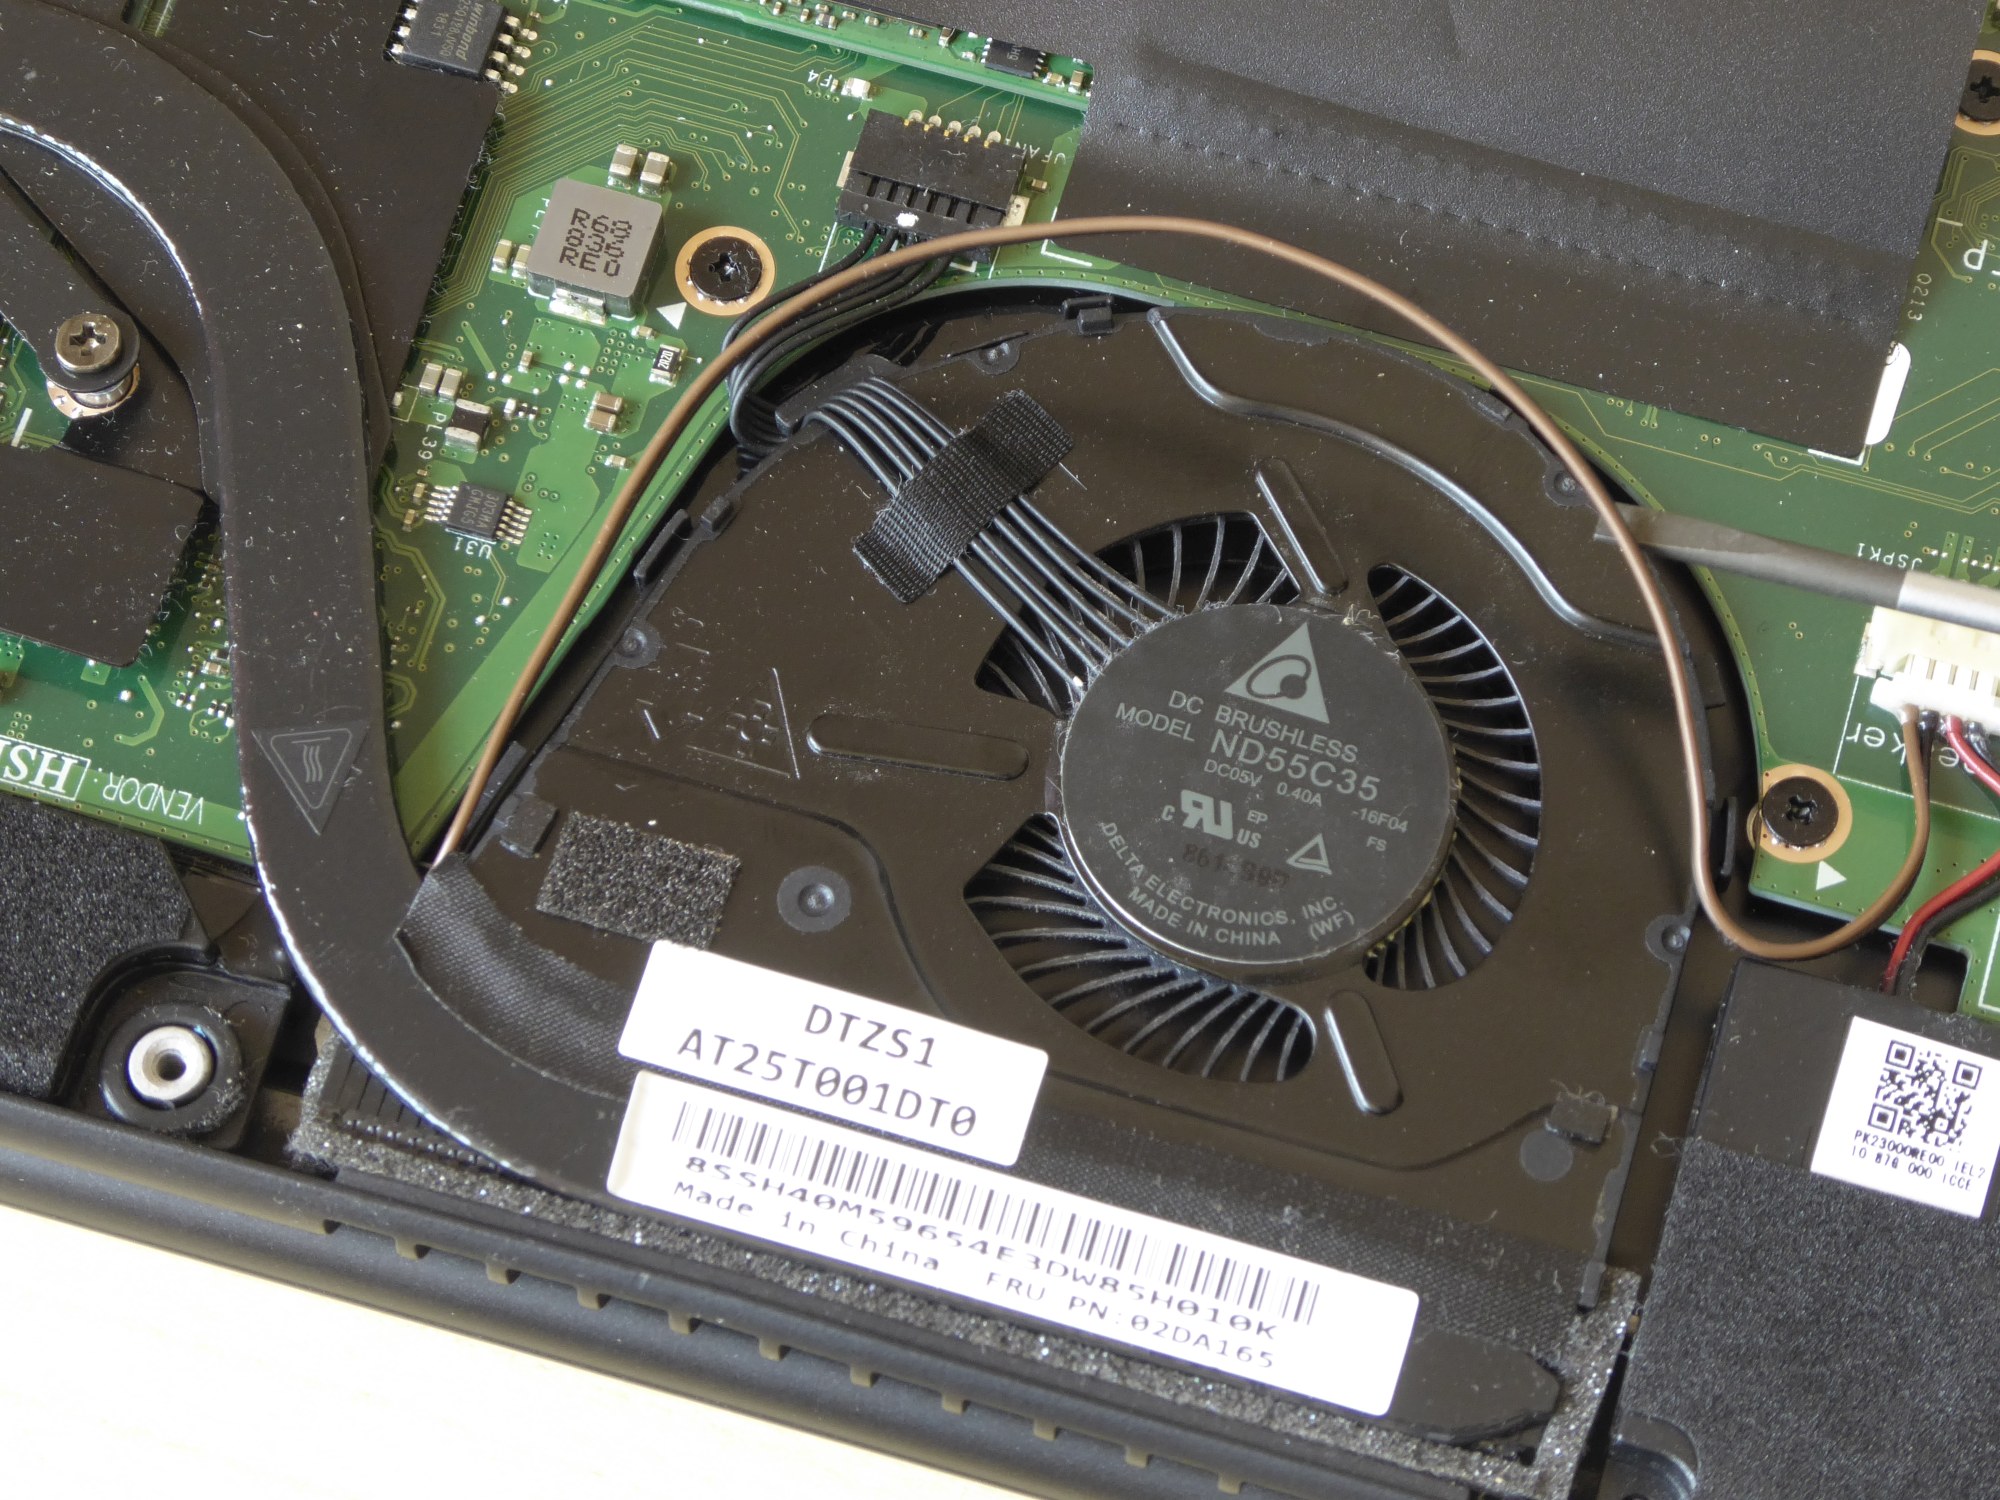
To remove the cooler, the small wire to the speaker must be taken out of the brackets on the cooler, this is not that difficult. At one point you have to push it a little bit over a tab so that the cooler doesn’t get stuck on it.
speaker cable 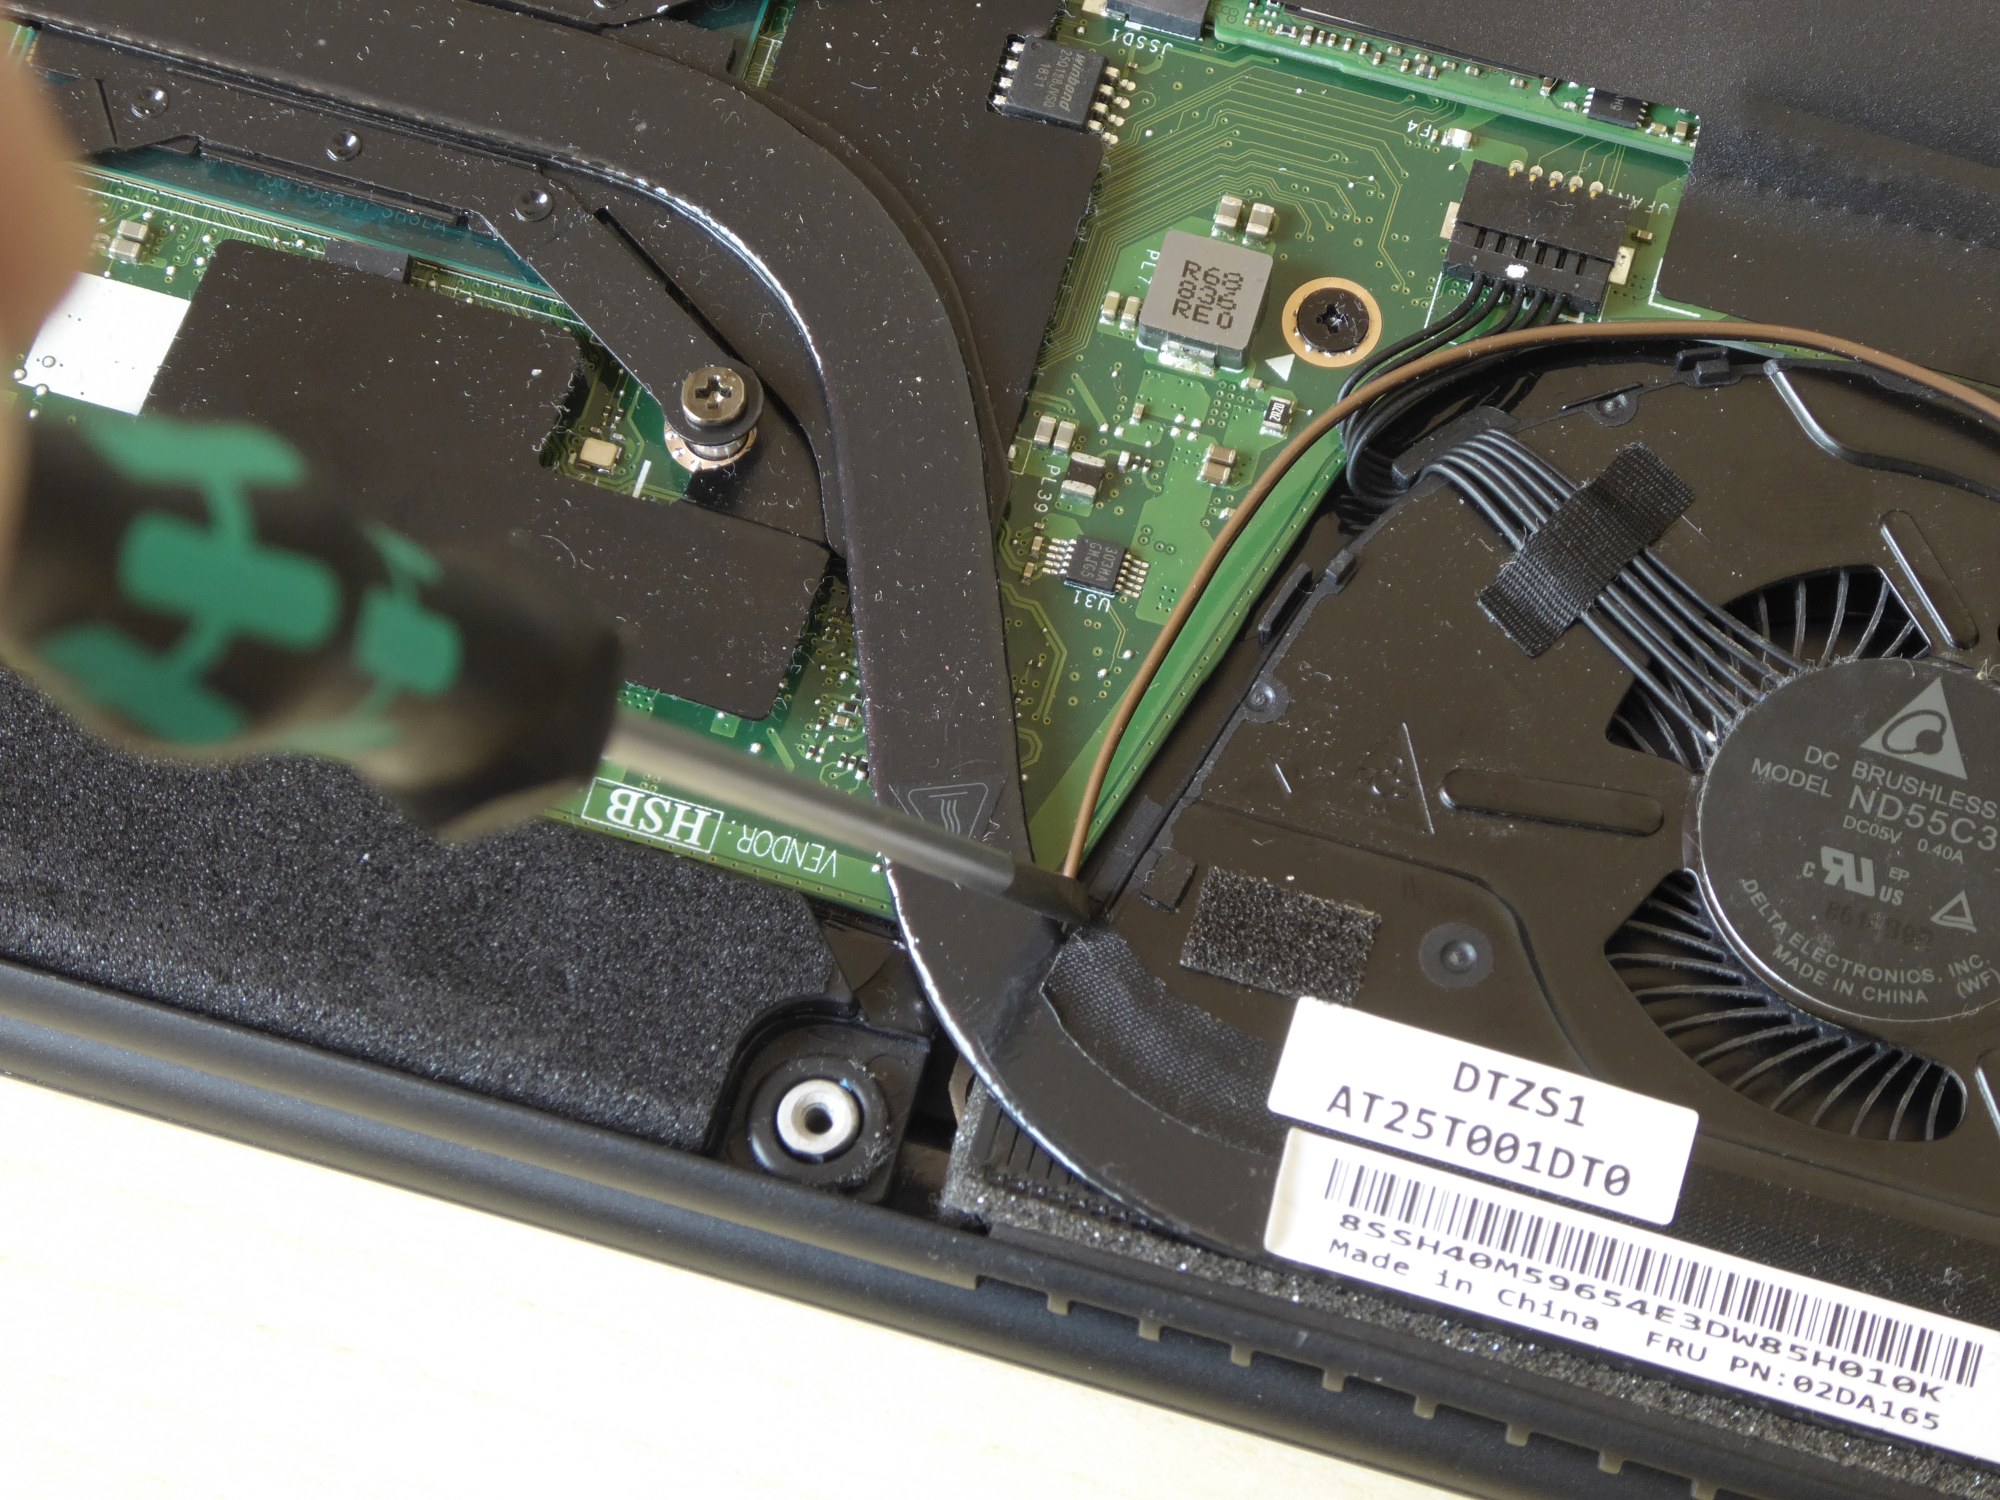
speaker cable 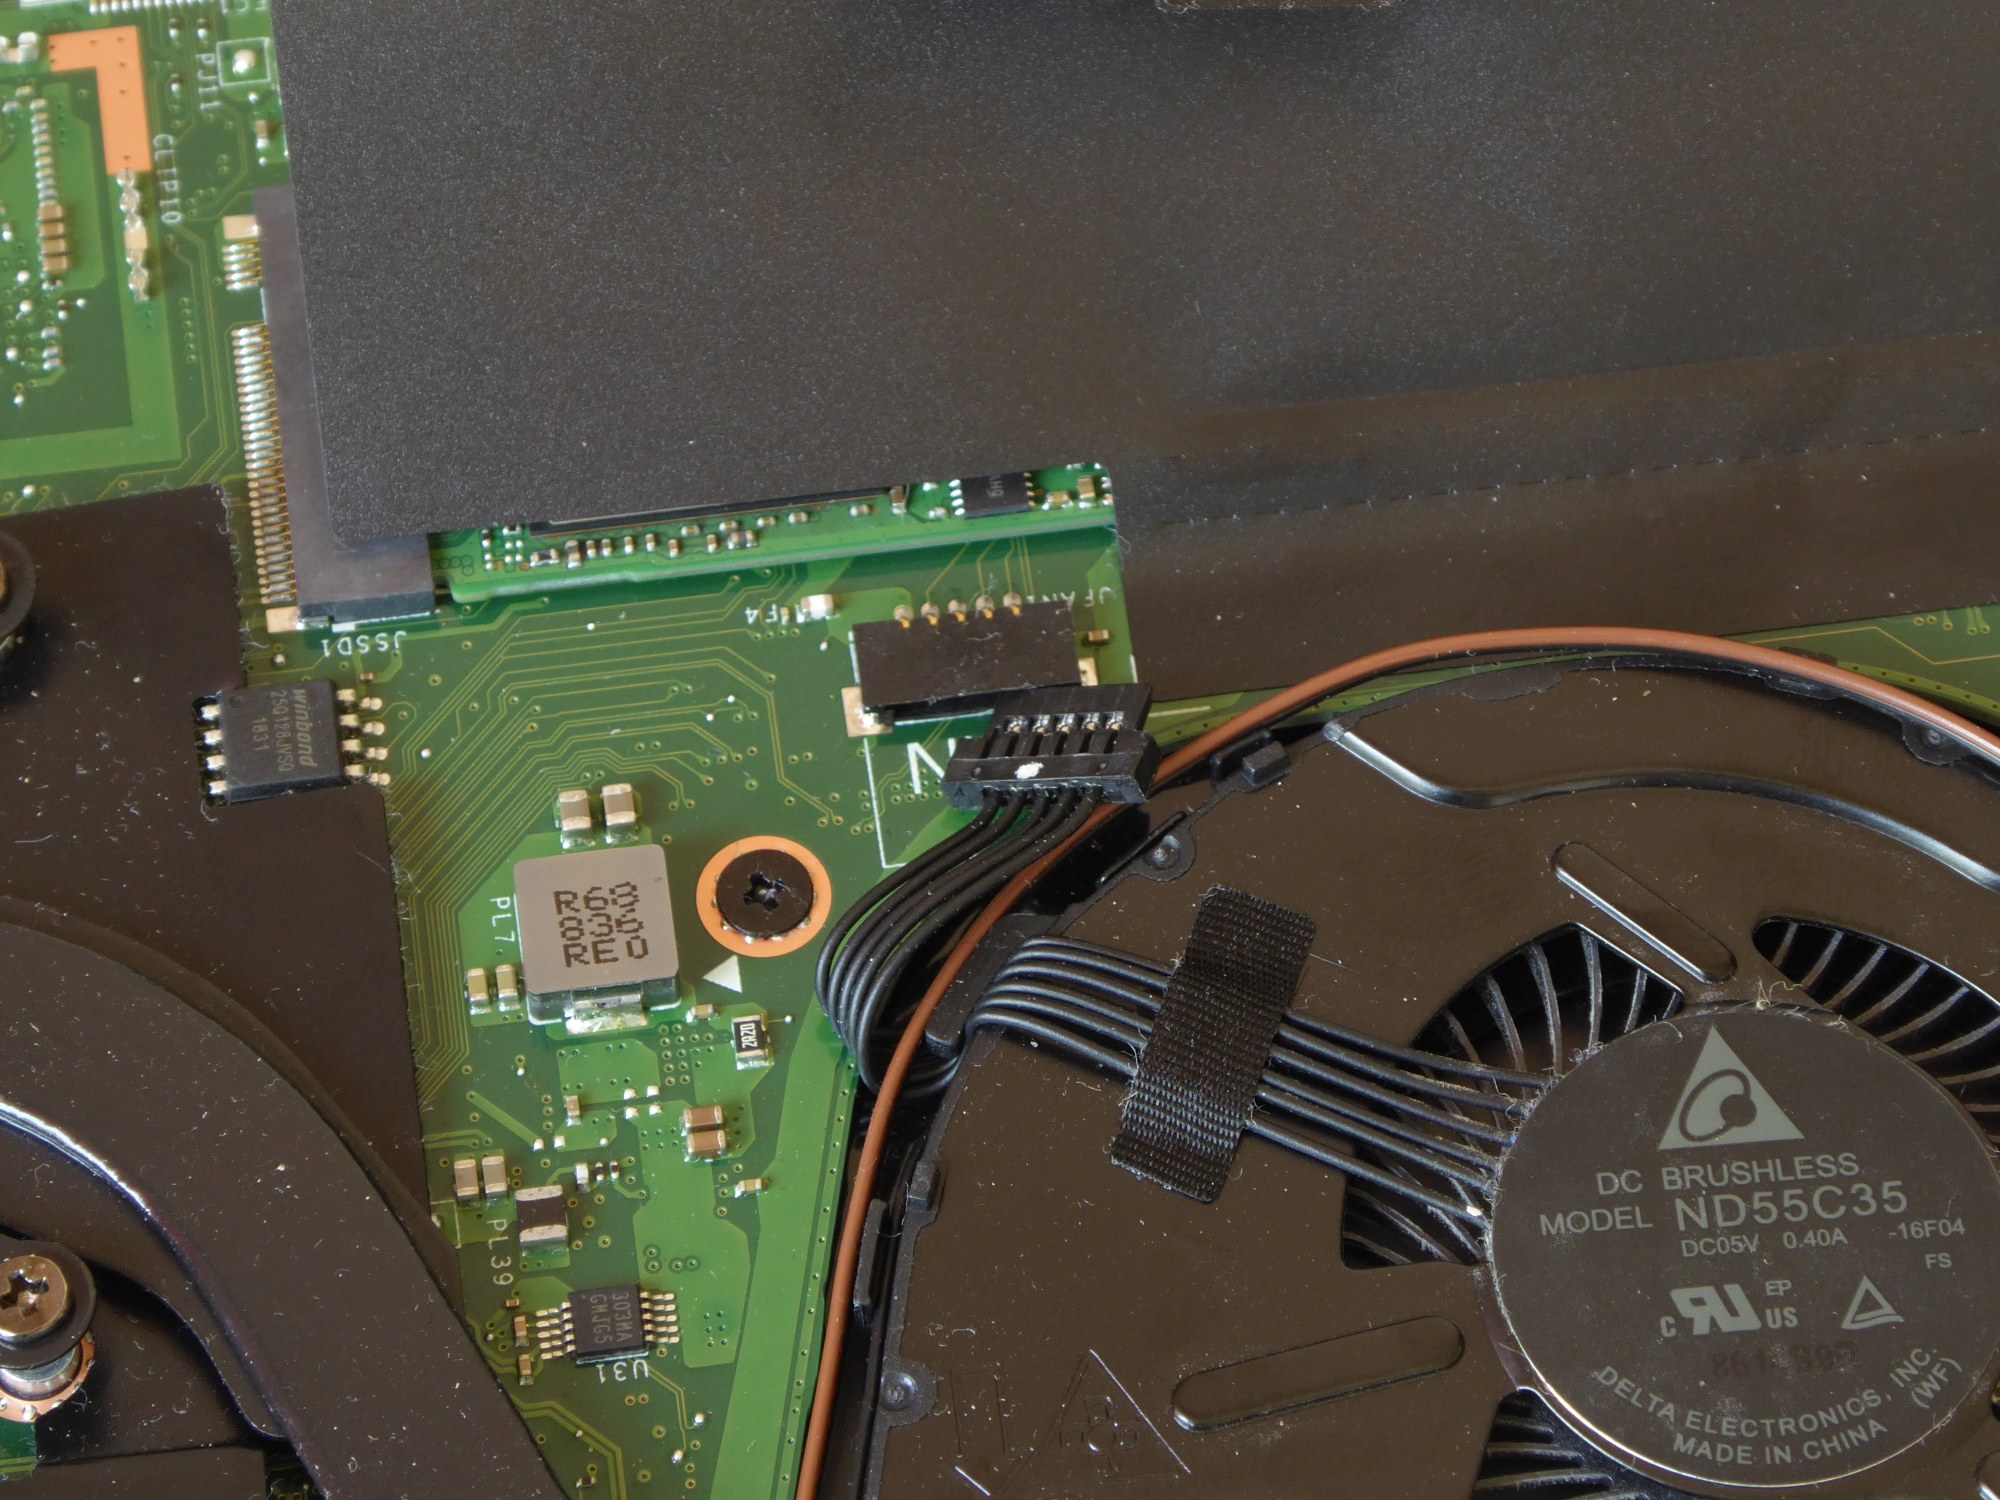
fan connector
The whole cooling unit is only attached to the CPU by the four screws. These are always loosened one after the other, then the entire cooling unit can be removed from the CPU in one piece. If you wiggle it slightly, the heat conduction paste will slowly loosen. The heatpipe is extremely thin and filigree, under no circumstances you should work with force or even pull the fan.
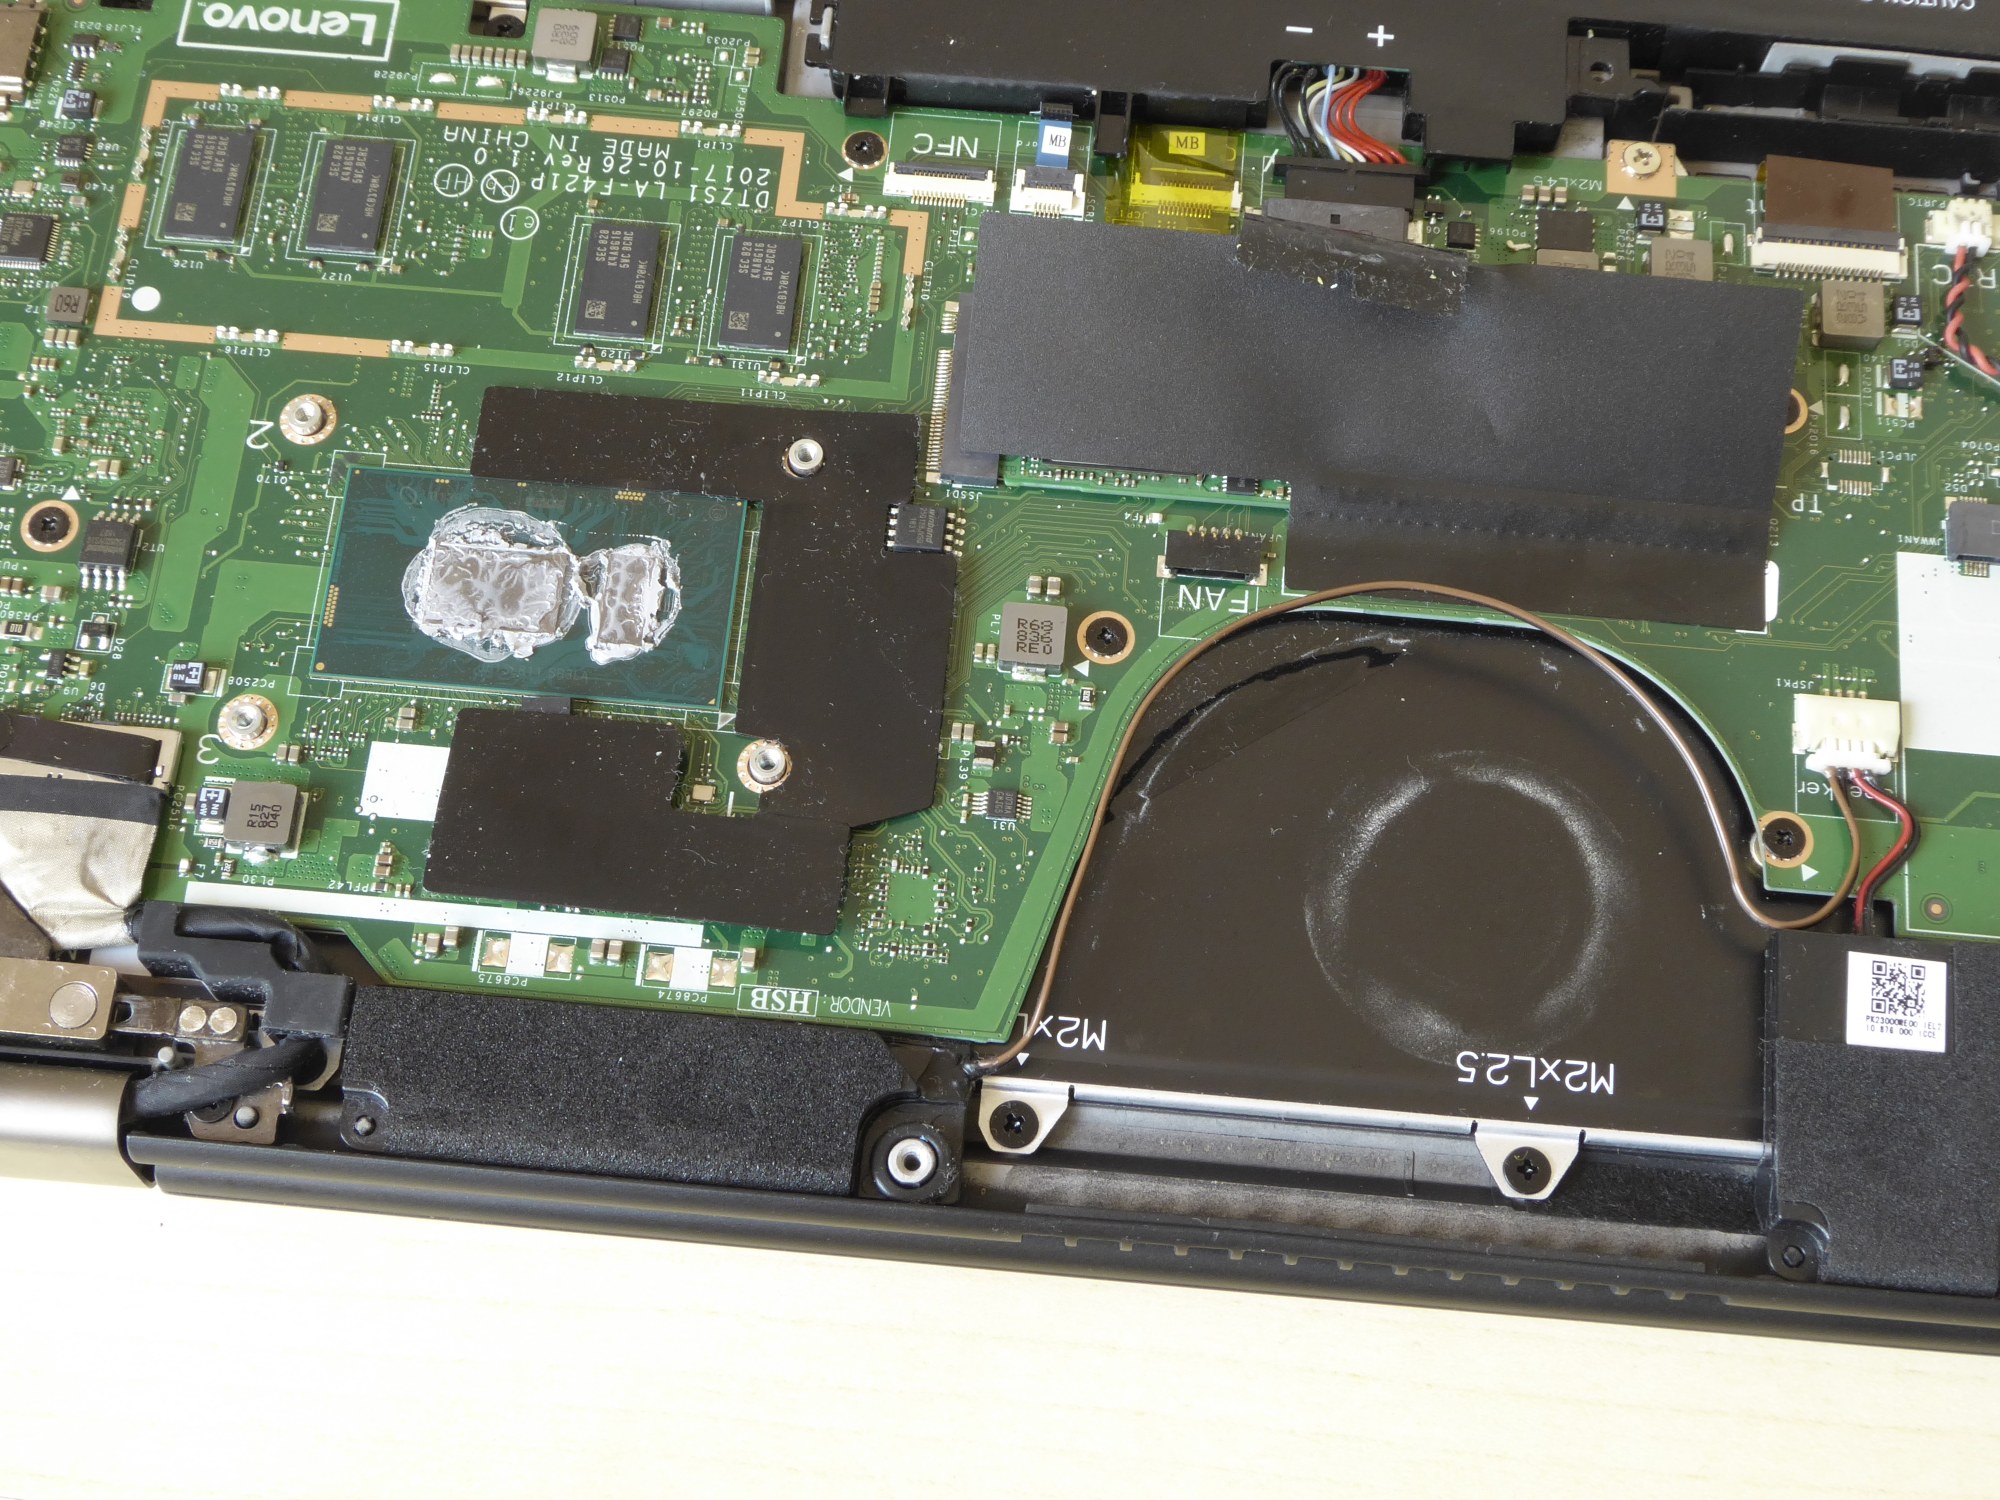
Mainboard without cooling unit 
Bottom side of the cooling unit 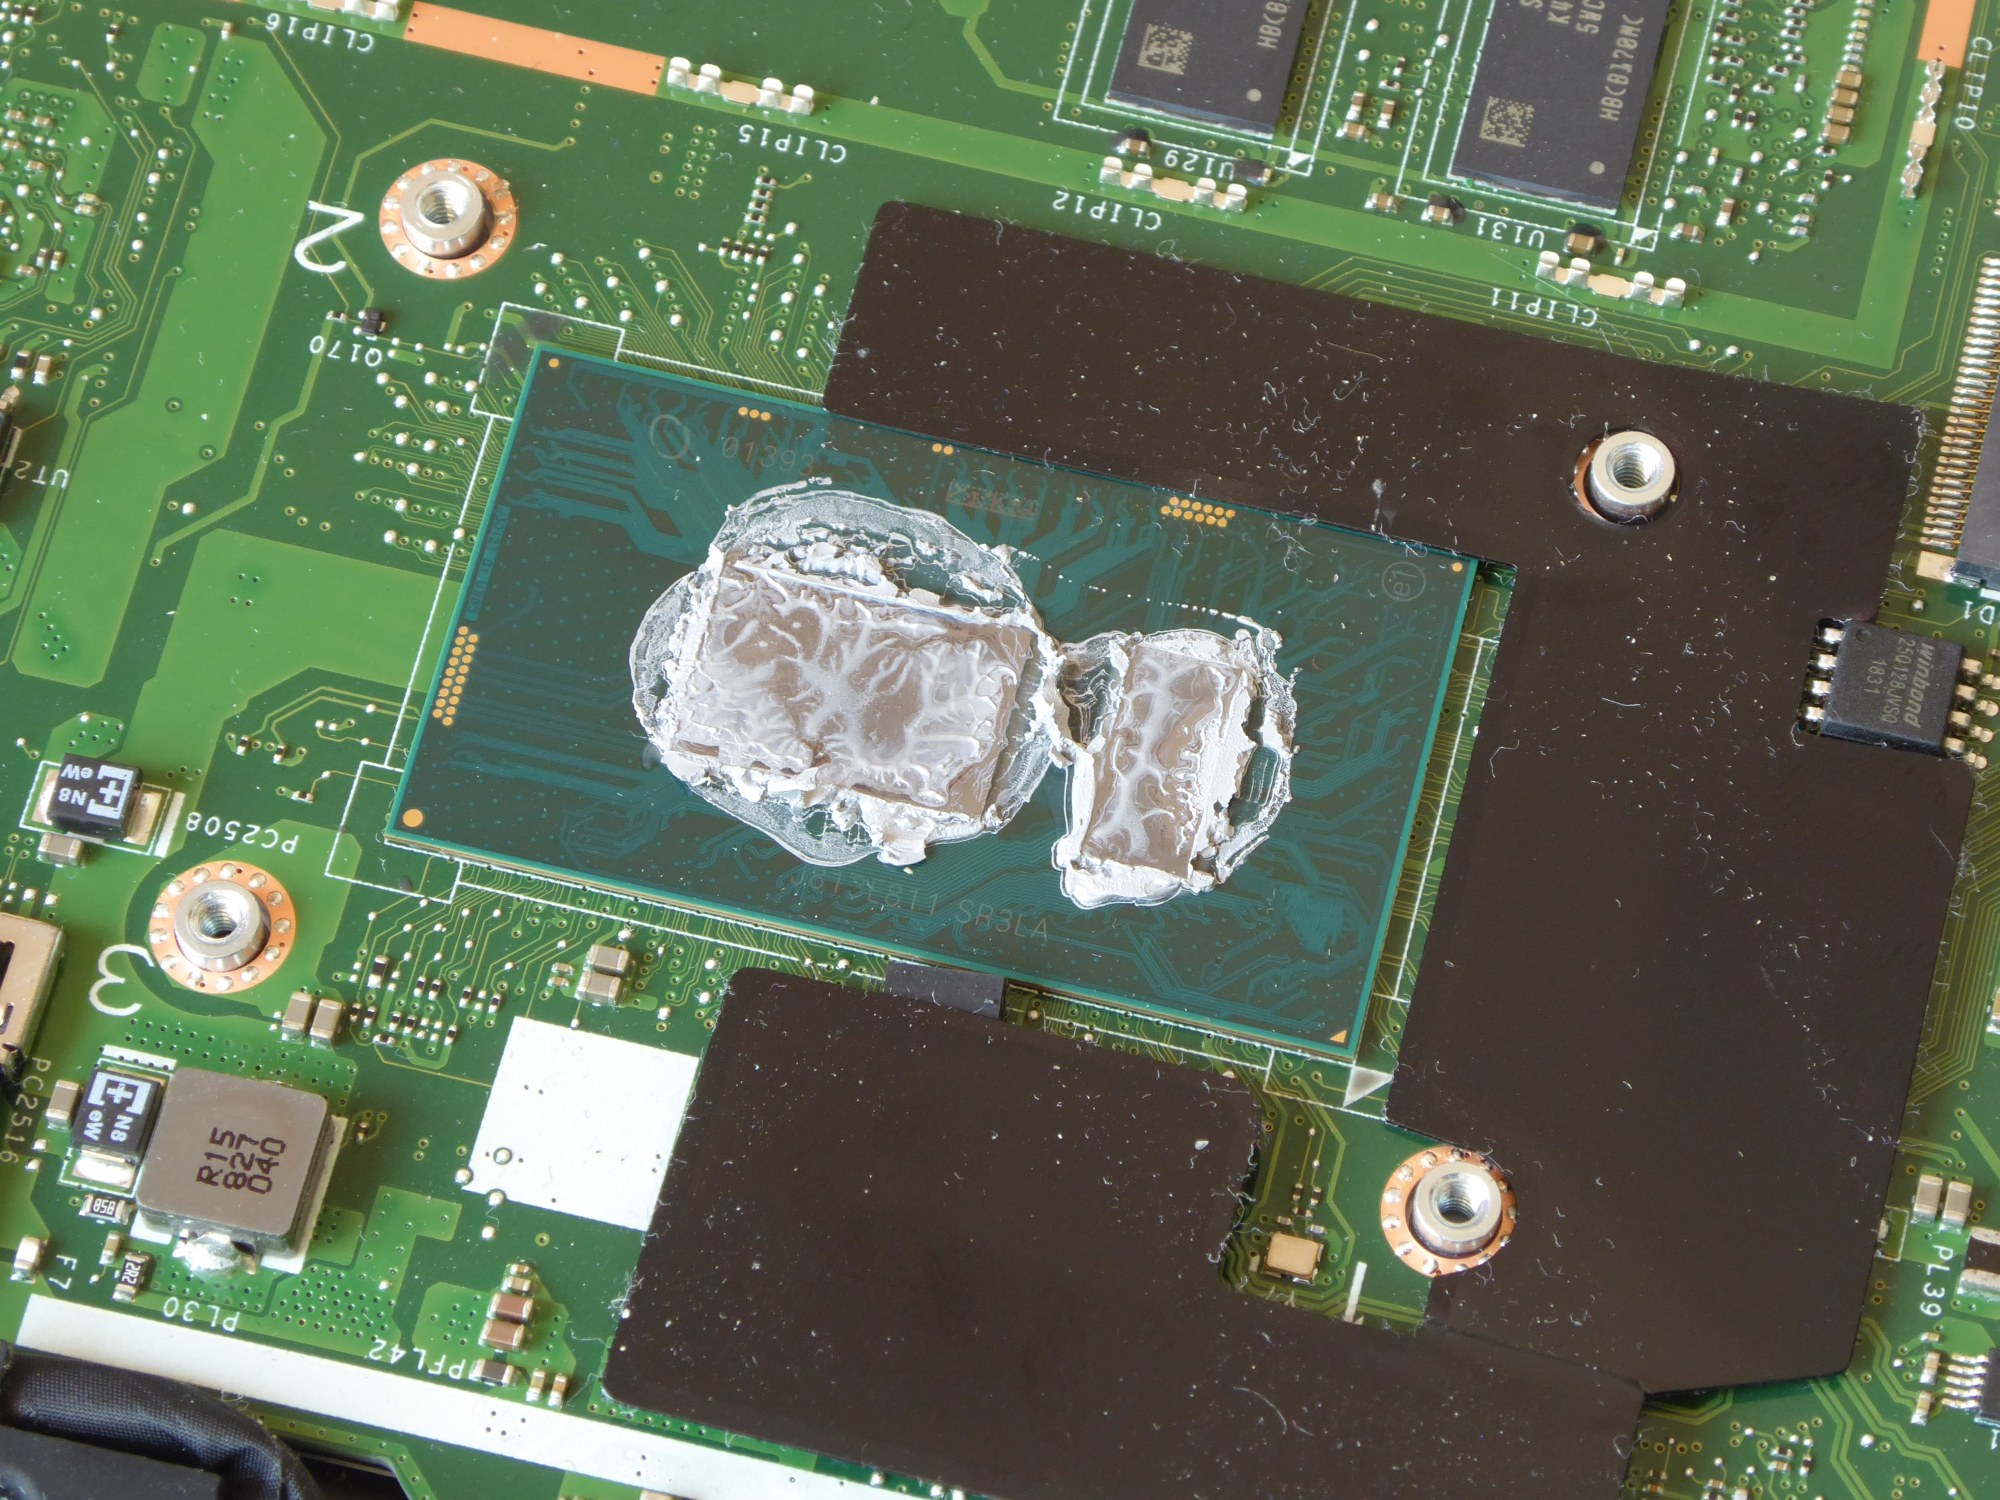
The CPU and the stock thermal compound
The heat-conducting paste here has now been largely pushed outwards after one year. Although it still looks quite “moist” in the middle and one could think that this would still be sufficient. But these are the remains of the (presumably) silicone oil, the actual solid particles for heat transfer have been pushed outwards (again, thanks to der8auer for this explanation).
Repasting
The thermal paste is carefully removed from the CPU and cooler with alcohol, the new thermal paste is applied fairly evenly (I definitely lack the practice here) on both chip surfaces.

Cleaned cooler surface 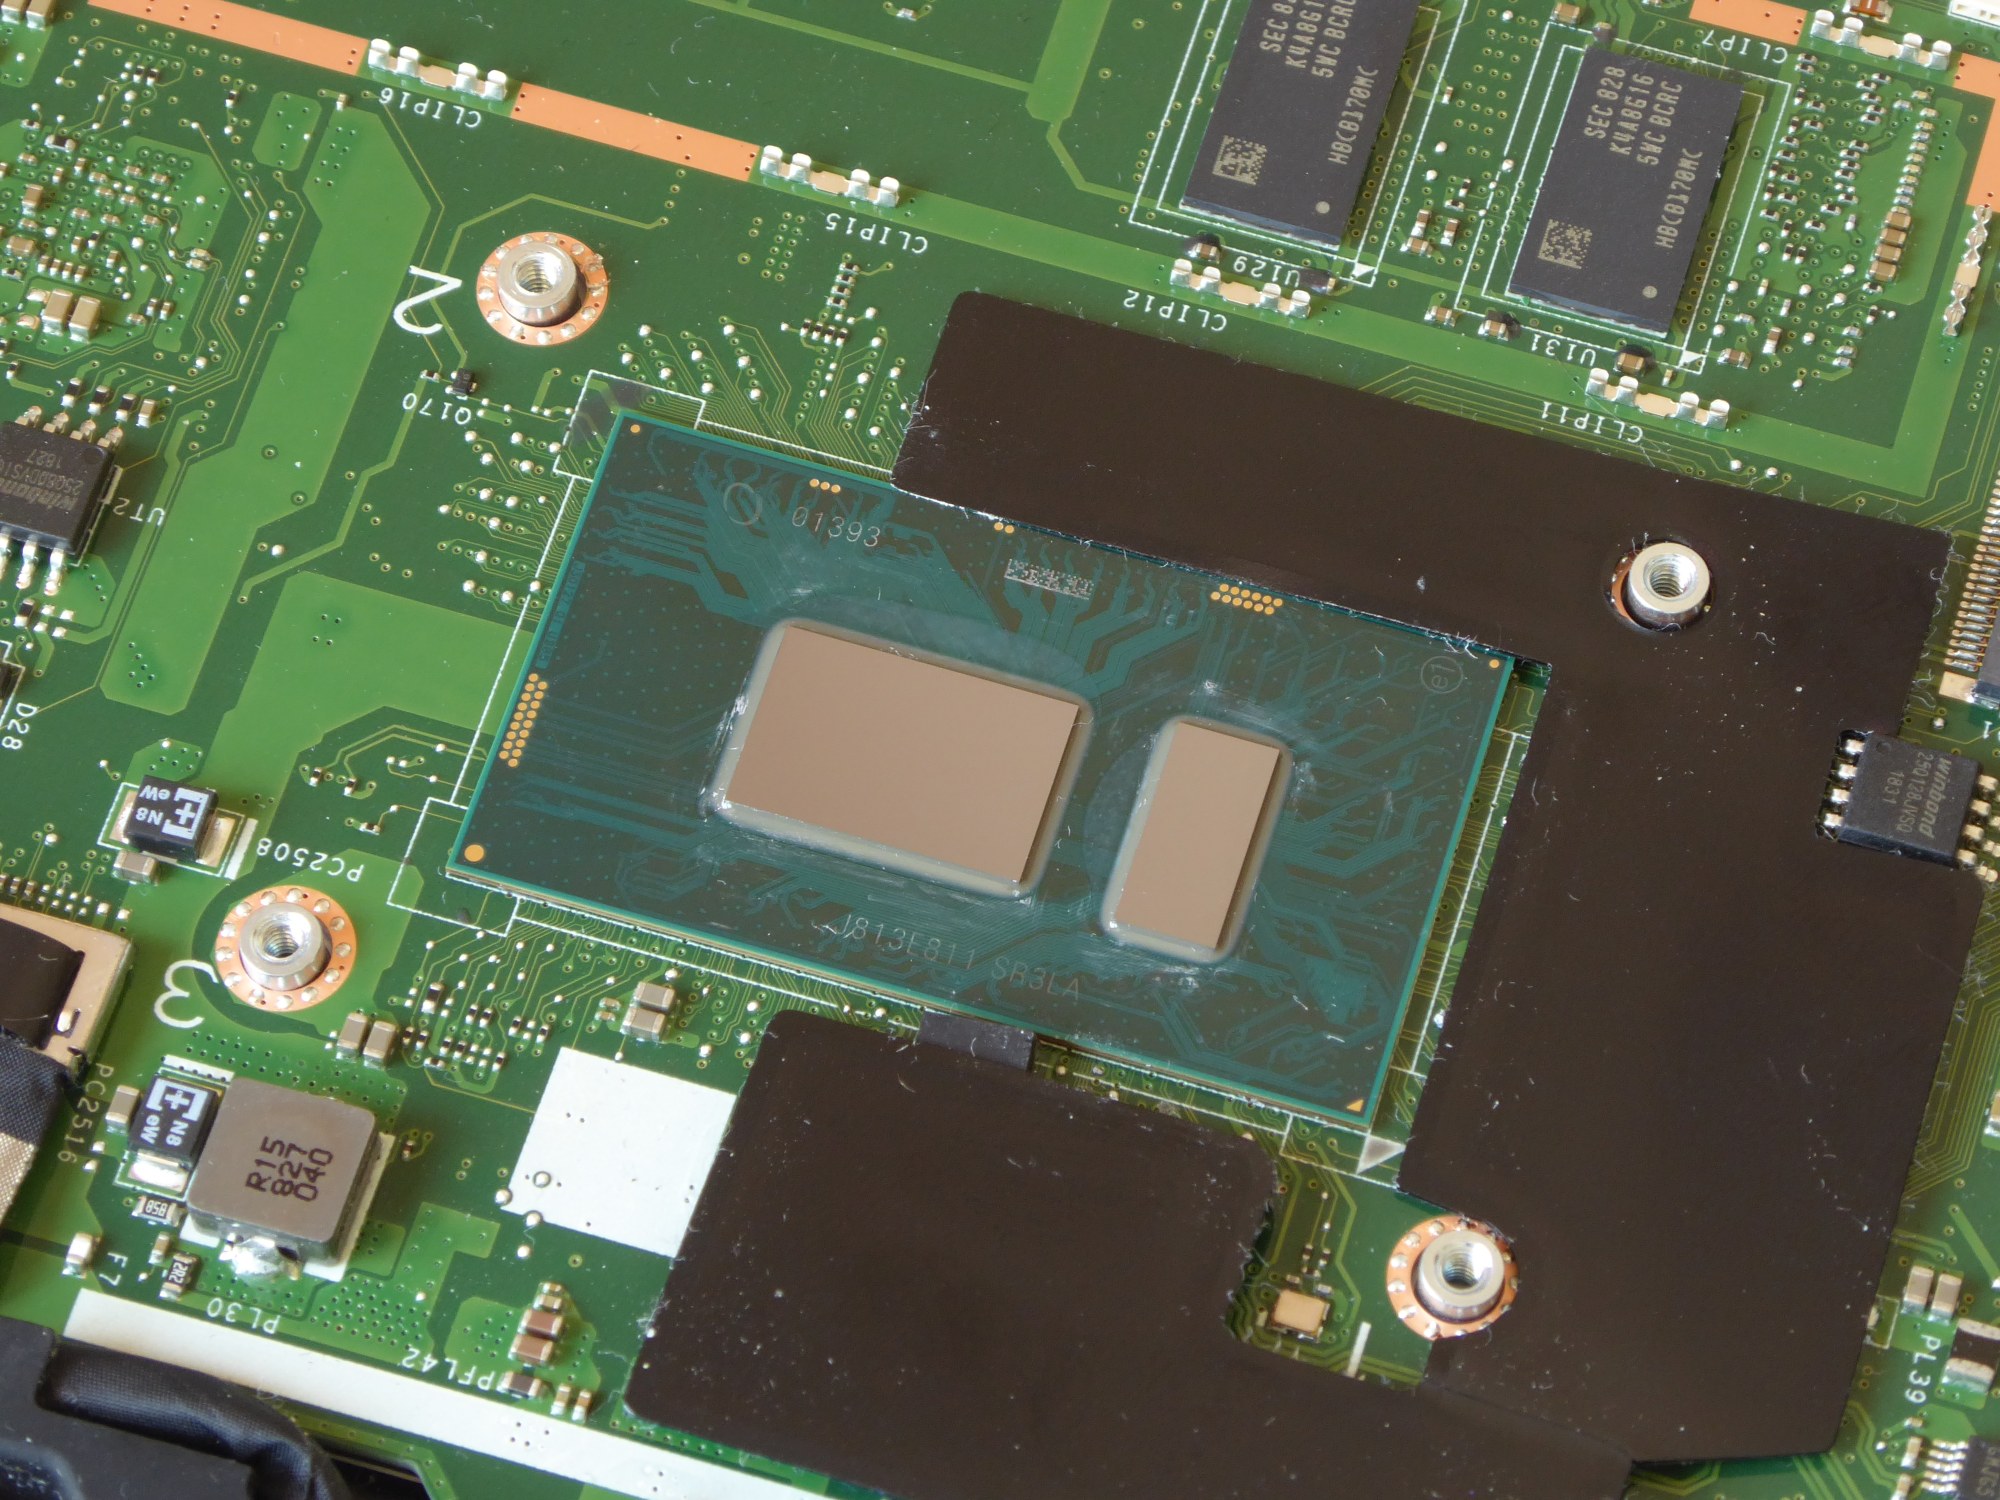
Cleaned CPU surface 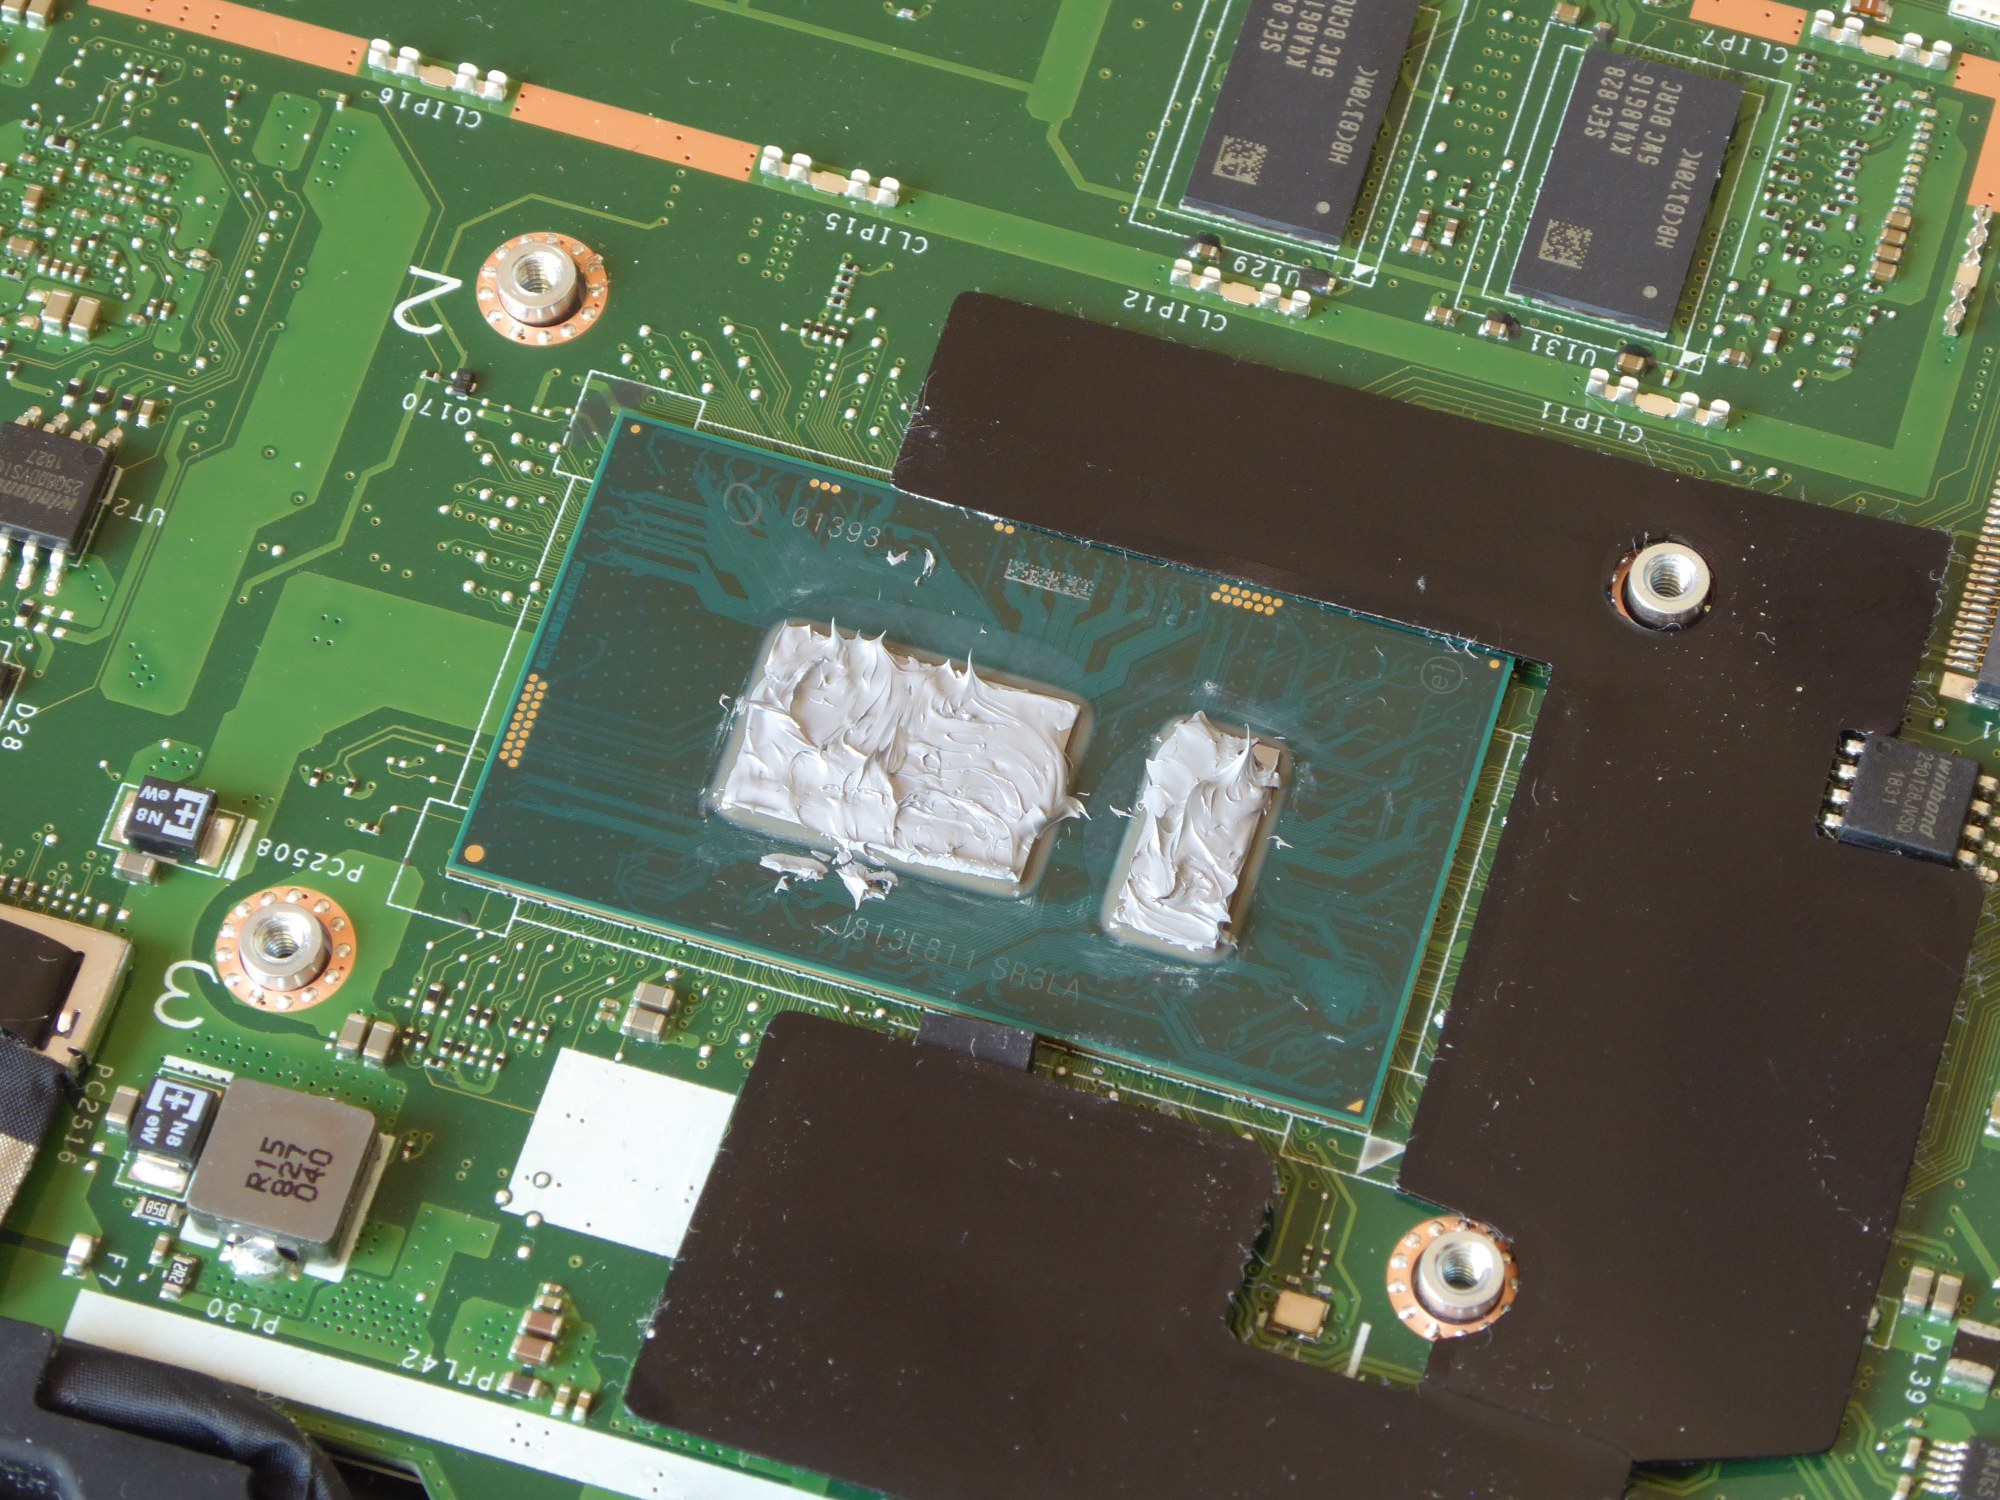
Thermal Grizzly Hydronaut on CPU
When mounting the fan, you only have to put the cable for the speaker back over the plug of the CPU fan first, then simply put the cooler back in place, tighten the screws a little bit at a time and finally put the cable back over the fan in those little slots.
Benchmark after repasting
The Prime95 test showed the following result:
It is noticeable that although the power consumption has also fallen to 7.7 watts (previously down to 5.3 watts), the clock frequency is still between 1.3 and 2.4 GHz (previously between 900 MHz and 2.3 GHz).
The device now runs the wPrime benchmark in 351.4 seconds (previously: 381.9 seconds). It is now difficult to judge to what extent this increase in performance can be attributed to the thermal compound paste and which part is achieved by simply cleaning the fan.
To test this, I had now opened the lid again to test the mere exchange of the thermal paste using wPrime, since I had also performed a benchmark after cleaning the cooler with the lid open. So the times with open lid and cleaned cooler can be compared:
- wPrime before repasting: 345,5 s
- wPrime after repasting: 337,5 s
So you do see a difference by doing a repasting, especially the difference between Prime95 and the values at HWMonitor are notable. To be honest, I have to say that I don’t notice any difference in everyday use, the power reduction due to too high temperature doesn’t really happen with this device when I use it in everyday use (maintaining this website, create some simple graphics, draw, watch nonsense on the internet and play classic games using DOSBox emulator).
undervolting mit throttlestop bringt nochmal einige prozent leistung.
beim lappen mit der schleifpaste gab es ein paar probleme. trotzdem hat sich die leistung verbessert.
Throttlestop ist genial. Auf diesem Gerät ist Linux installiert (ja, auf den Screenshots war es noch Win 10), da geht das leider nicht. Mein Thinkpad P53 schafft es im Benchmark mit Throttlestop von 26 auf 15 Sekunden Rechenzeit, das ist ein gewaltiger Unterschied. Etwa -100 mV Undervolting und die max. Turbo-Faktoren erhöht und schon rennt das Ding.
Es gibt Bioshacks, die Zugriff auf Overclockingoptionen öffnen:
https://github.com/digmorepaka/thinkpad-firmware-patches/blob/master/xx70_xx80_patches_v7.txt
Zum undervolten ist der bioshack aber gar nicht notwendig:
https://github.com/georgewhewell/undervolt
es gibt noch viele andere tools.
https://wiki.archlinux.org/title/Undervolting_CPU
Weniger Paste hätte wahrscheinlich besser funktioniert. Ich habe das gleiche Laptop und würde gerne Schleifen und Lappen probieren. Statt den Kühler gegen eine Referenzplatte zu lappen, würde ich den Kühler gegen die CPU lappen oder mit der 3-Stein-Methode gegen 2 andere Kühler.